Aside from editing your geometry within Houdini, you can also pull the network out into a text file to take a look. From this text file, you can edit attributes and import back into Houdini when you are happy with the changes. On this page we will take a look at this process.
First, we will take a look at the difference between exporting the geometry as a .geo or .hclassic file.
Create a geometry node and a box inside it. Right click your box and choose Save > Geometry.
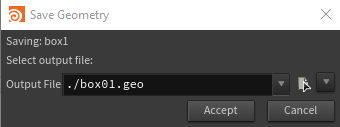

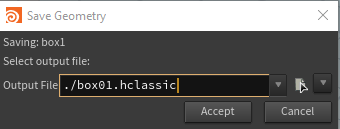

From here, open the file in Notepad or your editor of choice. Let's take a look at the differences in what the file formats gave us. First we can look at the .geo file:
	"fileversion","18.0.391",
	"hasindex",false,
	"pointcount",8,
	"vertexcount",24,
	"primitivecount",6,
	"info",{
		"artist":"Meme_Machine",
		"software":"Houdini 18.0.391",
		"date":"2020-03-26 11:21:35",
		"hostname":"DESKTOP-JI5MUIF",
		"bounds":[-0.5,0.5,-0.5,0.5,-0.5,0.5],
		"primcount_summary":"          6 Polygons\n",
		"attribute_summary":"     1 point attributes:\tP\n"
	},
	"topology",[
		"pointref",[
			"indices",[1,5,4,0,2,6,5,1,3,7,6,2,0,4,7,3,2,1,0,3,5,6,7,4]
		]
	],
	"attributes",[
		"pointattributes",[
			[
				[
					"scope","public",
					"type","numeric",
					"name","P",
					"options",{
						"type":{
							"type":"string",
							"value":"point"
						}
					}
				],
				[
					"size",3,
					"storage","fpreal32",
					"defaults",[
						"size",1,
						"storage","fpreal64",
						"values",[0]
					],
					"values",[
						"size",3,
						"storage","fpreal32",
						"tuples",[[-0.5,-0.5,-0.5],[0.5,-0.5,-0.5],[0.5,-0.5,0.5],[-0.5,-0.5,0.5],[-0.5,0.5,-0.5],[0.5,0.5,-0.5],[0.5,0.5,0.5],[-0.5,0.5,0.5]
						]
					]
				]
			]
		]
	],
	"primitives",[
		[
			[
				"type","Polygon_run"
			],
			[
				"startvertex",0,
				"nprimitives",6,
				"nvertices_rle",[4,6]
			]
		]
	]
]
```
This .geo file is good, but a little unclear at times. For comparison, here is what we get if we export as .hclassic:
NPoints 8 NPrims 6
NPointGroups 0 NPrimGroups 0
NPointAttrib 0 NVertexAttrib 0 NPrimAttrib 0 NAttrib 0
-0.5 -0.5 -0.5 1
0.5 -0.5 -0.5 1
0.5 -0.5 0.5 1
-0.5 -0.5 0.5 1
-0.5 0.5 -0.5 1
0.5 0.5 -0.5 1
0.5 0.5 0.5 1
-0.5 0.5 0.5 1
Run 6 Poly
 4 < 1 5 4 0
 4 < 2 6 5 1
 4 < 3 7 6 2
 4 < 0 4 7 3
 4 < 2 1 0 3
 4 < 5 6 7 4
beginExtra
endExtra
The .hclassic file a lot clearer, making it a good candidate for this sort of editing we want to look at. To get started seeing the sorts of changes we can make, choose a point and change it to 3. I changed a -0.5 to -3. Save this out as a .geo and read it back into Houdini with a File node. After ensuring my display flag was set on the File node I received the following result:
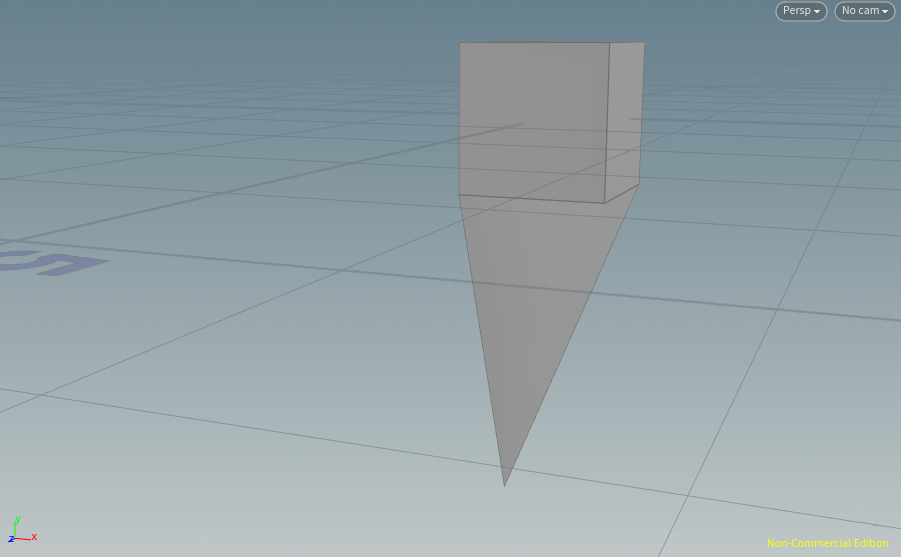

And the code that gave this result looks like this:
NPoints 8 NPrims 6
NPointGroups 0 NPrimGroups 0
NPointAttrib 0 NVertexAttrib 0 NPrimAttrib 0 NAttrib 0
-0.5 -3 -0.5 1
0.5 -0.5 -0.5 1
0.5 -0.5 0.5 1
-0.5 -0.5 0.5 1
-0.5 0.5 -0.5 1
0.5 0.5 -0.5 1
0.5 0.5 0.5 1
-0.5 0.5 0.5 1
Run 6 Poly
 4 < 1 5 4 0
 4 < 2 6 5 1
 4 < 3 7 6 2
 4 < 0 4 7 3
 4 < 2 1 0 3
 4 < 5 6 7 4
beginExtra
endExtra
As you can see, one of our points has moved to the coordinate we specified. Next, we will add a color SOP and set the box to red (or any colour you prefer) to the box SOP and export it once again as .hclassic to see how this changes the output. This is the result I received:
NPoints 8 NPrims 6
NPointGroups 0 NPrimGroups 0
NPointAttrib 1 NVertexAttrib 0 NPrimAttrib 0 NAttrib 0
PointAttrib
Cd 3 float 1 1 1
-0.5 -0.5 -0.5 1 (1 0 0)
0.5 -0.5 -0.5 1 (1 0 0)
0.5 -0.5 0.5 1 (1 0 0)
-0.5 -0.5 0.5 1 (1 0 0)
-0.5 0.5 -0.5 1 (1 0 0)
0.5 0.5 -0.5 1 (1 0 0)
0.5 0.5 0.5 1 (1 0 0)
-0.5 0.5 0.5 1 (1 0 0)
Run 6 Poly
 4 < 1 5 4 0
 4 < 2 6 5 1
 4 < 3 7 6 2
 4 < 0 4 7 3
 4 < 2 1 0 3
 4 < 5 6 7 4
beginExtra
endExtra
We now have an additional field next to our point vectors. This is the colour of each face of the geometry. For this example we will change one point to yellow. Edit one of the colour vectors to read (1 1 0) then read the file back in with your file node and take a look at the result.
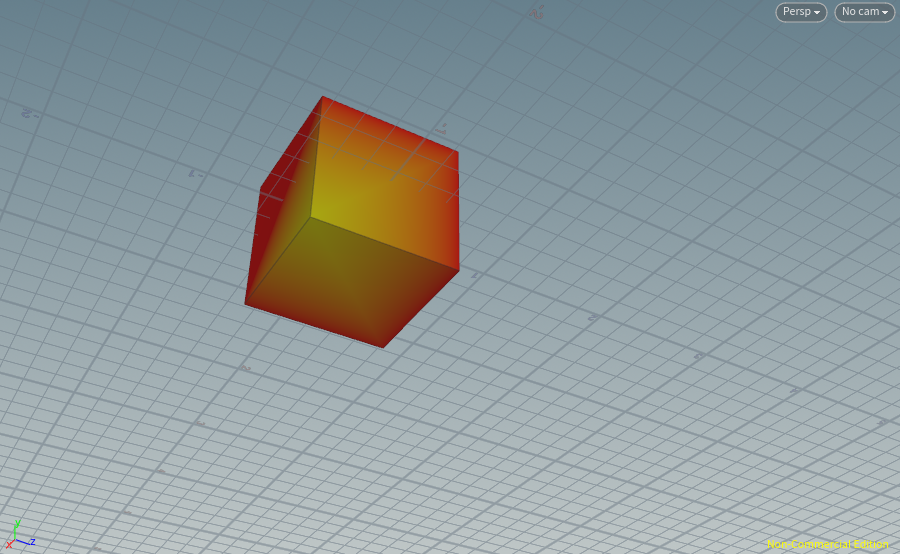

You can do this with any point and colour combination you like on the geometry.
If you wanted to change just a face of the cube, we have a method for that too. Change your Color SOP's Class to Primitive and export as .hclassic once again. Open the file in your text editor and take a look at the changes.
NPoints 8 NPrims 6
NPointGroups 0 NPrimGroups 0
NPointAttrib 0 NVertexAttrib 0 NPrimAttrib 1 NAttrib 0
-0.5 -0.5 -0.5 1
0.5 -0.5 -0.5 1
0.5 -0.5 0.5 1
-0.5 -0.5 0.5 1
-0.5 0.5 -0.5 1
0.5 0.5 -0.5 1
0.5 0.5 0.5 1
-0.5 0.5 0.5 1
PrimitiveAttrib
Cd 3 float 1 1 1
Run 6 Poly
 4 < 1 5 4 0 [1 0 0]
 4 < 2 6 5 1 [1 0 0]
 4 < 3 7 6 2 [1 0 0]
 4 < 0 4 7 3 [1 0 0]
 4 < 2 1 0 3 [1 0 0]
 4 < 5 6 7 4 [1 0 0]
beginExtra
endExtra
The colour vector is now in the poly face area of our file. Change one of these to [1 1 0] (or any other colour your prefer) and read it back in as a .geo file to take a look at the result.
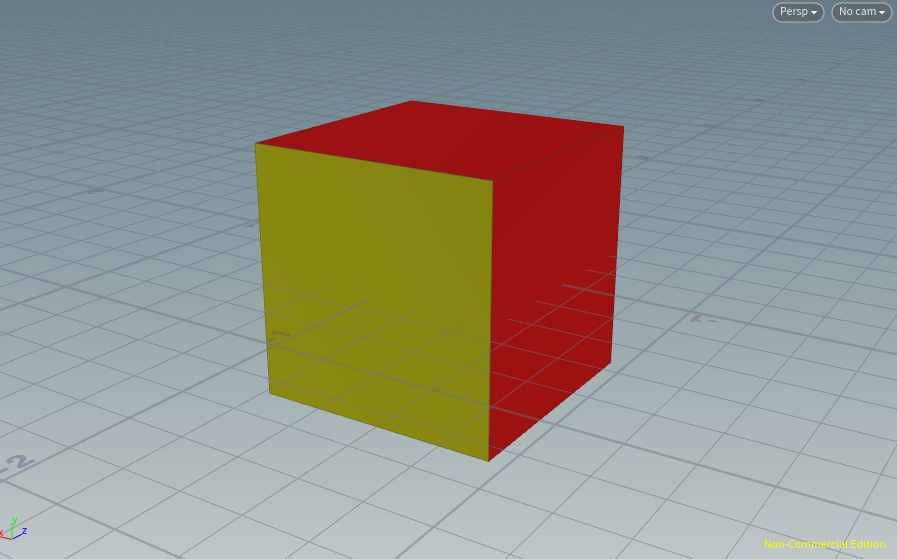

As you can see the face we specified has changed.
Exporting files in this was allows you to take a look at what is happening in your file path in a very versatile way. Try out some other combinations and see what the outcomes are.