15 Jul 2021 18:07
Unreal Engine 4 Shader Exploration
These are some first steps in experimenting with using a UE4 material shader, and the 'custom node' to insert HLSL shader code.
The material Blueprint is configured to act as a post-process, and in the test is connected in the scene to a 'post-processing' volume. Moving in and out of the volume enables and disables the shader.
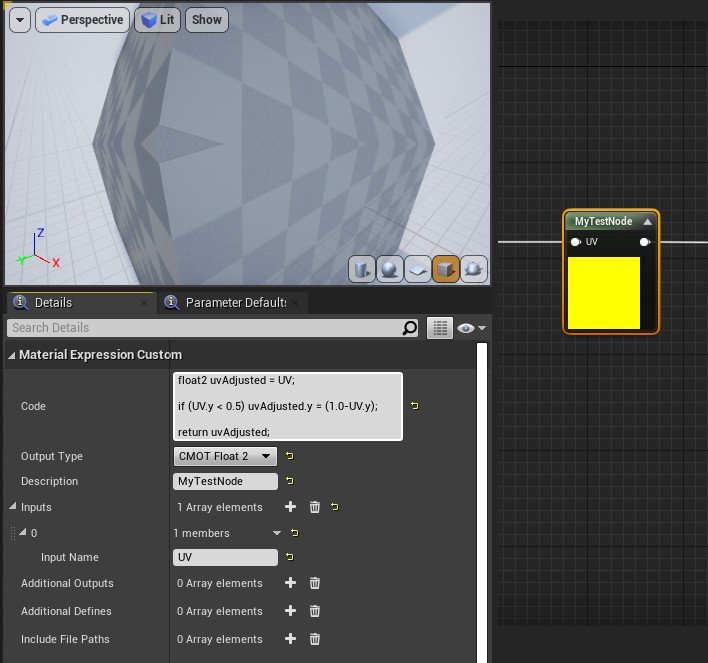
The HLSL code is entered in the 'code' section of the material's custom node, which flips the y value of the incoming UV values depending upon its value:
	float2 uvAdjusted = UV;
	if (UV.y < 0.5) uvAdjusted.y = (1.0-UV.y);
	return uvAdjusted;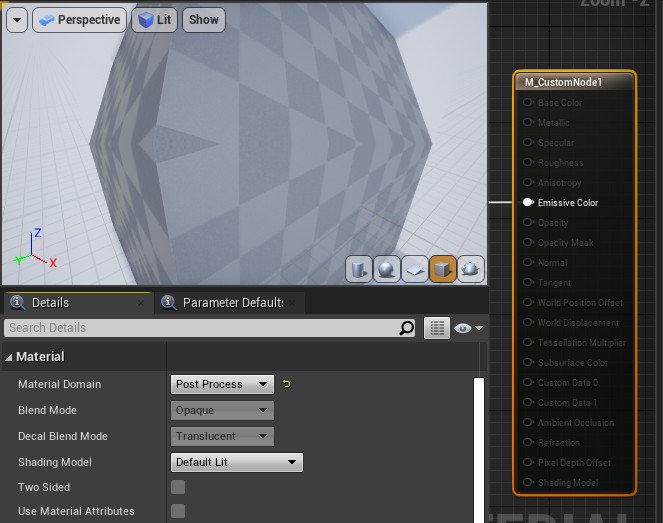

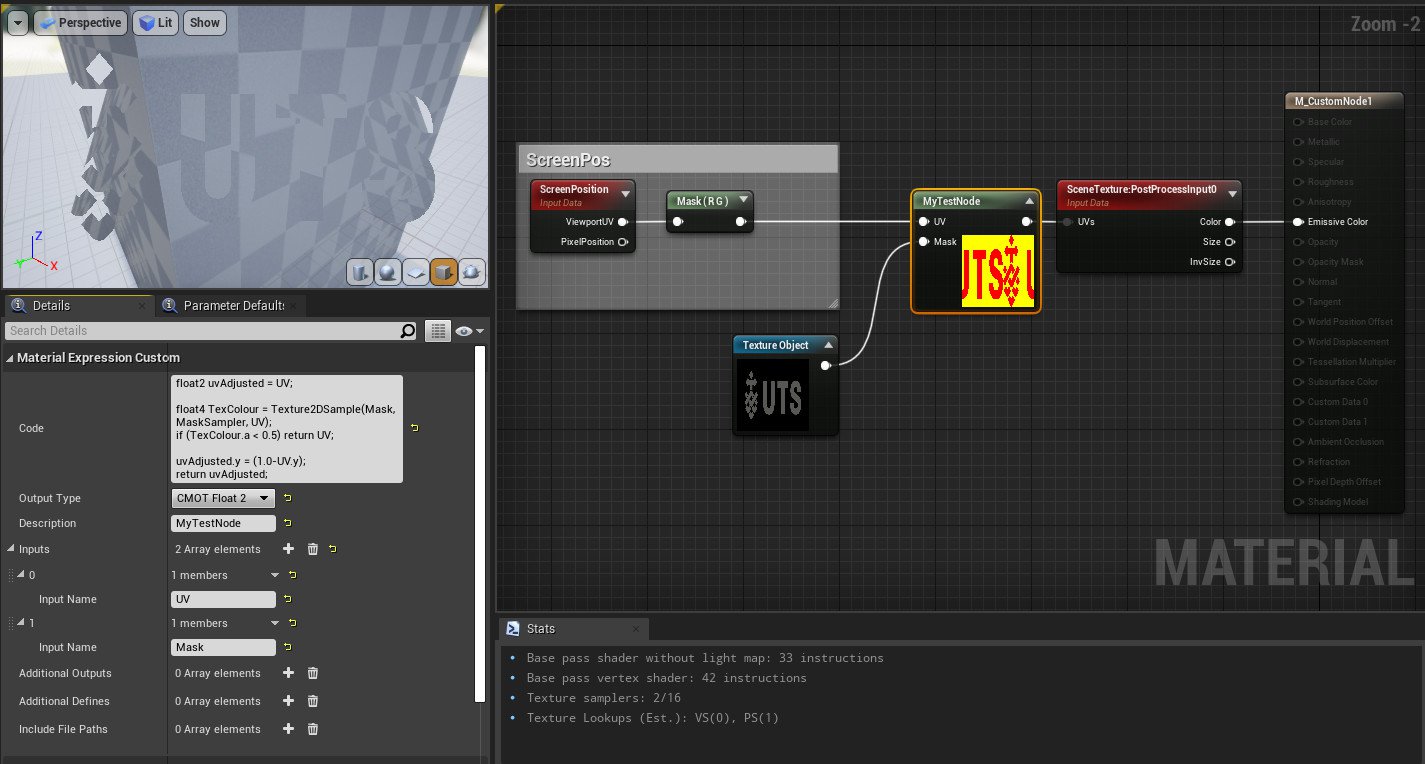
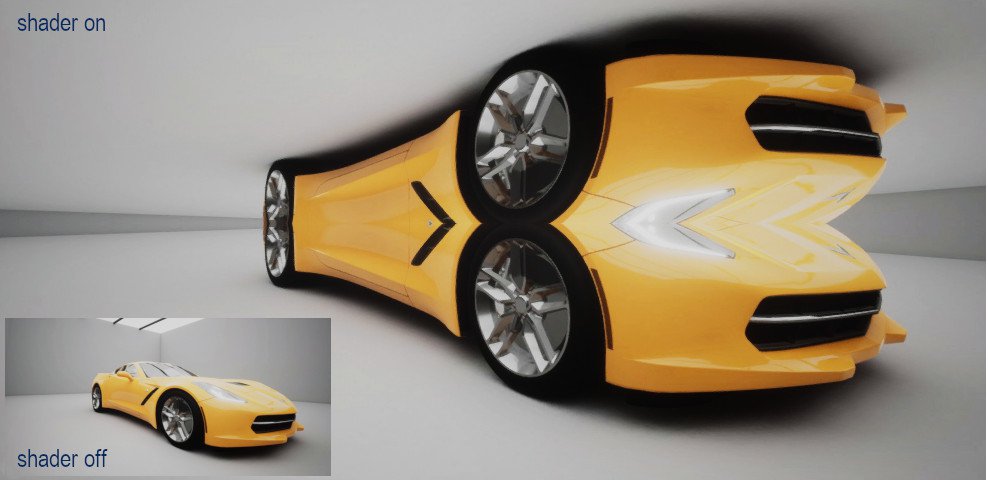
Now, moving to using the HLSL to sample the alpha channel of an external texture.
This uses Texture2DSample, and where the source texture is transparent, the pixels are not Y-flipped:
	float2 uvAdjusted = UV;
	float4 TexColour = Texture2DSample(Mask, MaskSampler, UV);
	if (TexColour.a < 0.5) return UV;

	uvAdjusted.y = (1.0-UV.y);
	return uvAdjusted;
Direct SceneTexture Access
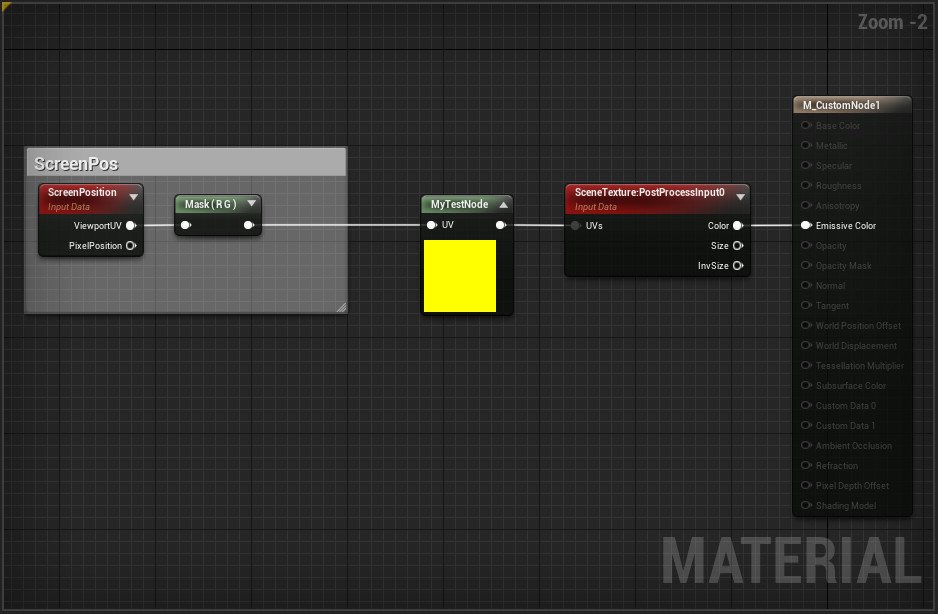
This time, instead of altering the UV data going into the PostProcess SceneTexture, this code accesses the data internally. It then also outputs the result directly. (Note: The custom node's connection to the SceneTexture is only needed in order to provide access to its functions)
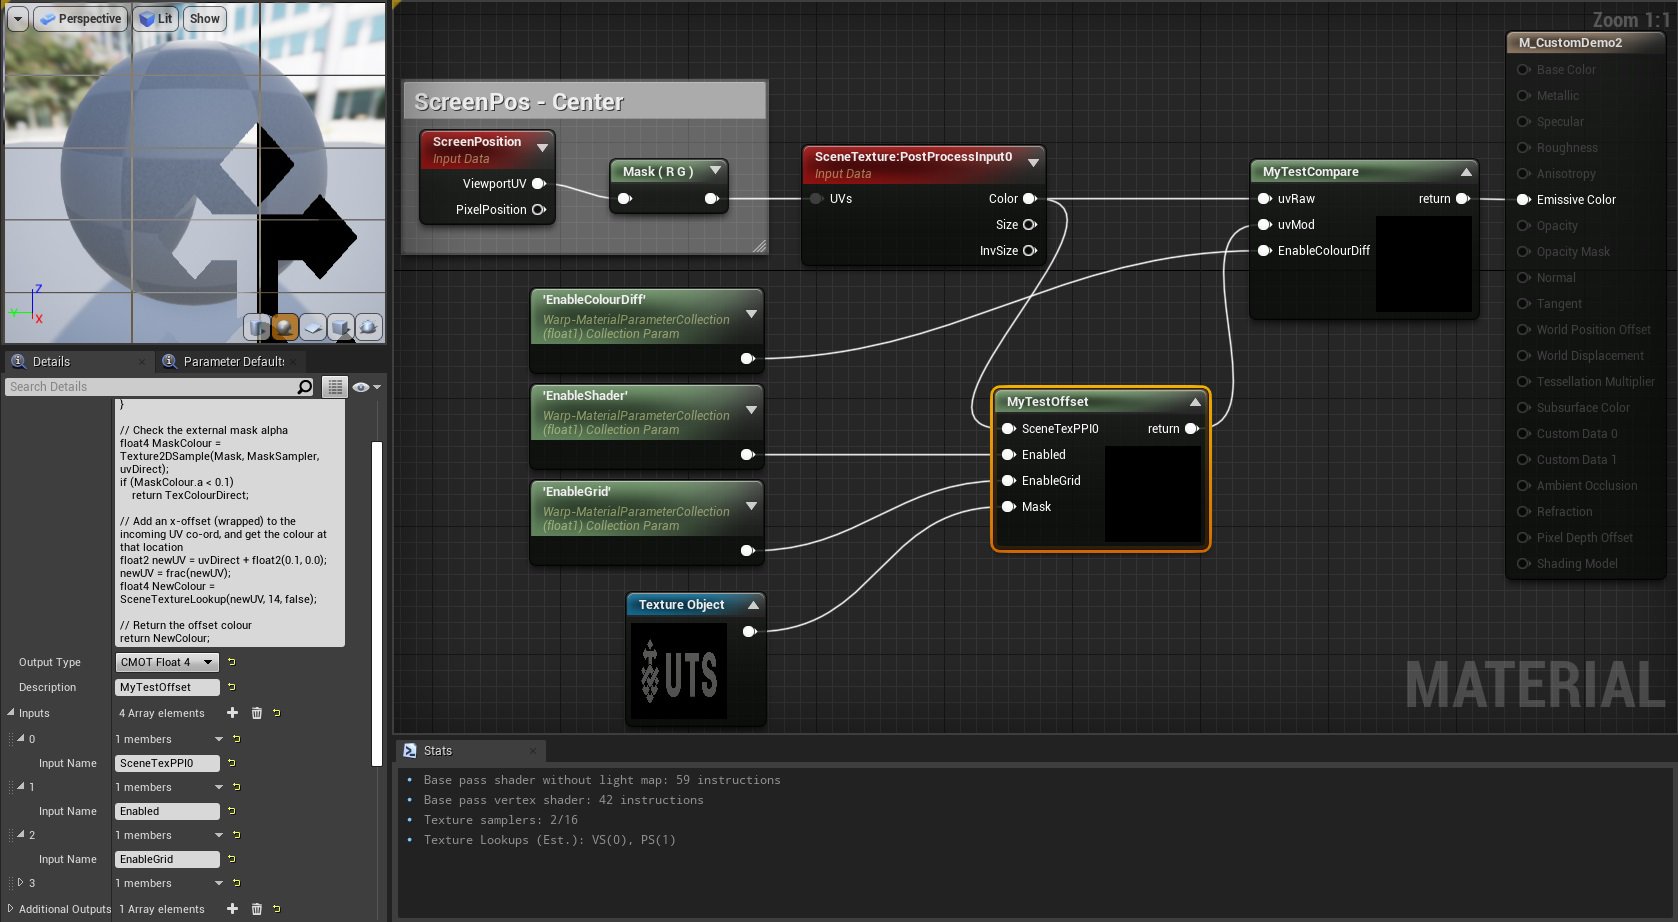
MyTestOffset Custom Node
The primary HLSL node now has 3 inputs:
- SceneTexPPI0 - connection to a SceneTexture:PostProcess0 node
- Enabled - connection to the 'EnableShader' Material Property
- EnableGrid - connection to the 'EnableGrid' Material Property
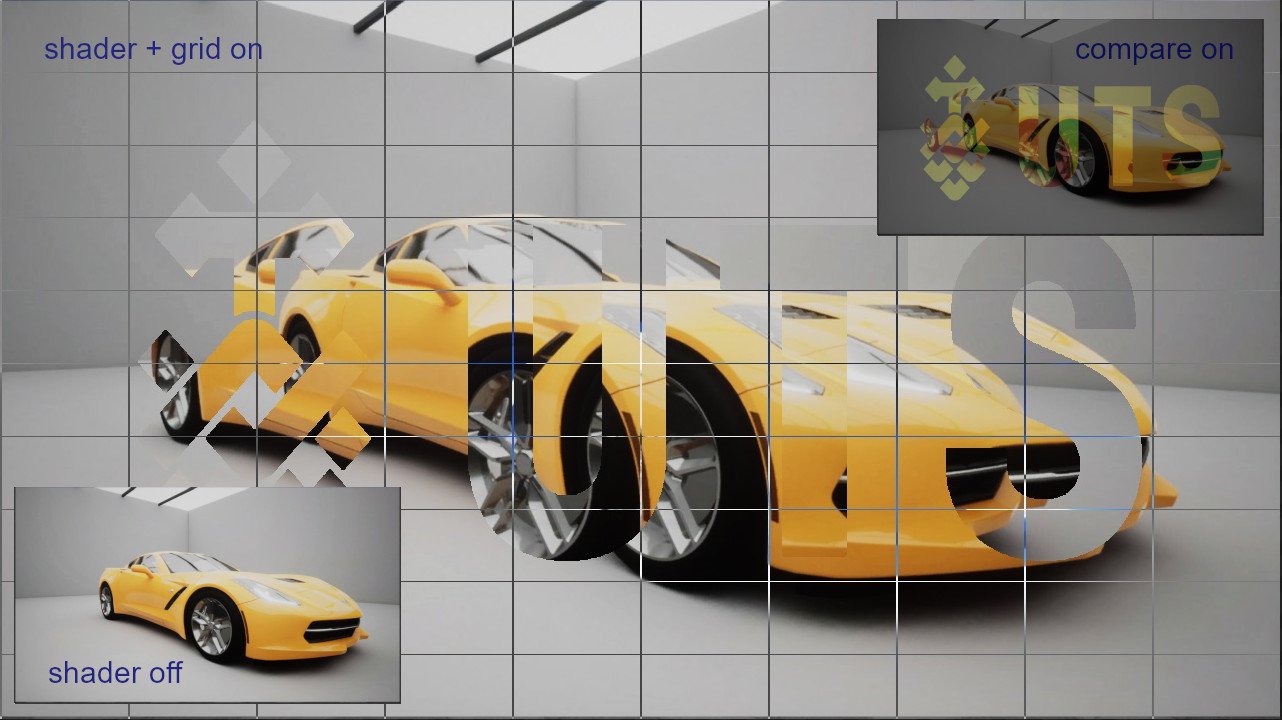
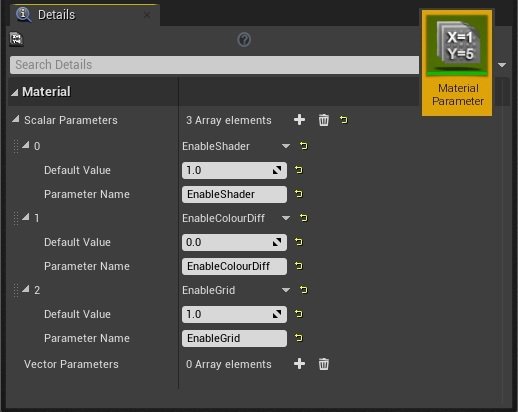
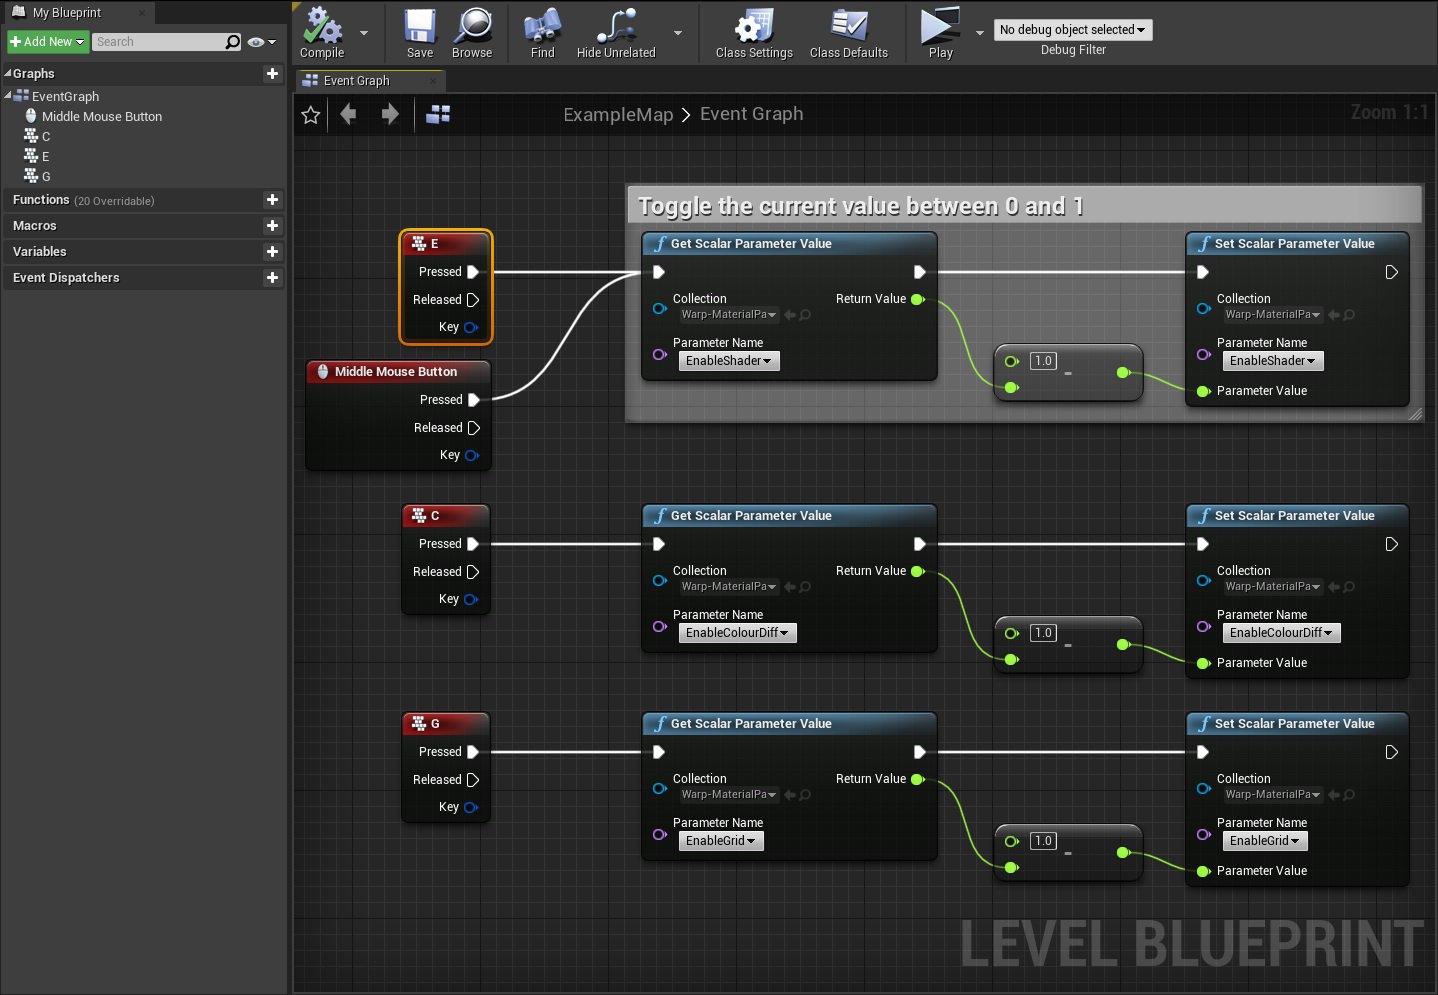
The two 'Material Property' connections respond to the values contained in a 'Material Parameter Collection' object added to the Content Browser. This in turn has its values set by the inputs in the main Level Blueprint's Event Graph, allowing the shader and overlay grid to be toggled on and off.
Main Custom Node code:
	if (!Enabled)
		return SceneTexPPI0;

	// Obtain the pixel's UV directly from the PostProcess0 scene texture (index 14)
	float2 uvDirect = GetDefaultSceneTextureUV(Parameters, 14);

	// Get the pixel colours from the framebuffer at the original UV pos
	float4 TexColourDirect = SceneTextureLookup(uvDirect, 14, false);

	// Grid overlay
	if (EnableGrid)
	{
		bool bGridX = (fmod(uvDirect.x, 0.1) < 0.0015);
		bool bGridY = (fmod(uvDirect.y, 0.1) < 0.0015);
		if (bGridX || bGridY)
			return 1-TexColourDirect;
	}

	// Check the external mask alpha
	float4 MaskColour = Texture2DSample(Mask, MaskSampler, uvDirect);
	if (MaskColour.a < 0.1)
		return TexColourDirect;

	// Add an x-offset (wrapped) to the incoming UV co-ord, and get the colour at that location
	float2 newUV = uvDirect + float2(0.1, 0.0);
	newUV = frac(newUV);
	float4 NewColour = SceneTextureLookup(newUV, 14, false);

	// Return the offset colour
	return NewColour;
Material Parameter Collection
This object is added in the content browser (appearing as the icon shown) , and provides a method of accessing variables within a material. Clicking on it allows you to edit its details, and add new variables that can then be used as required.
In this instance, the parameters are controlled using keypresses via the main 'Level Blueprint'.
Switching and Comparing Material Outputs
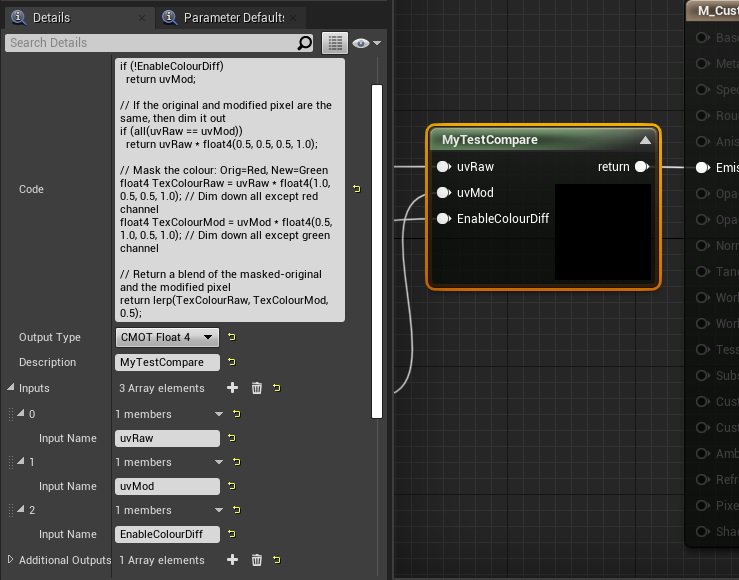
An additional HLSL custom node has been added between the main node's output, and the Material's final Emissive input.
The node takes 3 inputs:
- uvRAW - the unmodified colour output
- uvMod - the modified colour output
- EnableColourDiff - connection to the 'EnableColourDiff' Material Property
Pressing the 'C' key causes the node to toggle its comparison of the two colour outputs. When enabled, pixels with the same colour are dimmed out by 50%, differences are colour coded red (original) and green (changed), and then shown as a blend of the two.
Comparison Custom Node code:
	if (!EnableColourDiff)
		return uvMod;

	// If the original and modified pixel are the same, then dim it out
	if (all(uvRaw == uvMod))
		return uvRaw * float4(0.5, 0.5, 0.5, 1.0);

	// Mask the colour: Orig=Red, New=Green
	float4 TexColourRaw = uvRaw * float4(1.0, 0.5, 0.5, 1.0); // Dim down all except red channel
	float4 TexColourMod = uvMod * float4(0.5, 1.0, 0.5, 1.0); // Dim down all except green channel

	// Return a blend of the masked-original and the modified pixel
	return lerp(TexColourRaw, TexColourMod, 0.5);
The final outputs here show the shader with the grid enabled, as well as the output from the separate node which compares the raw and modified outputs.