Exporting Geometry from Houdini to Omegalib
This tutorial will cover exporting static geometry from Houdini into the Data Arena. The preferred format to export is Stanford .ply files, which contain the geometry description of meshes (that is vertices, faces, and colors) but can easily export any other attribute. This is great, because creators of visualization can export extra attributes which can then be used in the visualization to display extra data. For example, extra data labels containing the names of cities could be exported and then displayed on click on the object.
The ROP output driver of Houdini can be used to export ply files.
We will build a simple data visualization with Houdini and show how to export this to omegalib. Note, that this is a tutorial on exporting data, not on making good visualizations, so the shown example is probably not the best way to visusalize the existing dataset.
The data
We will use a classical dataset used in many statistics courses, the mtcars dataset, which contains different information on cars. The mtcars set is a dataset with 32 observations on 11 variables.
[, 1] mpg Miles/(US) gallon
[, 2] cyl Number of cylinders
[, 3] disp Displacement (cu.in.)
[, 4] hp Gross horsepower
[, 5] drat Rear axle ratio
[, 6] wt Weight (lb/1000)
[, 7] qsec 1/4 mile time
[, 8] vs V/S
[, 9] am Transmission (0 = automatic, 1 = manual)
[,10] gear Number of forward gears
[,11] carb Number of carburetors
Download the dataset here
Importing the table in Houdini
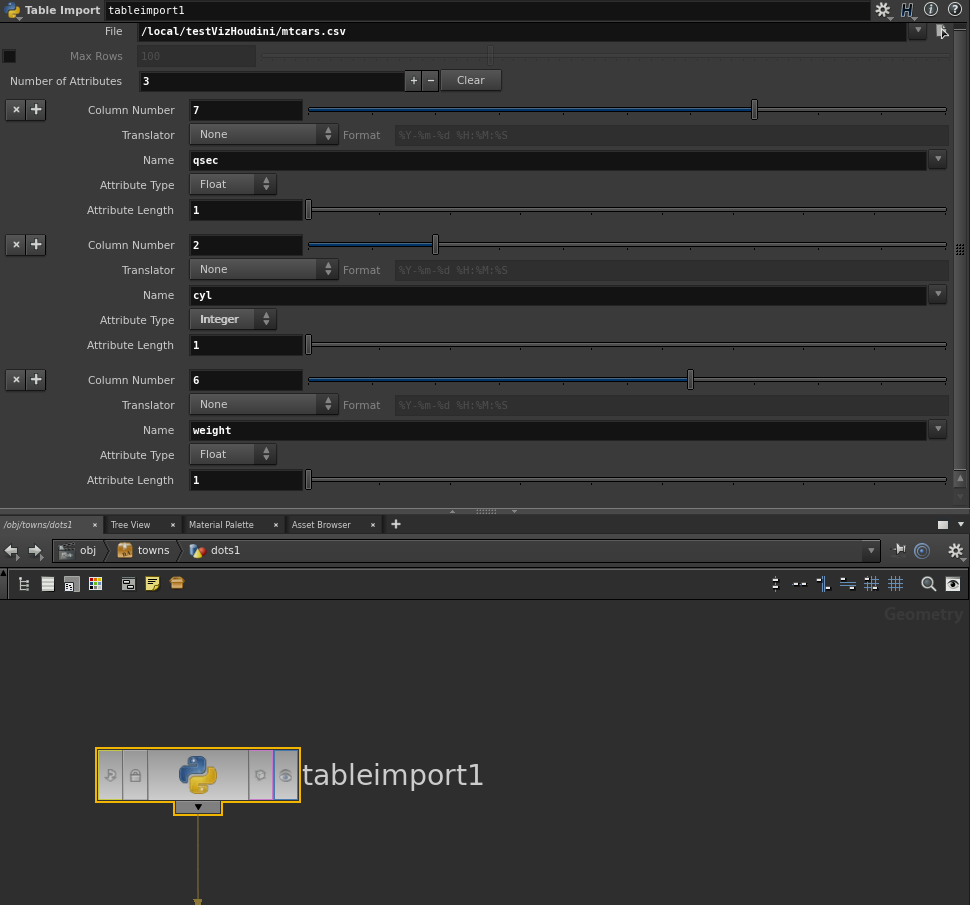

Use a table import operator and add a new attribute for every column you want to import. We want to use qsec, cyl and weight to see if there is a correlation between these three variables. You have to pick out the right column number, as the importer does not automatically recognize the csv header. Also use the correct attribute length, which is one for attributes for our case.
You can look at the imported data in the geometry spreadsheet to check, that you have imported the correct column.
Mapping data to primitives
Next, we want to visualize our data. Houdini uses the positional attribute P to store the point position. Use a attribute create operator to map the columns to the position.

As shown in the figure above, we map the 1/4 mile time (qsec) to the x-axis, the cyl to the y axis and the weight to the z-axis. These are relatively random assignments just for the purpose of demonstration. Note, that we convert to the weight attribute from lb/1000 to kg/1000 and then multiple by 10 to scale the values approximately the same data range as the other two columns.
Now that we have the positions, we can use a copy operator to copy generic primitives to these positions. We use tetrahedons (pyramids) to represent the data points:
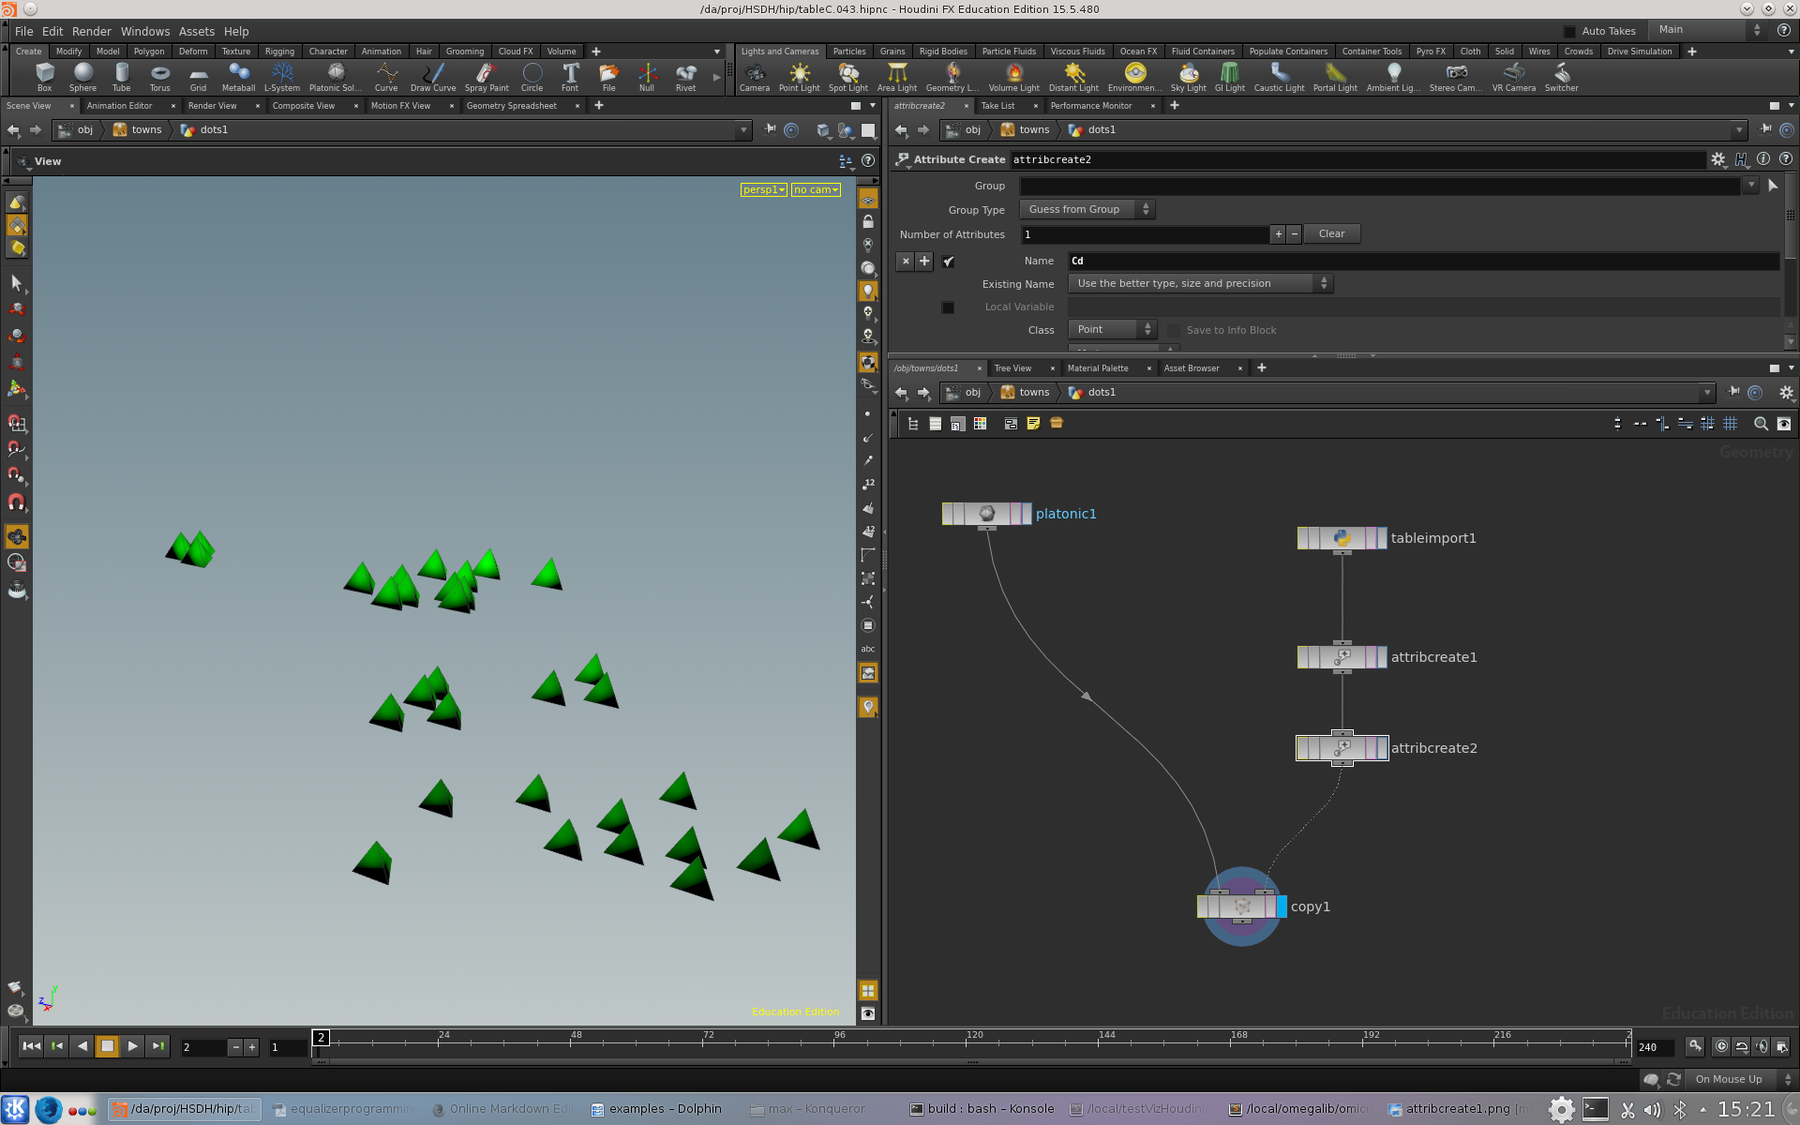

In the image above, we also created a color attribute (Cb) and mapped the cyl attribute to it.
Exporting to omegalib
The face normals need to be flipped before exporting, use a reverse operator. Now use the ROP output driver to export this to the ply format. In python, we use the standard cyclops model loaders to load this file. In the supplied python script, we also set a rotating camera manipulator on the node. Check the tutorial about custom interactions for details on this.
from cyclops import *
from omega import *

scene = getSceneManager()
scene.setBackgroundColor(Color(0.1,0.1,0.1,1))

fileToLoad = "mtcars.ply"
def addModel(fileToLoad, isText=False):
# Load a static model
mdlModel = ModelInfo()
mdlModel.name = fileToLoad
mdlModel.path = fileToLoad
mdlModel.optimize=False # optimising takes a LONG time..
return mdlModel

scene.loadModel(addModel(fileToLoad))
model = StaticObject.create(fileToLoad)
model.setName(fileToLoad)
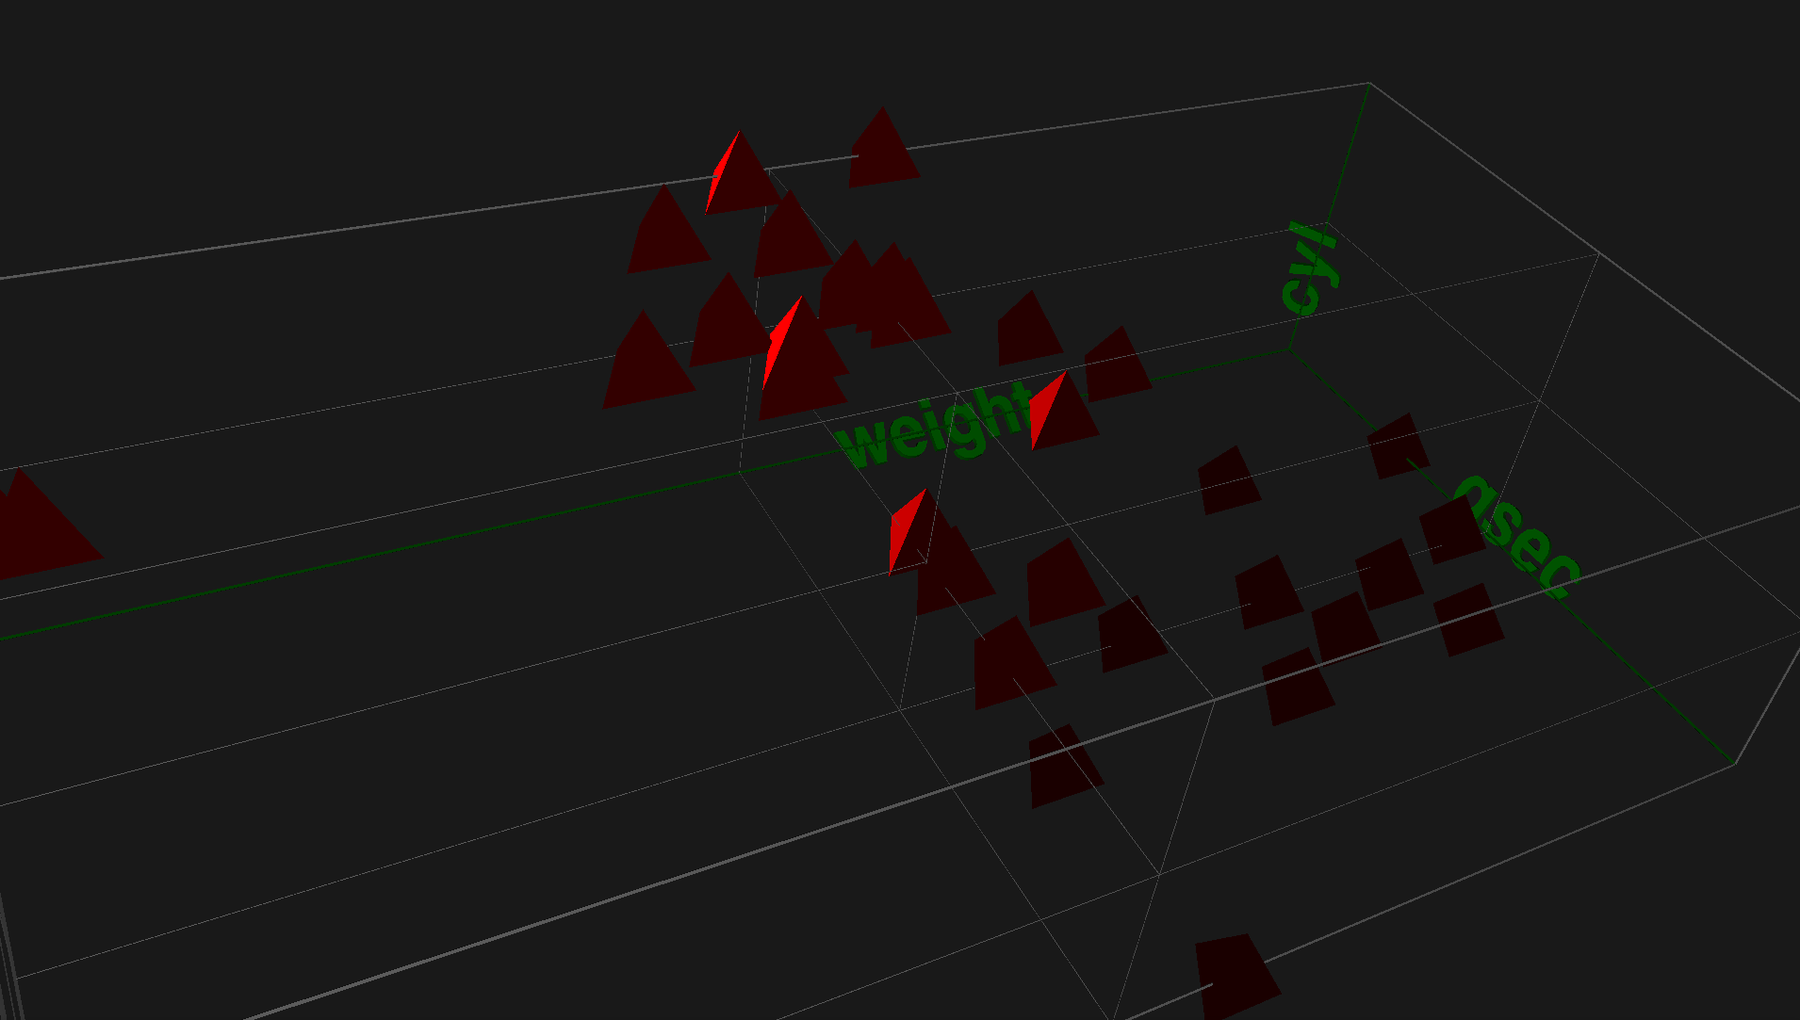
We also built axis in Houdini, which are included in the tutorial Houdini file. The creation of these is out of scope of this tutorial though.

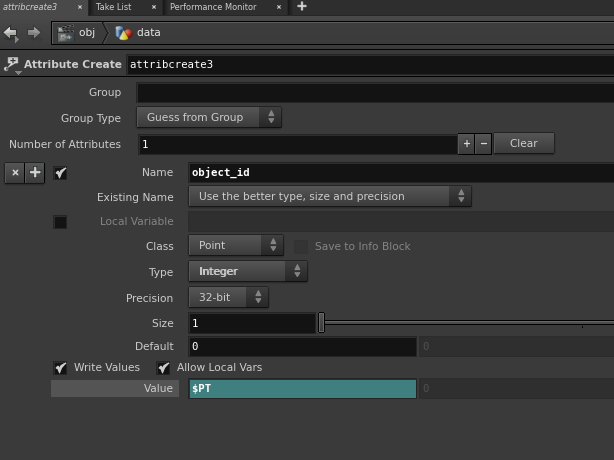
Normally, ply files are exported as a single large geometry, which is good if there are no interactive parts. However, if you want to move a certain part of the model in the scene, the objects have to be grouped. Either, you can export this part as a seperate model or set the object in Houdini. You can set a field object_id per point, i.e. the object, which the point will belong to. You will find a switch in houdini to switch object ids on and off.
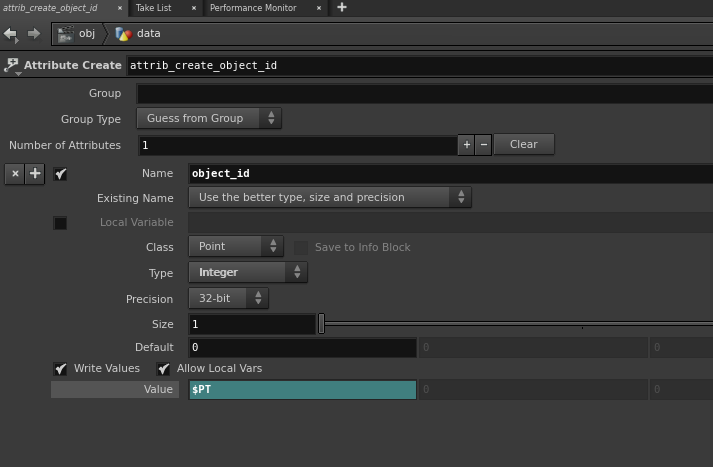

As shown in the figure above, create an attribute which takes the PT (point) number and therefore is equal to the number of imported rows. This attribute must be created before the copy operator, else there would be a unique id for every vertex of the tetrahedons, which we obviously don't want. Before exporting the geometry, the geometry should be sorted on object_ids, because the importer assumes, that the object_ids are monotonically increasing and continuous. See the Houdini tutorial file to see how this is put in place.
Making objects face the camera
When having labels in a 3D scene, it often makes sense to always orient them towards the camera. When exporting ply with object_ids, you can use the Data Arena ply loader to specify the objects to automatically face the screen. Import and register the plugin before loading and then pass the “shiftVerts faceScreen” as a ReaderWriter option to the modelinfo. The first option will calculate the center of the object to be at the center of their bounding box, rather than at (0,0,0). The object will rotate around its center when using the faceScreen option, so not setting “shiftVerts” will cause weird rotations to happen.
#use the LoaderTools package from daHEngine
from daHEngine import LoaderTools
#register DA ply loader. Do this before loading any ply files!
LoaderTools.registerDAPlyLoader()

def addModel(fileToLoad, faceScreen=False):
mdlModel = ModelInfo()
...
if faceScreen:
mdlModel.readerWriterOptions = "shiftVerts faceScreen"
return mdlModel
...