Add the DA Assets plugin for input device support
At the moment we are still navigating our project with Unreal Engine's default mouse and WASD key controls. At the Data Arena, we're moving away from these devices which are oriented towards a single user, and thinking towards multi-user experiences. We have developed a DA Assets plugin for simple integration of our input devices.
For this project, we'll be installing this plugin to use the SpaceMouse as a camera controller, and our Motion Capture system controller cursors for object interaction with up to 8 people at once.
Of course, these devices might not be accessible where you are right now. Our plugin includes keyboard and mouse "fallbacks" so you can test from any device, and switch over to the Data Arena devices with a simple box check when ready.
⚙️ Install and setup
Save and close your project and the Unreal Engine editor, and follow the download and install instructions on our DA Assets wiki page. Once you've installed the plugin, continue here.
🎥 Add a SpaceMouseCamera
From the DA Assets folder in the Content Browser, drag a SpaceMouseCamera actor into your level. Position this where you prefer, ideally far enough away to see the entire Earth actor (X: -1800, Y: 0, Z: 0).
Set this camera as default
Select the SpaceMouseCamera in the top-right World Outliner panel, then open you Level Blueprint.


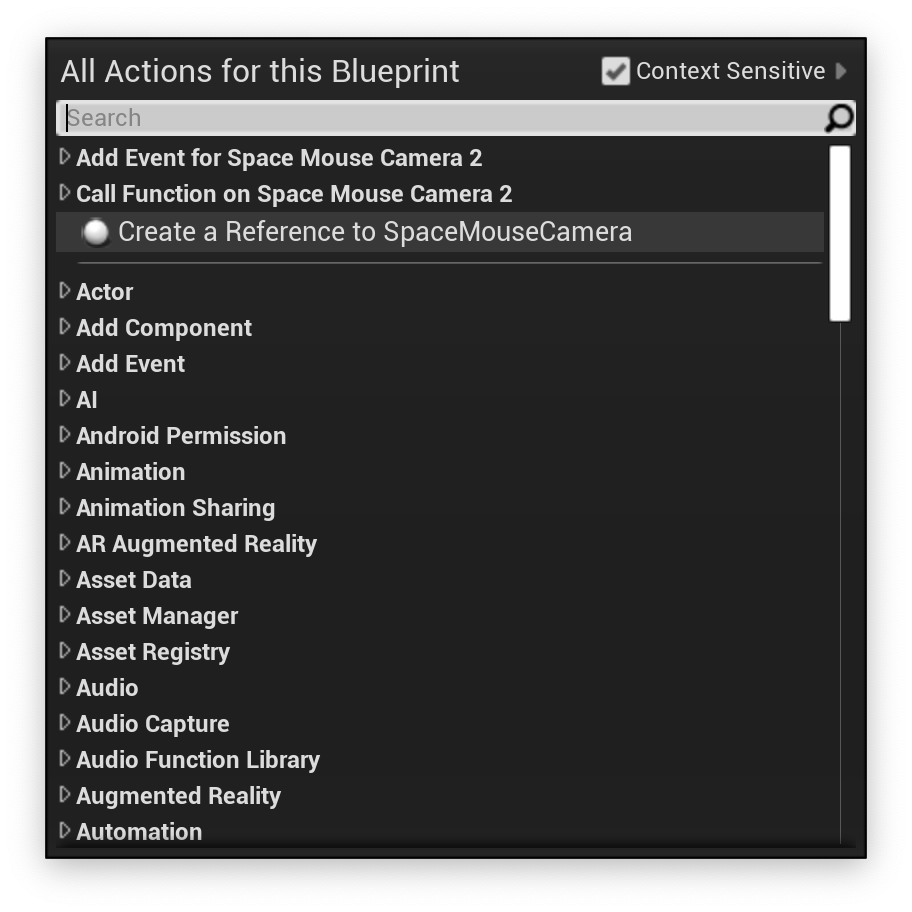
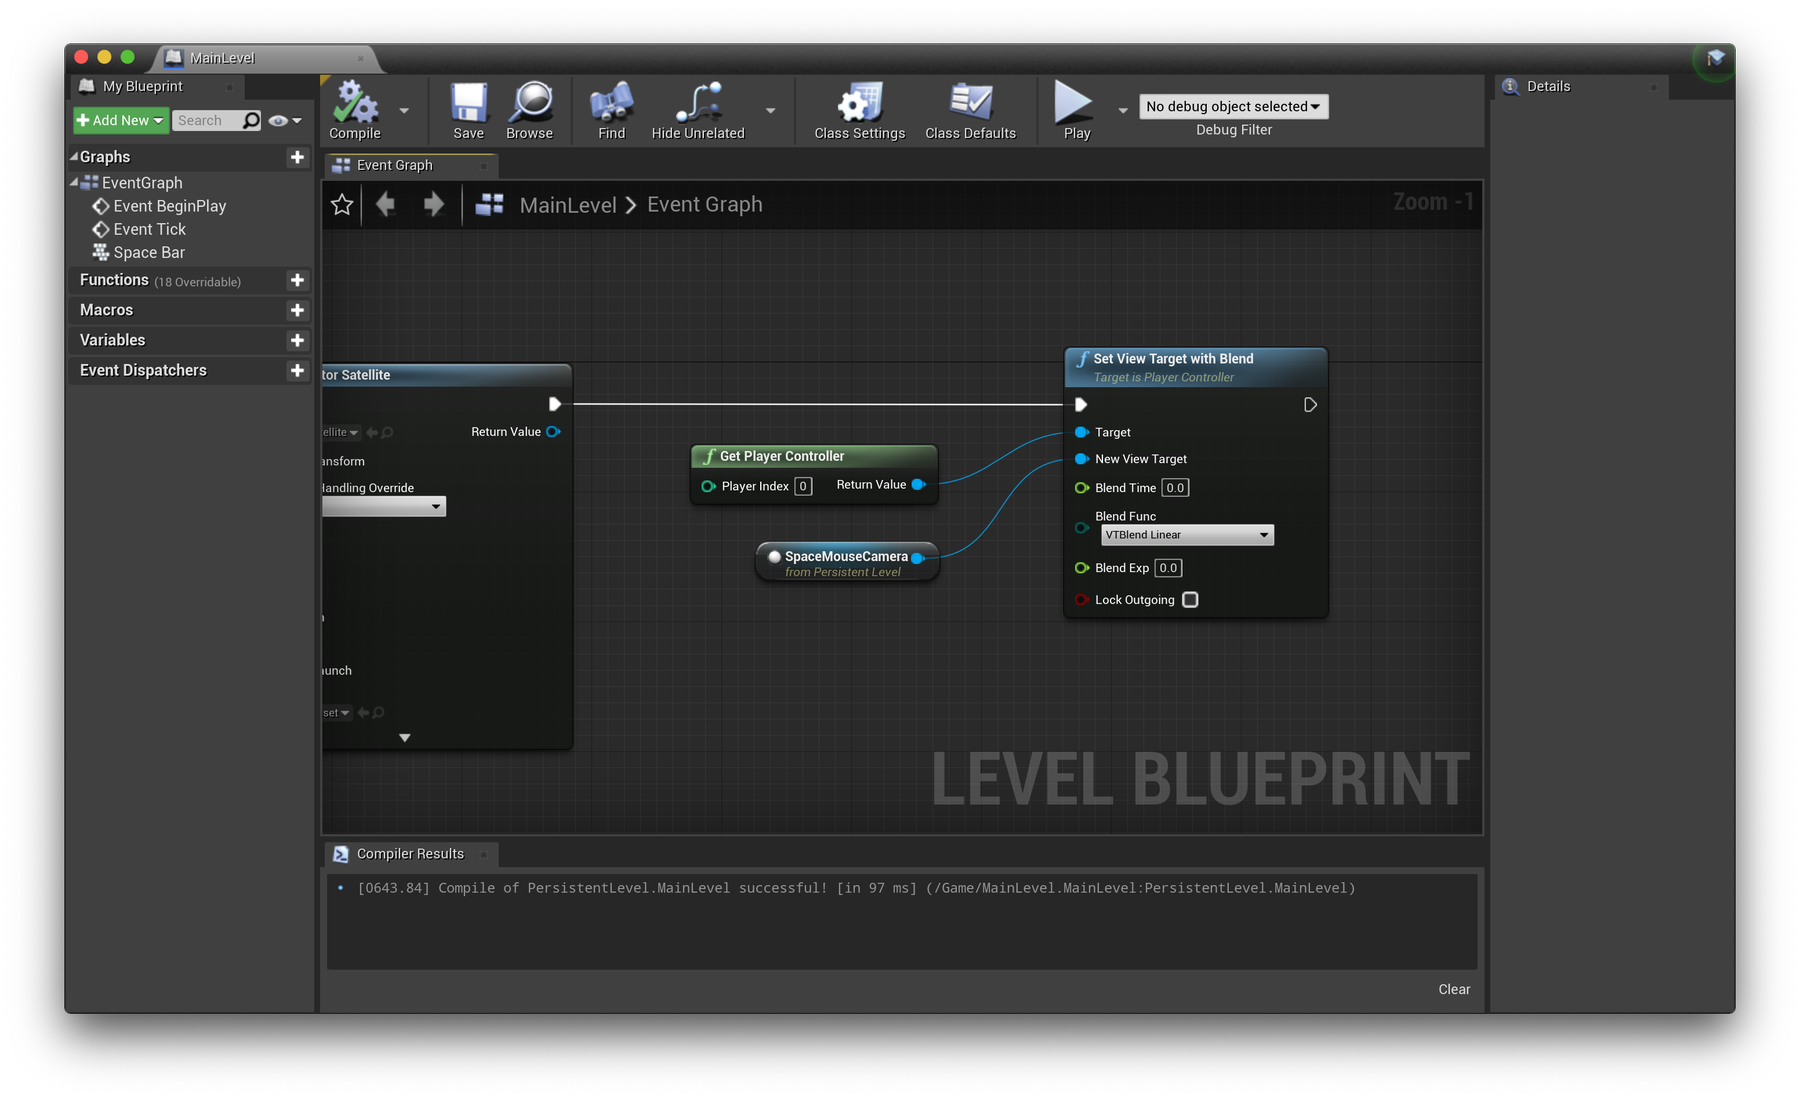
At the end of the BeginPlay chain (after spawning Satellite objects), right-click and choose Create a Reference to SpaceMouseCamera.
To tell Unreal Engine to use this camera as the game default, add a Set View Target with Blend node, and pass in the SpaceMouseCamera as the New Target. Connect a Get Player Controller node as the Target. Play your level and you should now be looking through this new camera object, but you won't be able to look around or navigate just yet.


⌨️ Set project axis inputs
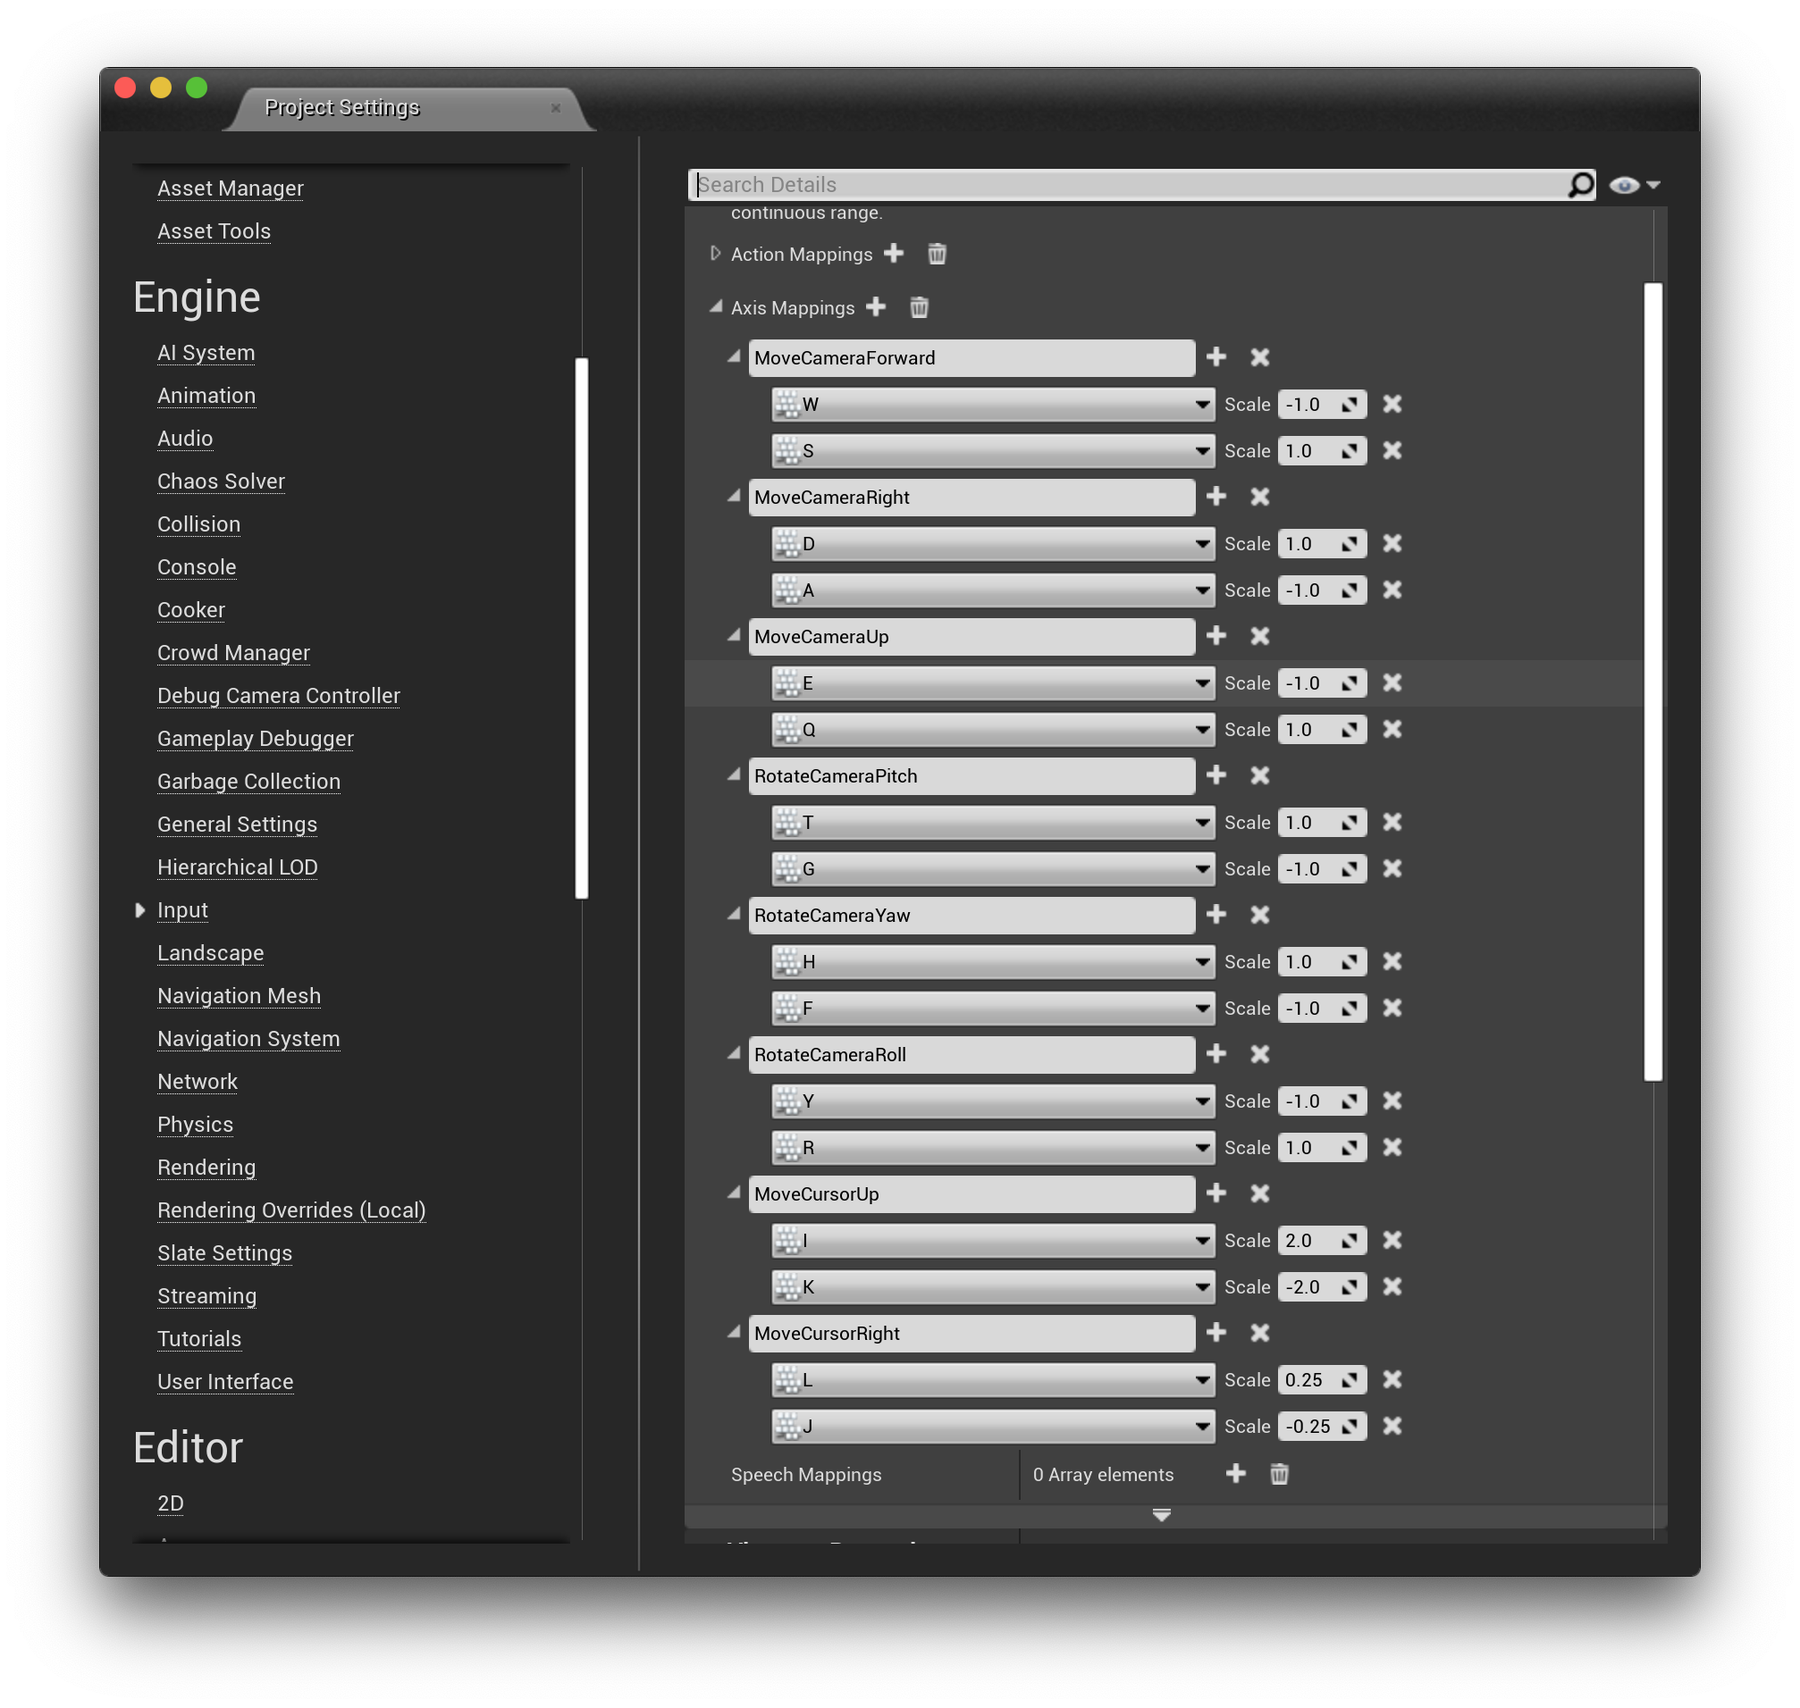
Notice the Use VRPN Input option on your SpaceMouseCamera. When running your project(s) in the Data Arena, we'll enable this option to navigate the game camera with our real SpaceMouse device. When disabled, the SpaceMouseCamera will look to your Input Axis Mappings settings which define keyboard key input as a replacement for moving and rotating the camera. For more information on Axis Mappings, watch this helpful video.
To continue, you'll need to set up your Axis Mappings in Project Settings → Input. Follow the screenshot below as a reference for what you'll need to enter. Alternatively, you can download the file below and place it in your project files in the Config folder, and restart your project.
👉
Return here if you need to adjust the sensitivities of the camera or cursor movements.


Run and experiment
Play your project, and you should now be able to navigate the SpaceMouseCamera with WASD and TFGH keys! Experiment with the camera sensitivity and friction settings in the Details panel.
Up next we'll look into creating an interactive cursor to hover over our Satellite objects and view more details about them. We can have up to 8 Motion Capture-controlled cursors in operation at once in the Data Arena.