Create an Interactive Cursor
The DA Assets plugin comes with a TrackerCursor class that was developed for the Cozy Living Room project. This cursor can be controlled with our Motion Capture system in the Data Arena, or with keyboard key fallbacks when developing outside the DA. It was designed to highlight objects, pickup, rotate and drop them in an interactive scene.
📂 Copy to your project
For our project, it would be ideal to use a cursor to point to Satellite objects and trigger the visiblity of their details — labels and orbit rings. The TrackerCursor is a good start, so find it in the DA Assets files, click-and-drag into your project Content folder and choose Copy Here.
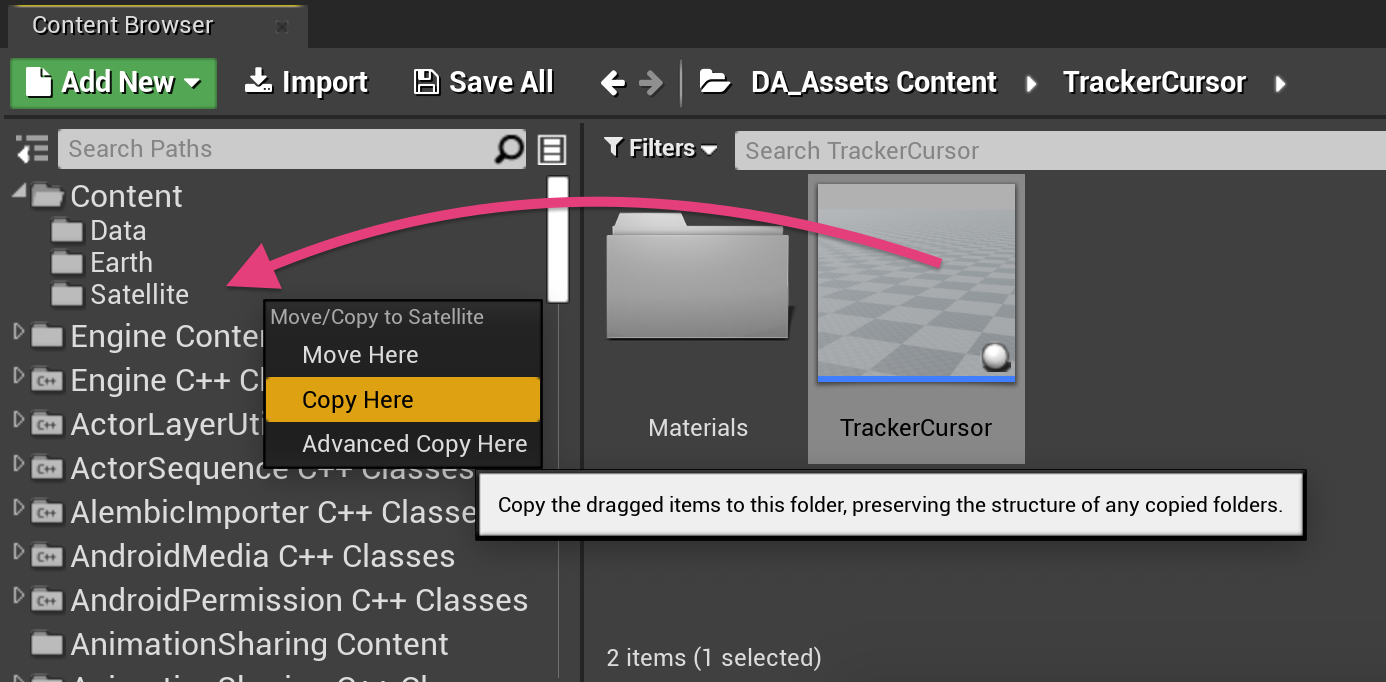
To keep things organised, rename your newly copied class to SatelliteCursor.
Hide details by default
Before we continue, our project is still only generating a portion of the available Satellites from our Data Table (set while developing labels and rings). Head to your Level Blueprint and either remove the Branch counting the Array Index, or increase the "less than" value to 1500.
Then, go to your Satellite class, select the Show Details boolean variable and change the default value to false (unchecked) to hide labels and rings. Our goal is to enable this boolean when we hover a cursor over a Satellite object.
Run and test
Run your project and make sure all dots are visible (well, more than 100 if you're not up for counting...). You might also notice this message.
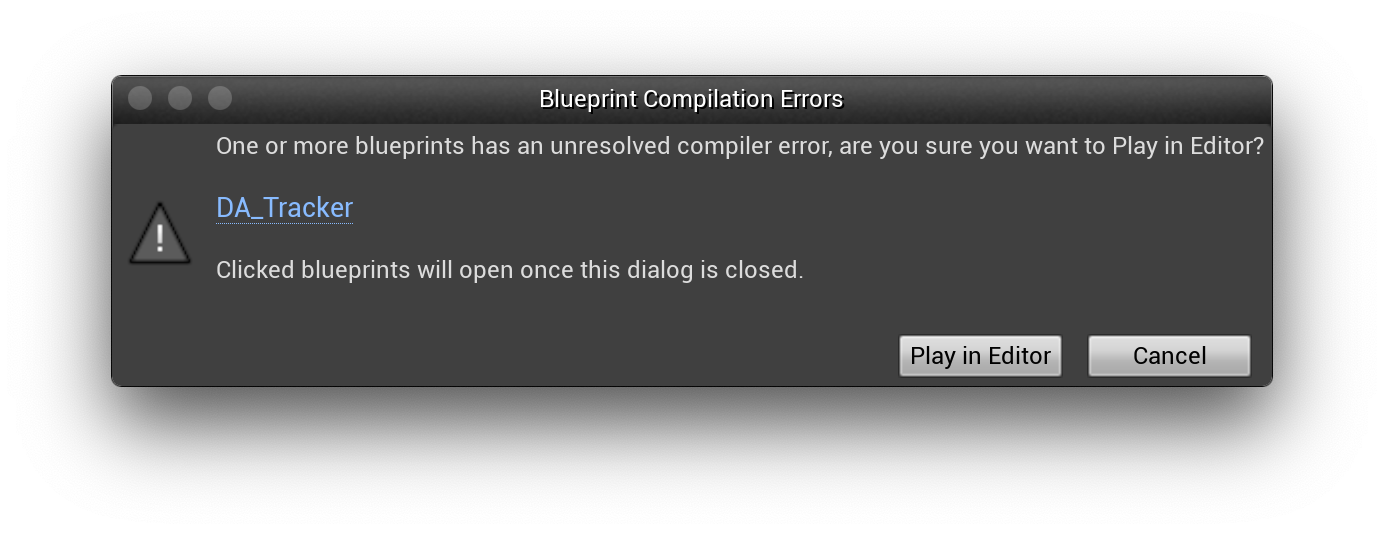

You can safely ignore this warning and press Play in Editor. The TrackerCursor (and your newly copied SatelliteCursor) class contains references to the nDisplay plugin (via a DA_Tracker class). nDisplay is what we utilise in the Data Arena to draw across our computing cluster. You do not need to install nDisplay (available on Windows only) to continue.
⭐️ Add a SatelliteCursor into your scene
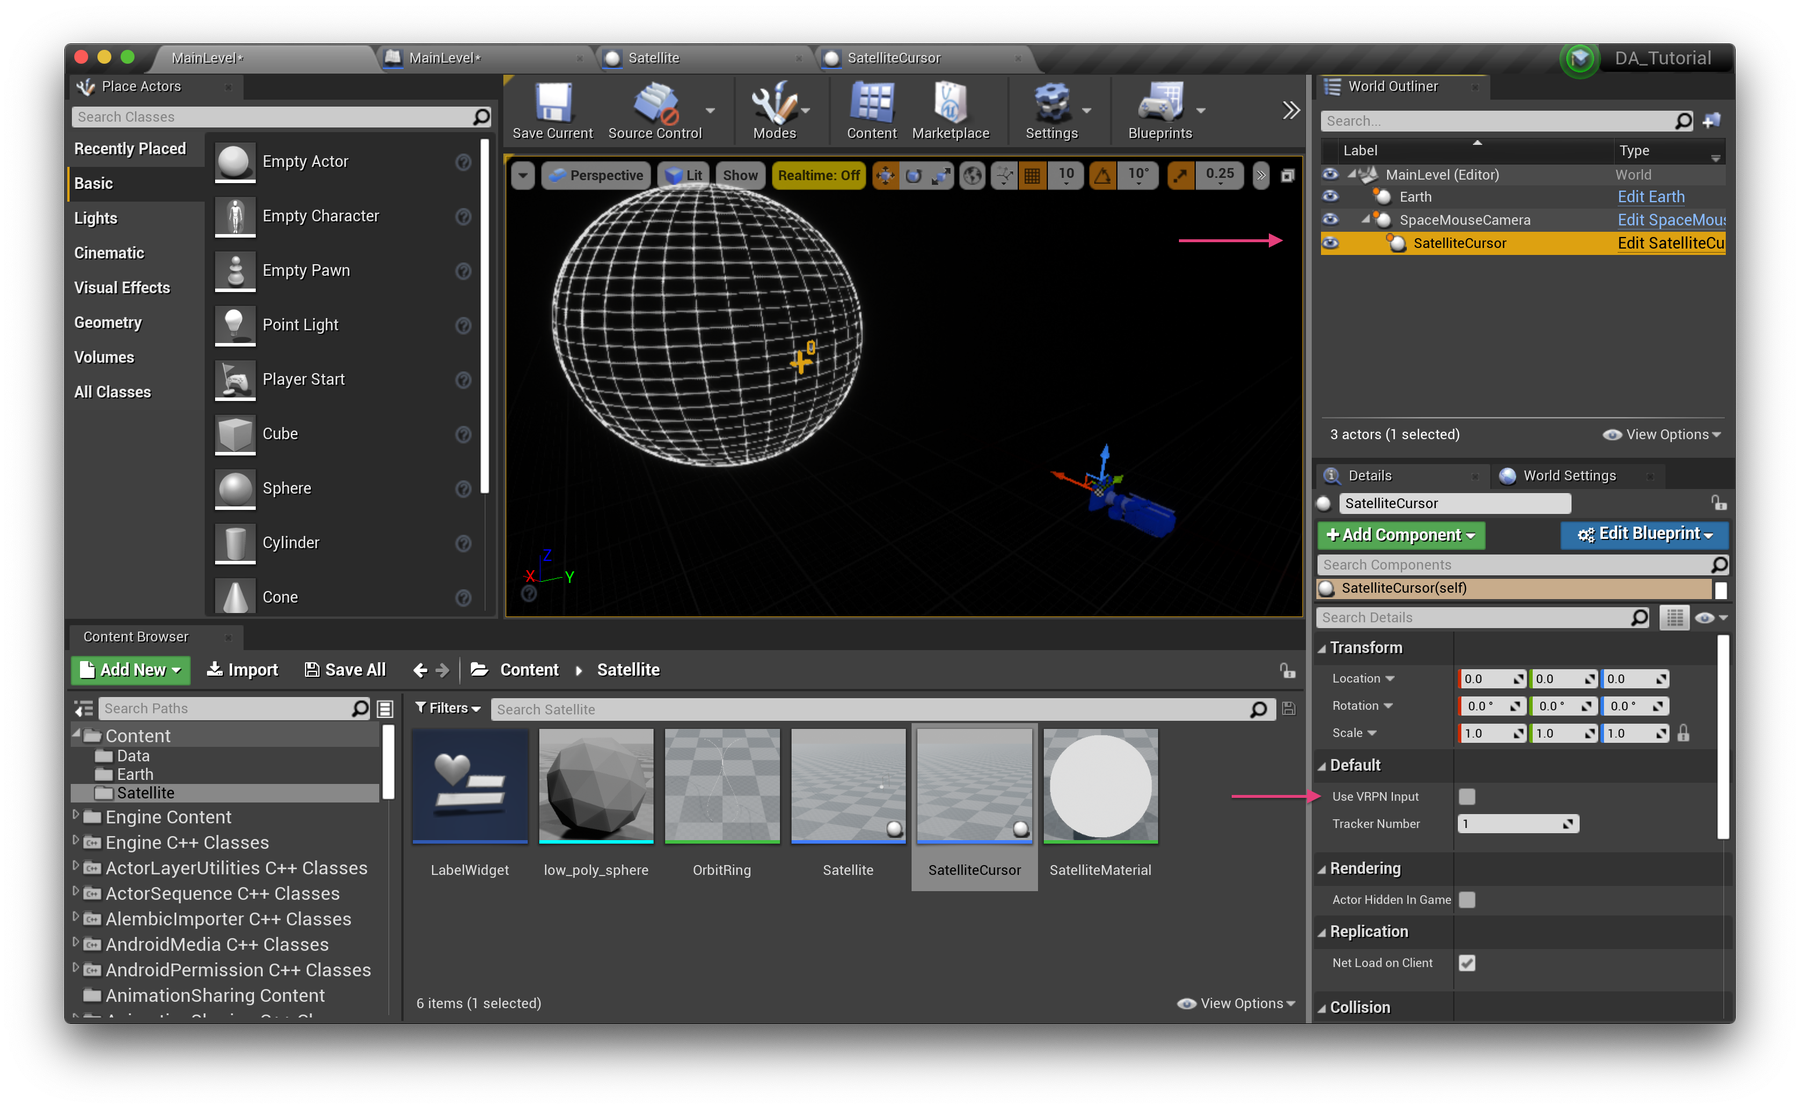
Click and drag a SatelliteCursor into your level from the ContentBrowser, and make sure it's attached to the SpaceMouseCamera as a child in the World Outliner. Set its location to X: 0, Y: 0, Z: 0. The cursor works as a simulated on-screen interface by always appearing in from of the camera. Make sure Use VRPN Input is false (unchecked).
Run your project and try moving the cursor with you IJKL keys (as defined in Project Settings → Input). You won't be able to highlight anything yet, but this is a great start!

🔎 Start tracing for objects
Navigate to the Event Tick node and remove all functions except for Update Cursor Position. Add a call to Trace For Objects. Your blueprint should be looking like this at the moment:
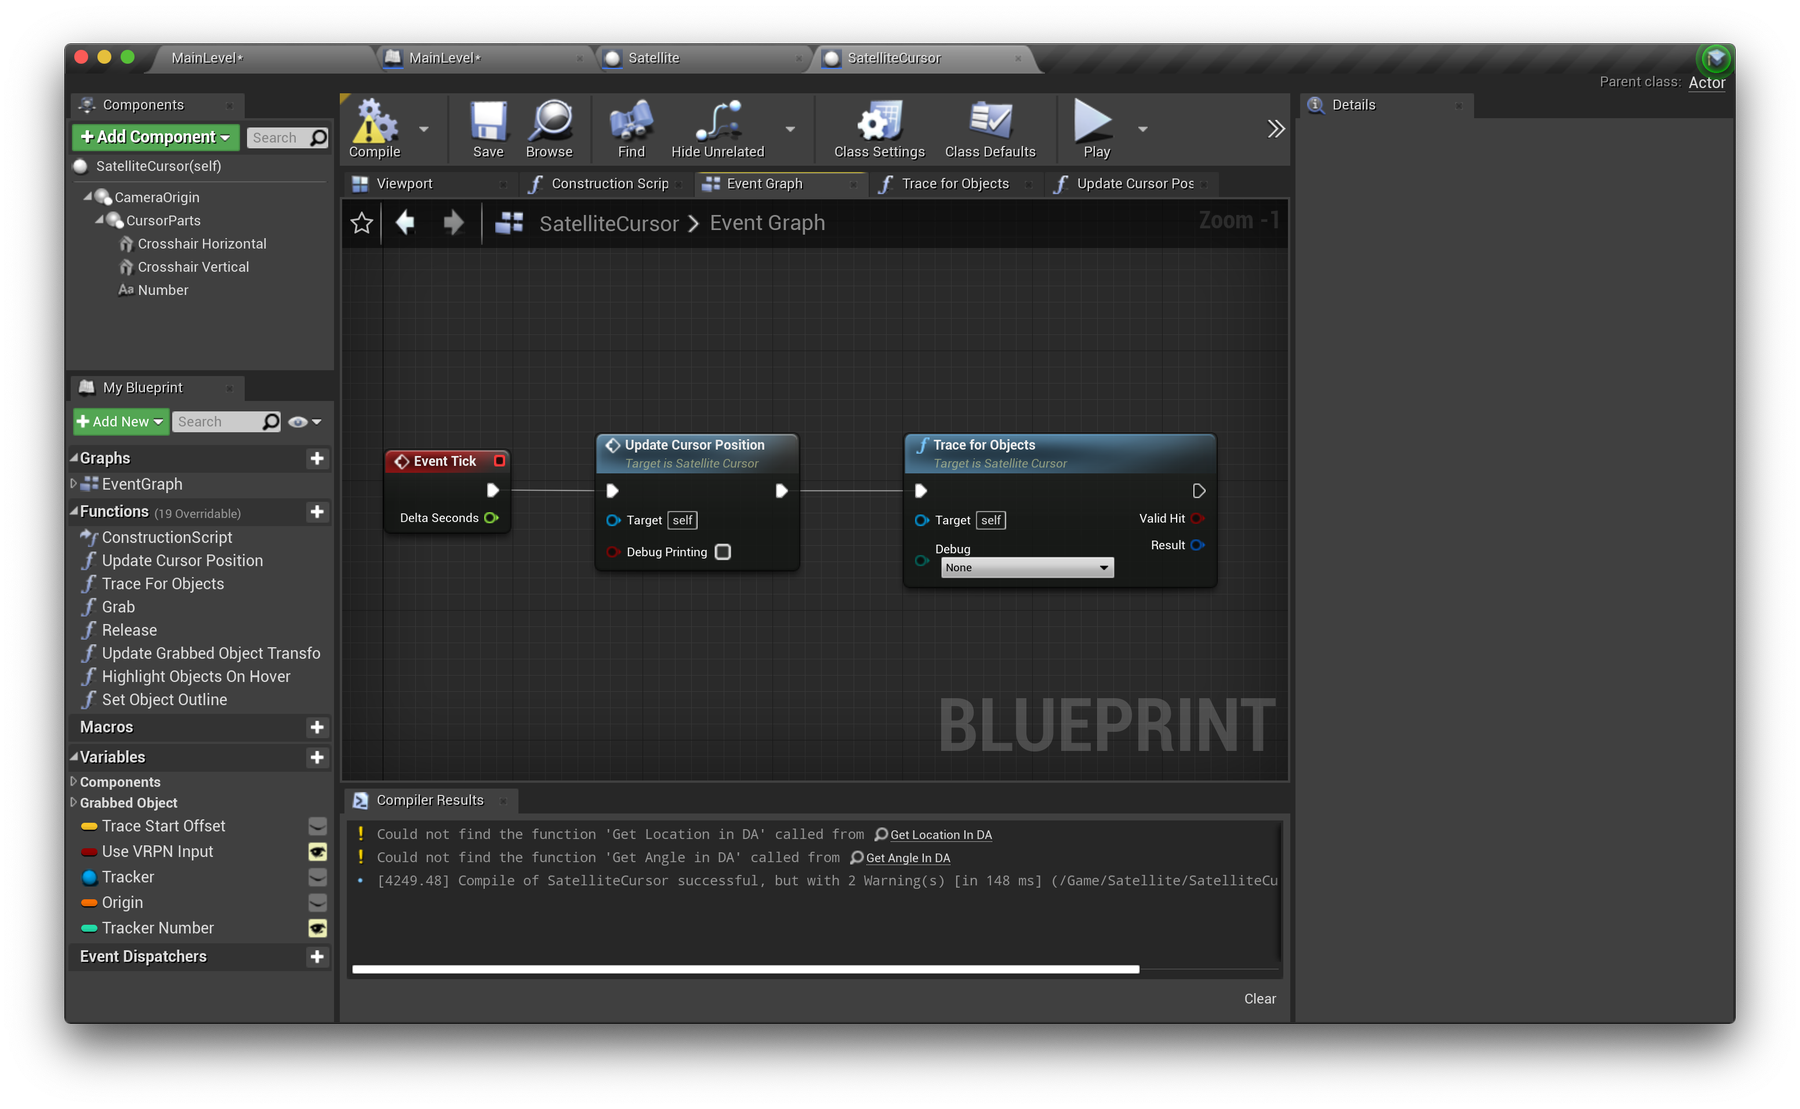

The Trace for Objects function will cast a ray from the camera through the cursor crosshair to the scene and return any objects that might have been found. We'll utilise this to trigger the details on our Satellite objects. Try adding a Print String function to the end of this chain and pass in the Valid Hit result. It should print True on screen if you've hovered over a Satellite dot, otherwise False.
👉
Objects can only be "hit" if their collision settings allow for it. This is why we've set NoCollision on our Earth actor, and on some of our Satellite's components—so they don't get in the way.
🏀 Enlarging the "hit" zone
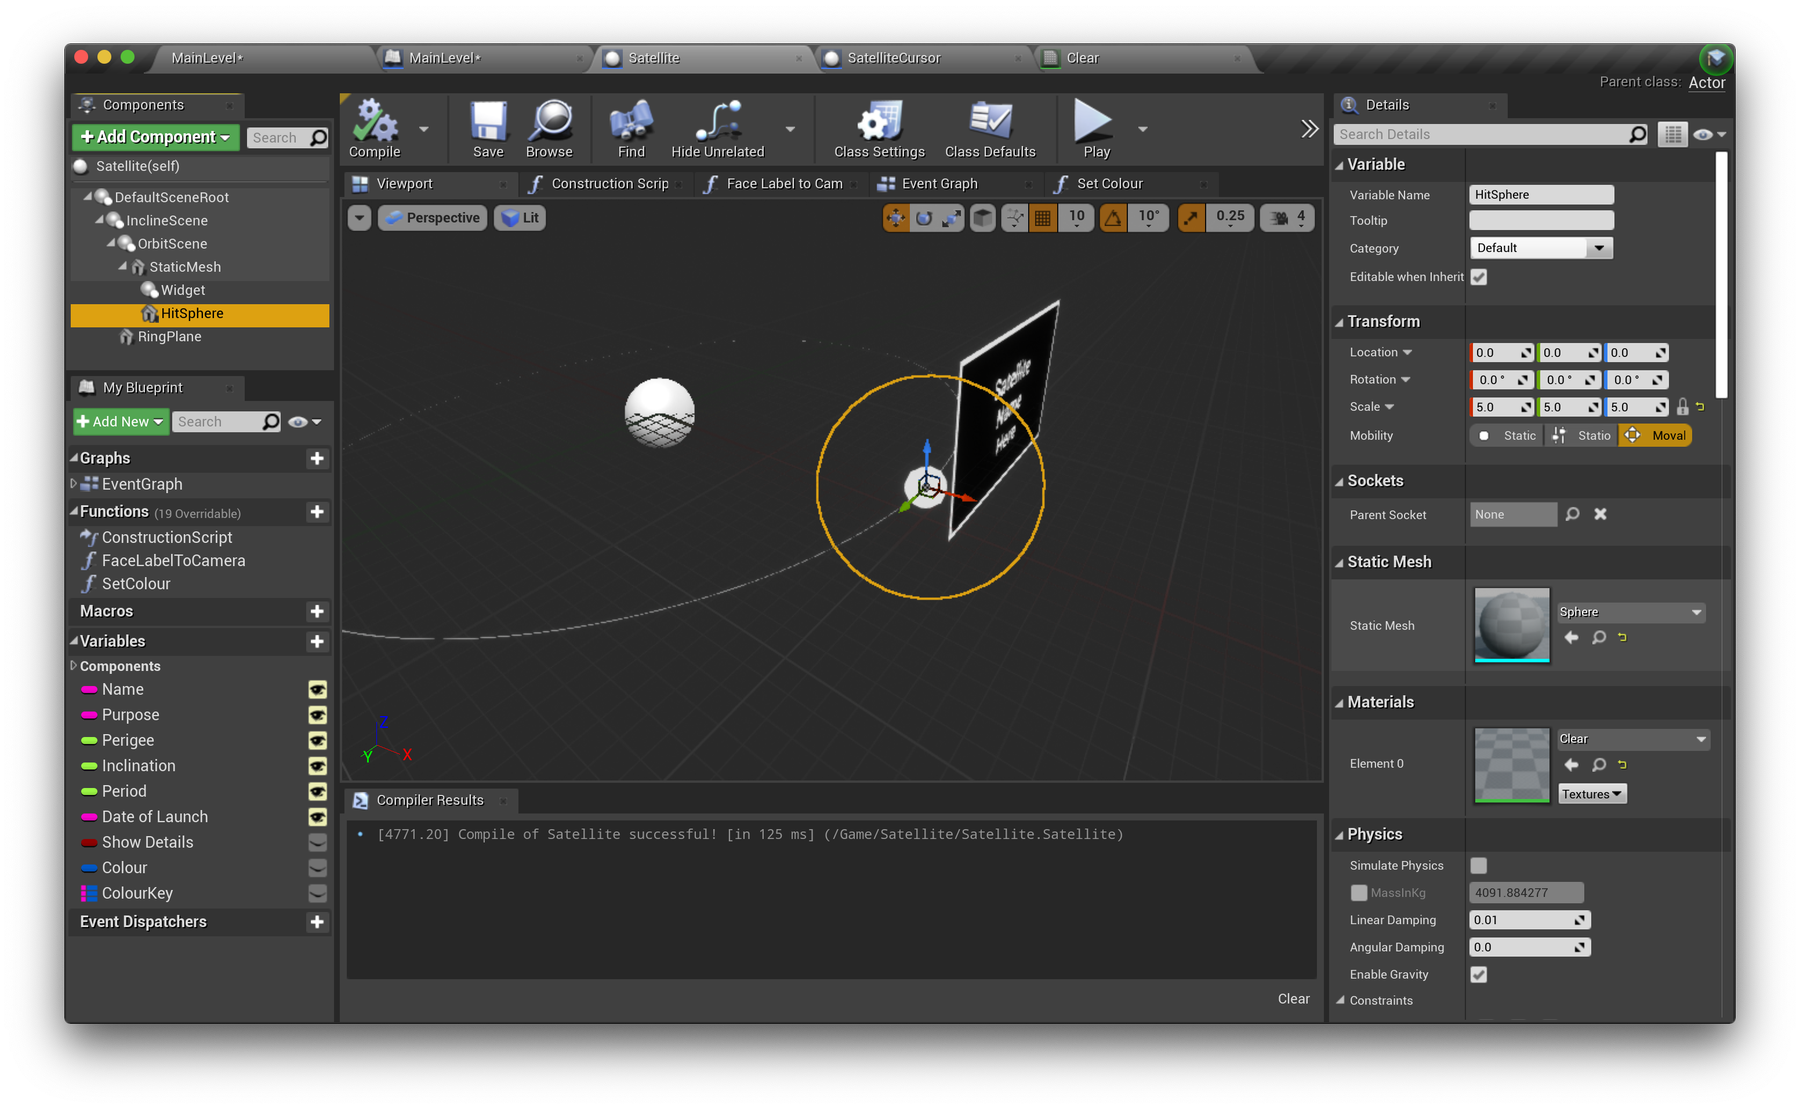
Our Satellite spheres are quite small and difficult to accurately hover over at this stage. Let's create an additional larger, yet invisible component to make this easier. Open you Satellite class and add another StaticMesh component called HitSphere, set the Static Mesh option to a default Sphere shape, and attach it to your existing StaticMesh component alongside the Widget component. Scale this to 5.0 on all axis.
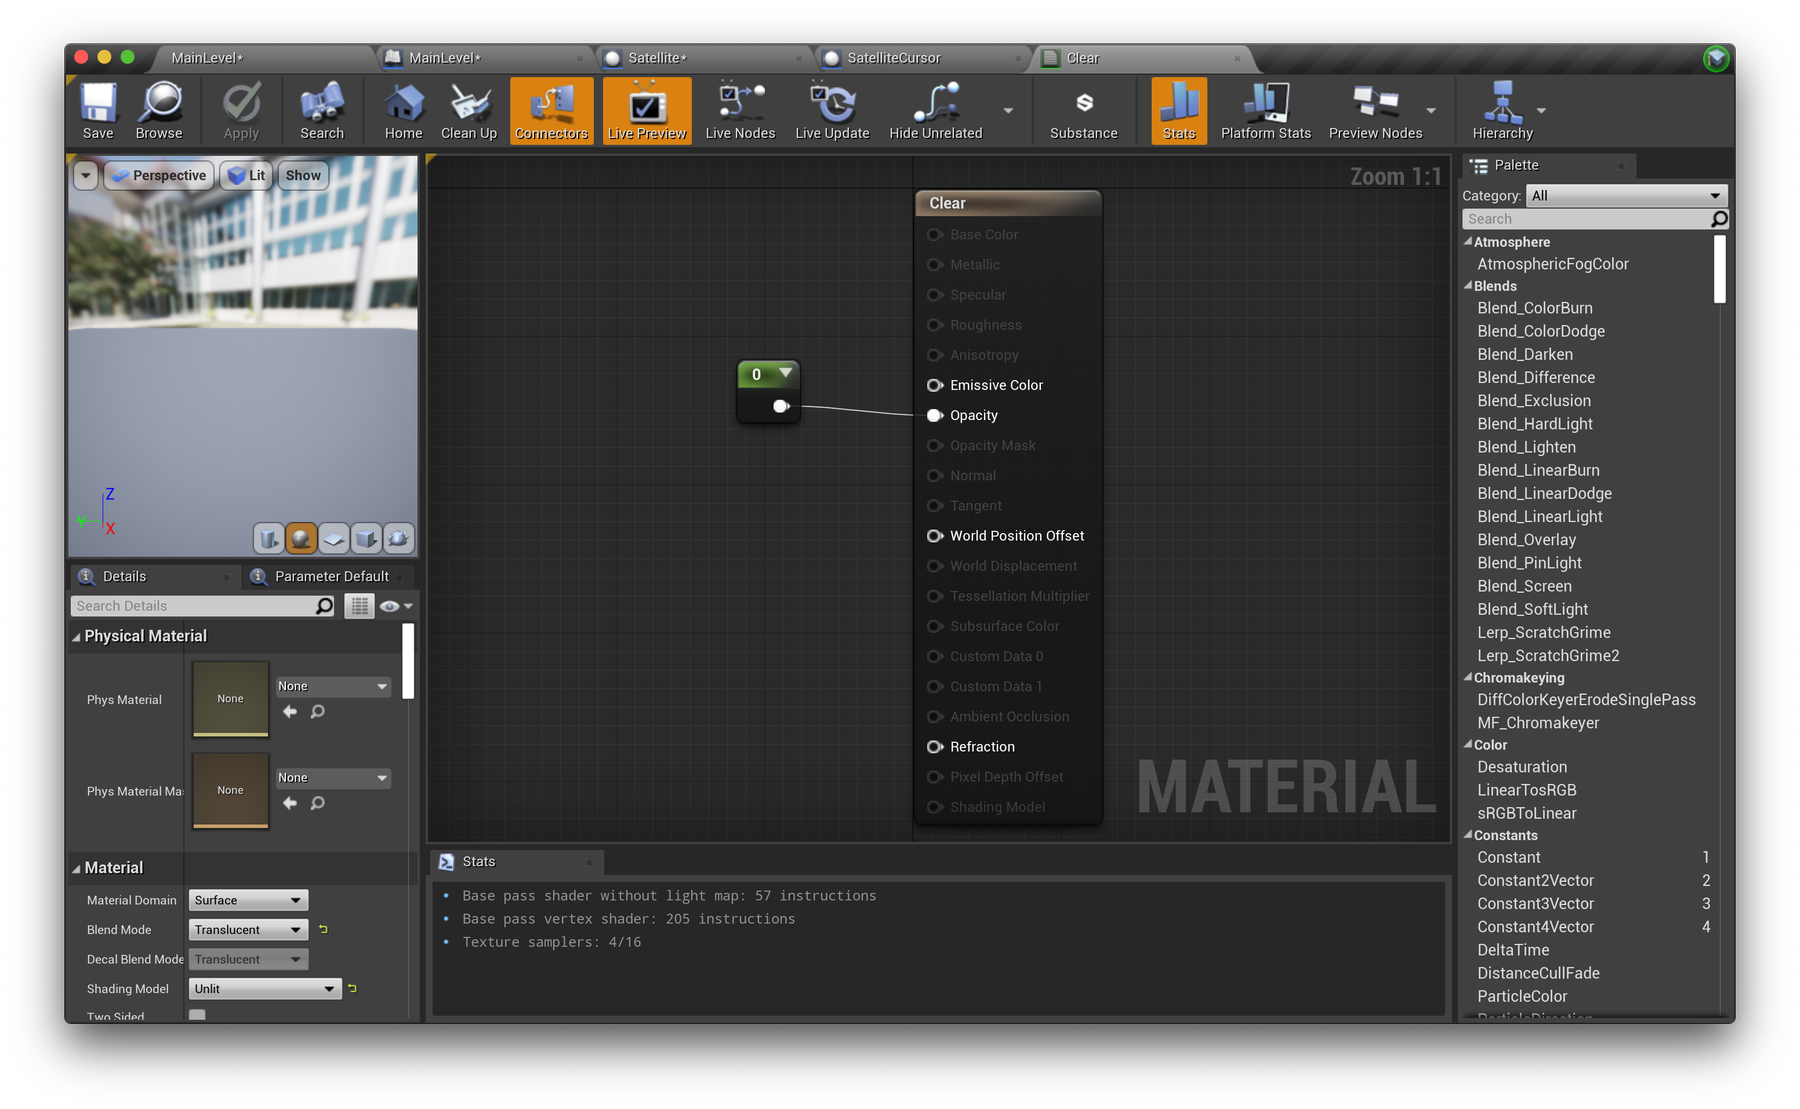
Create a new material named Clear. Set Blend Mode to Translucent and Shading Model to Unlit. Add a Constant node with value 0 connected to Opacity. Apply this material to your HitSphere component.


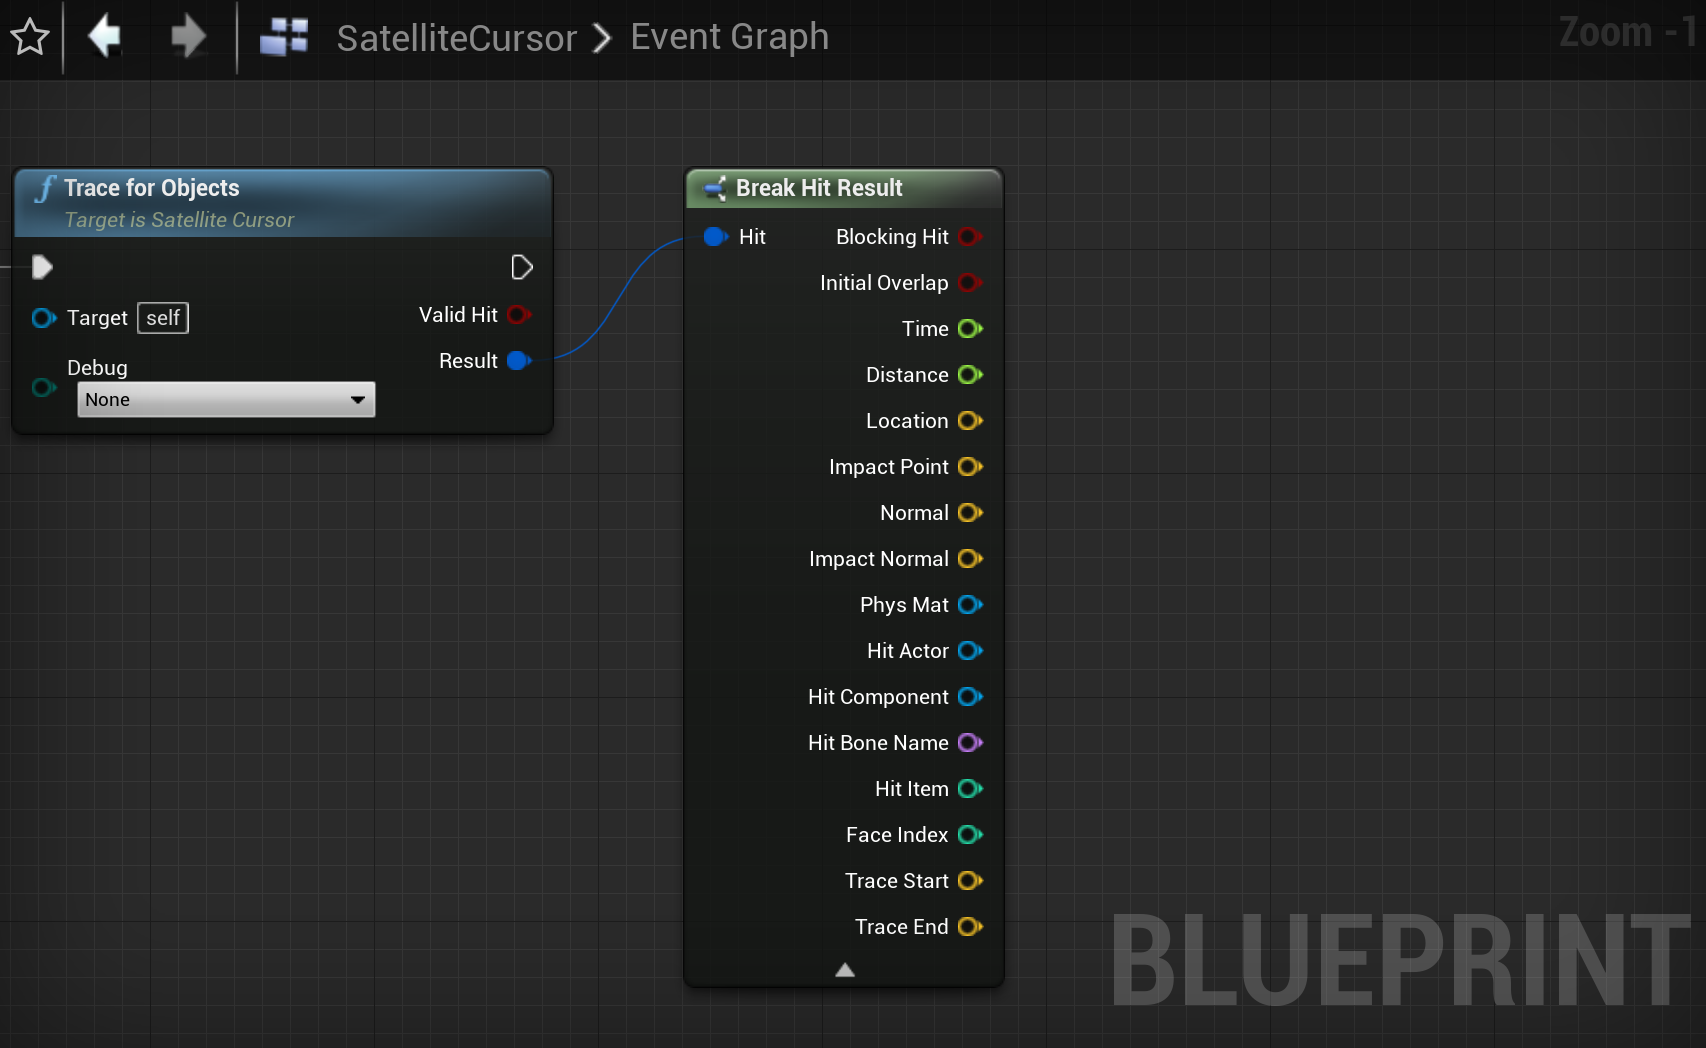
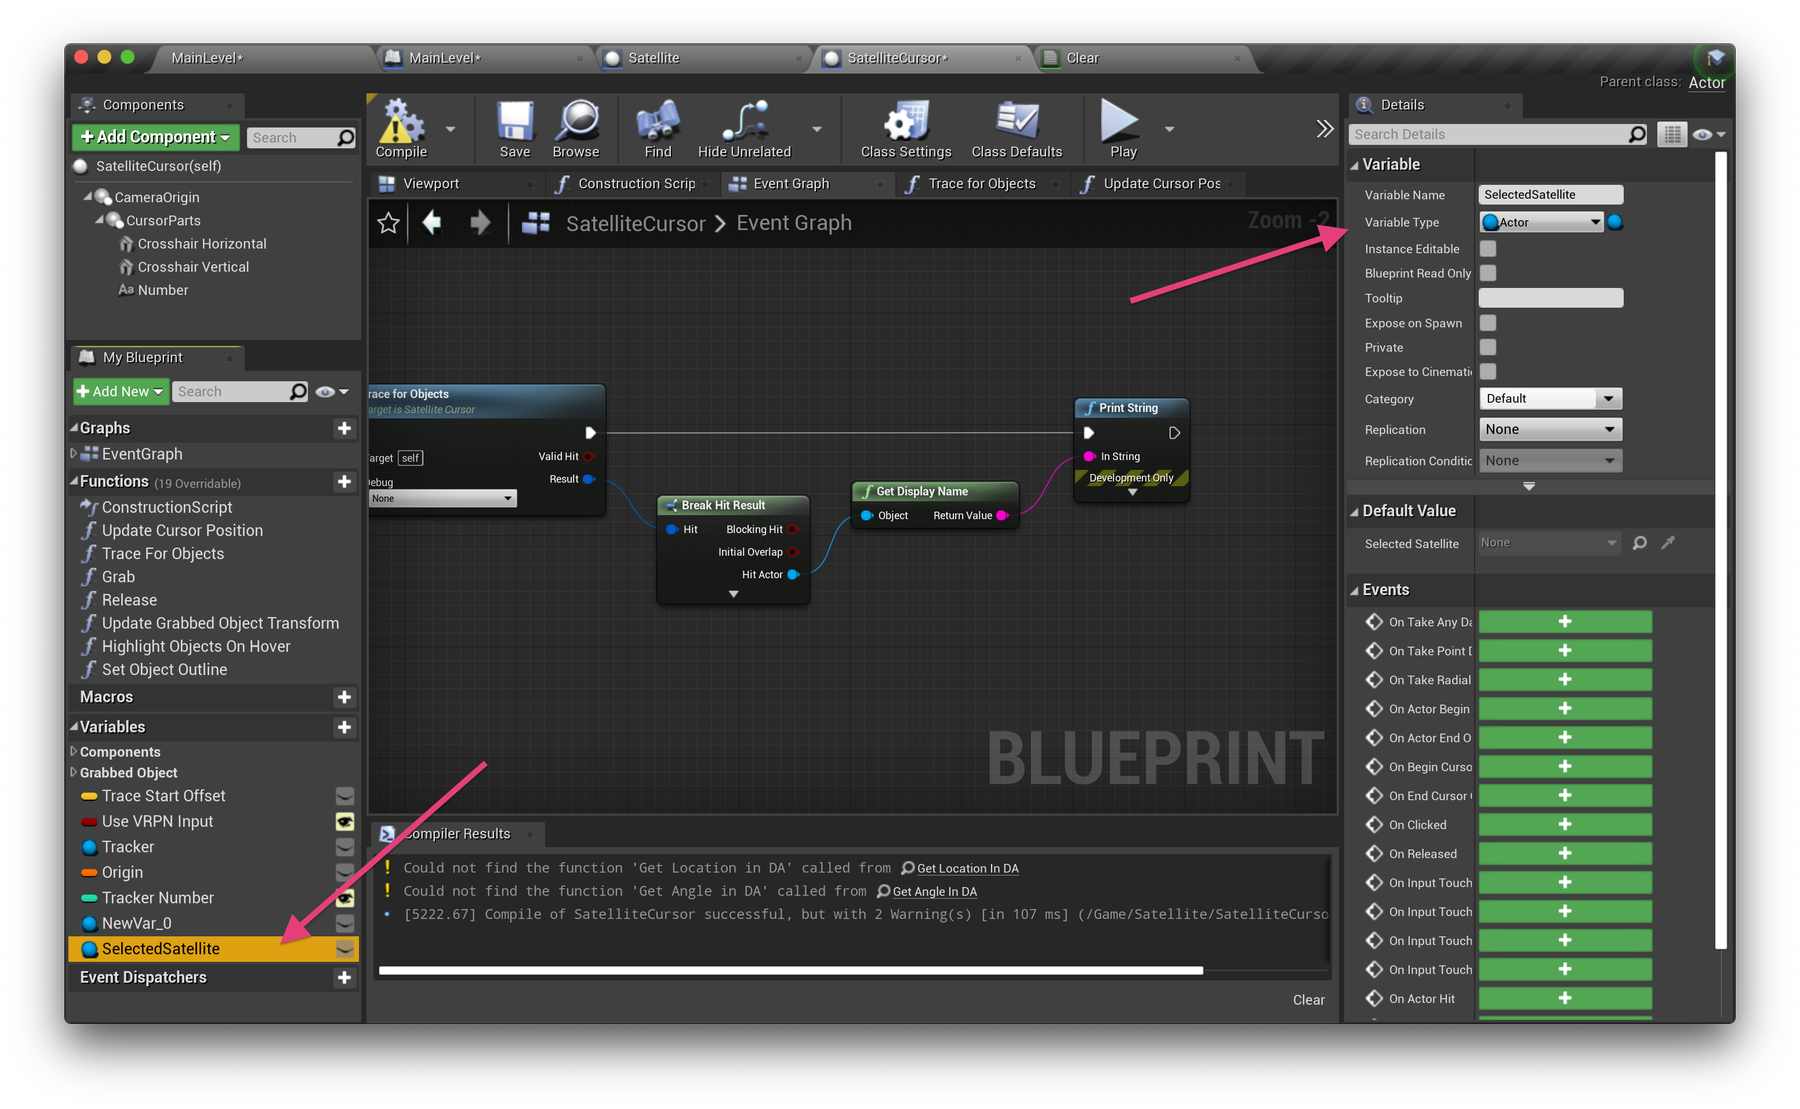
Now try running your project again and notice an improvement in your ability to separate Satellite objects. Let's try printing the name of each Satellite object we find. From the Trace for Objects function, notice the Hit Result output. Similar to working with our Data Table row structure, we want to "break" this result. The Hit Result output contains everything we need to know about what we're hovered over, when and where.

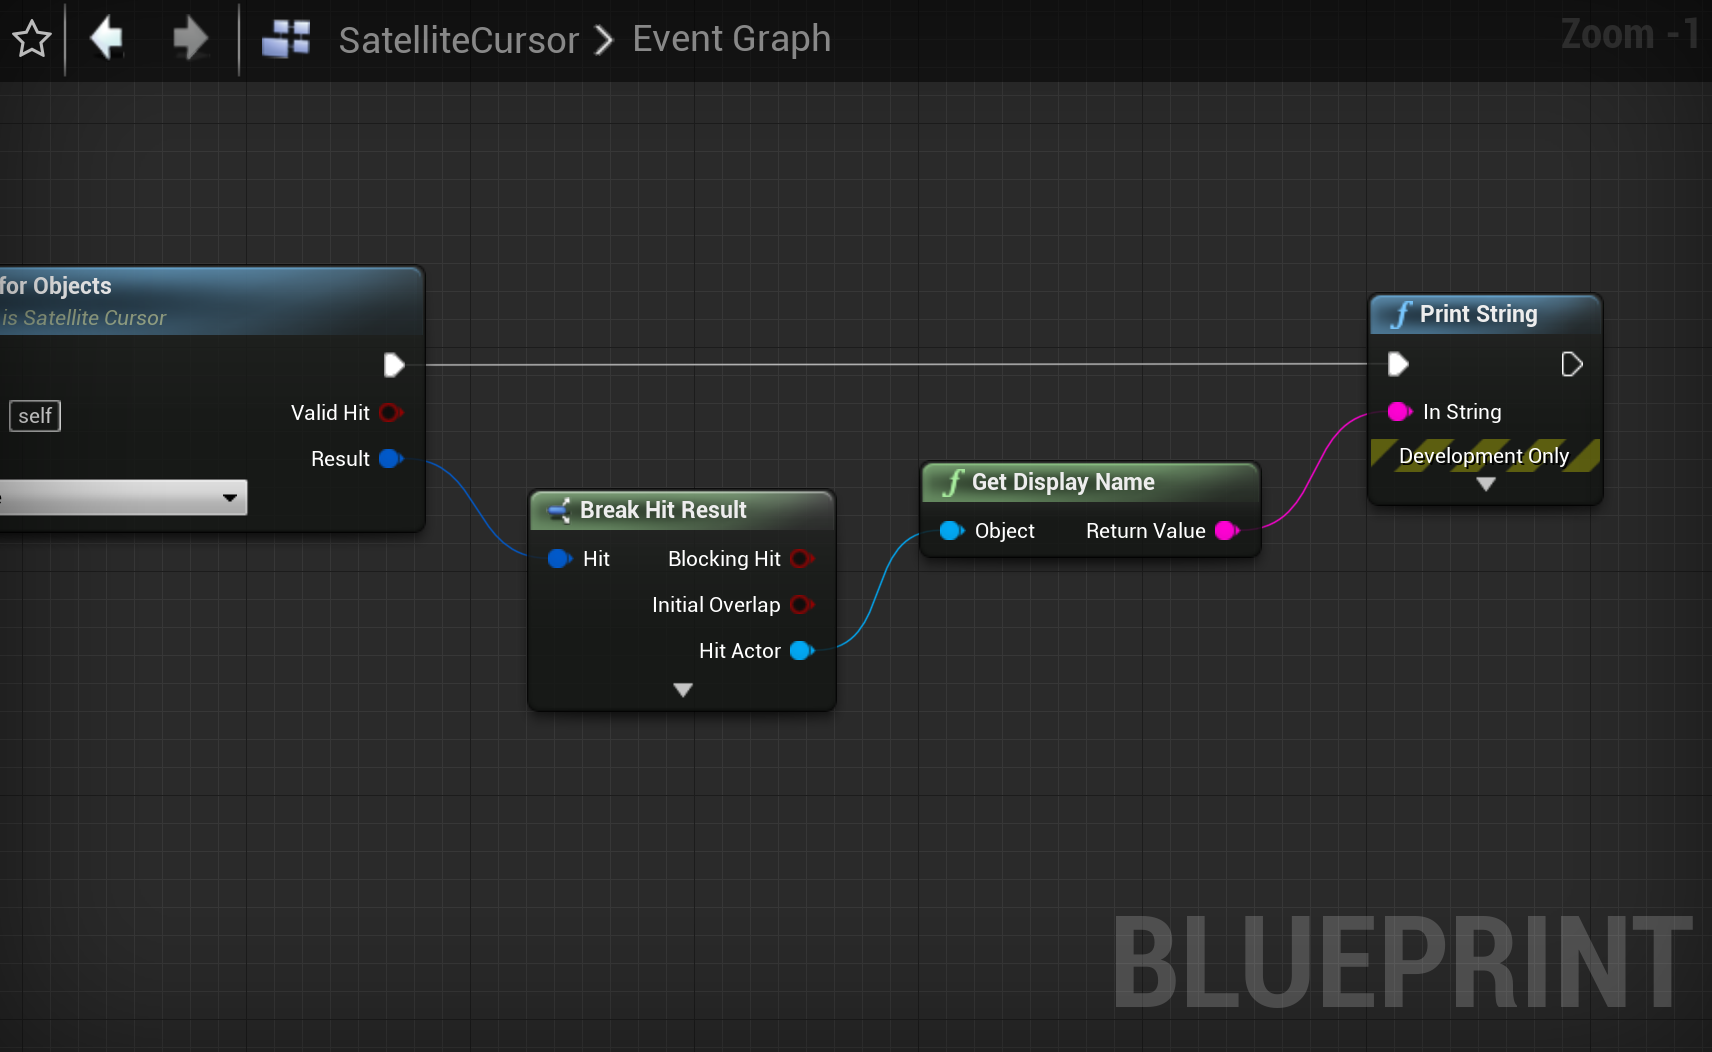
Try connecting Hit Actor to a Print String node. It should automatically convert it to a printable object with a Get Display Name node. You can then press the small arrow at the bottom of the Break node to compress the options to save space.

🎛 Toggle Show Details
If this is working, you should see Satellite16 and Satellite539 etc printing on screen. Great! We have what we need to continue.
To achieve our goal of enabling the Show Details option on the Satellite objects we select, and then disabling this option when we move away from them, create a new variable named SelectedSatellite and set its type to Actor. We will use this to remember what Satellite we've selected, so we can disable Show Details on it we select something else or nothing at all.

Create a Set Satellite Details function
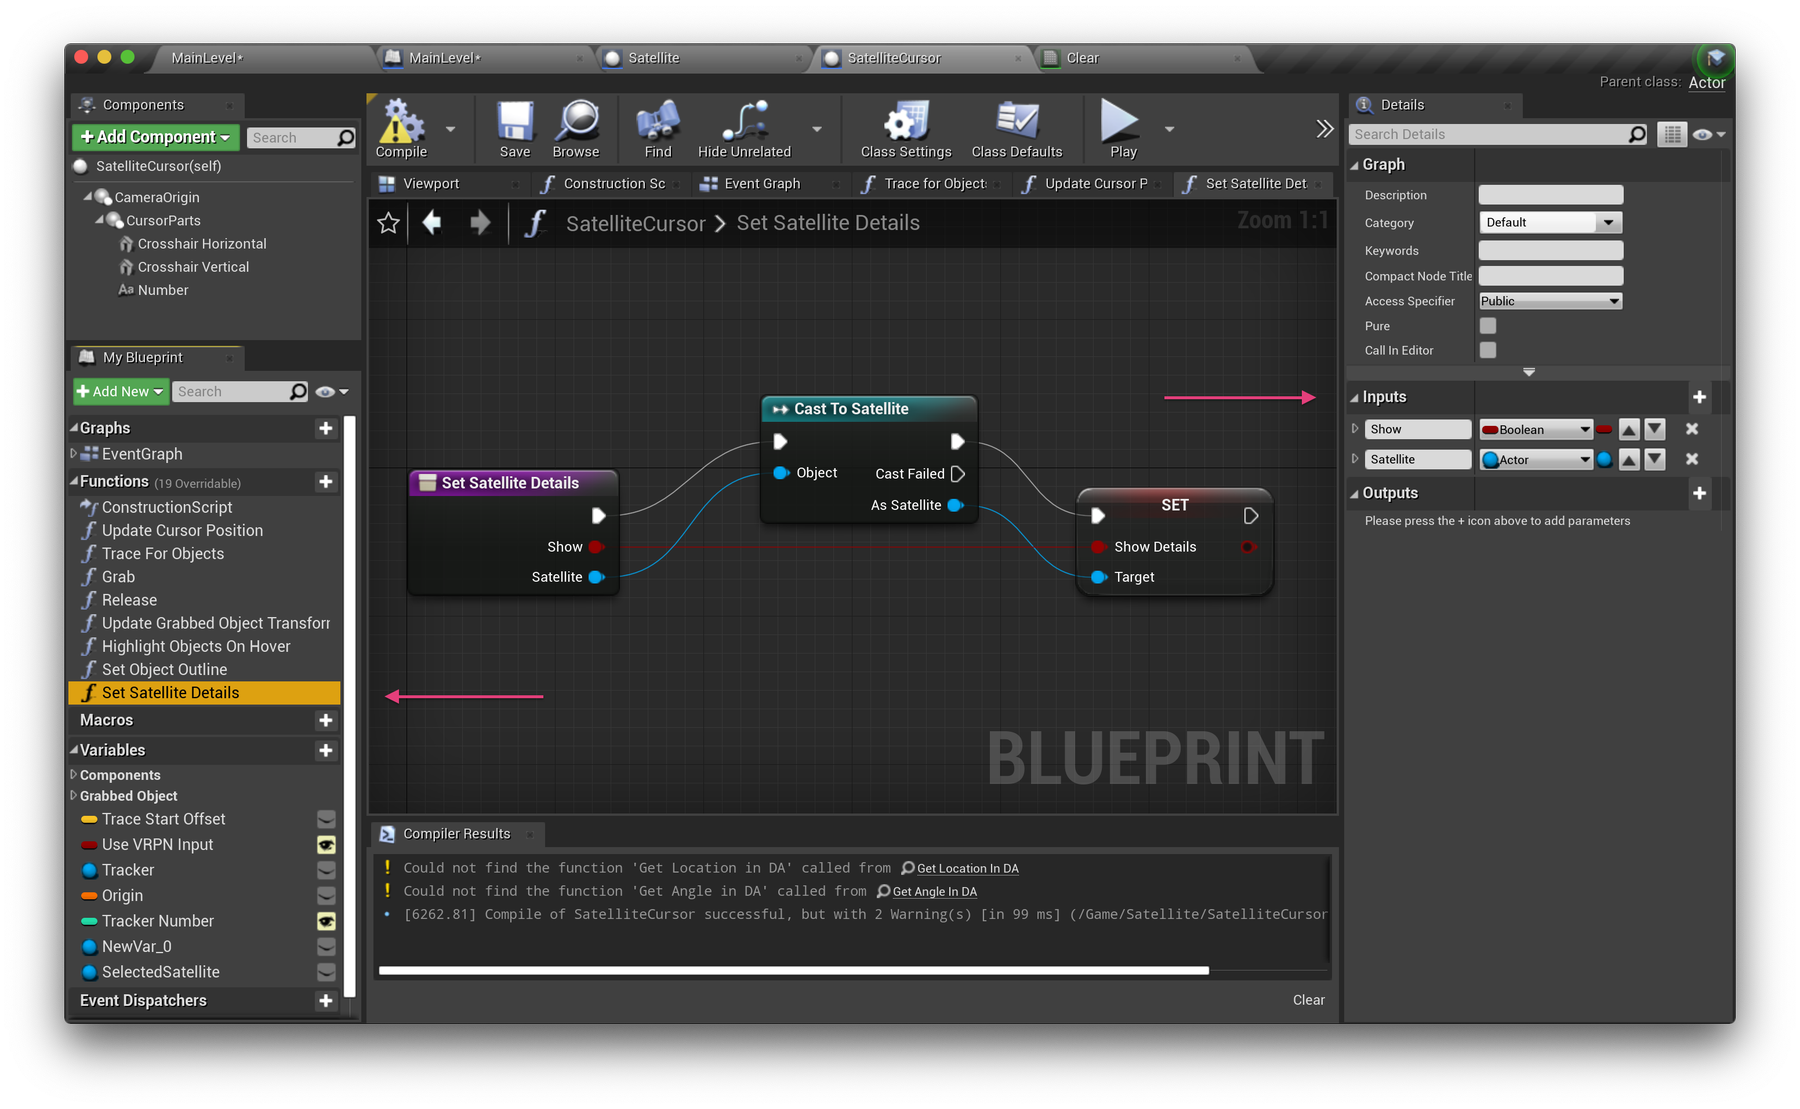
Create a new function called SetSatelliteDetails. We'll use this to tuck away the required nodes to enable or disable Show Details. Add two inputs. Show (boolean) and Satellite (Actor), then compile.
While we have access to the hit Actor on hover, we need to use a Cast node to tell Unreal Engine to interpret this object as a Satellite. Search and add a Cast to Satellite node, then from As Satellite search for Set Show Details and pass in the Show input. Great, all done here!

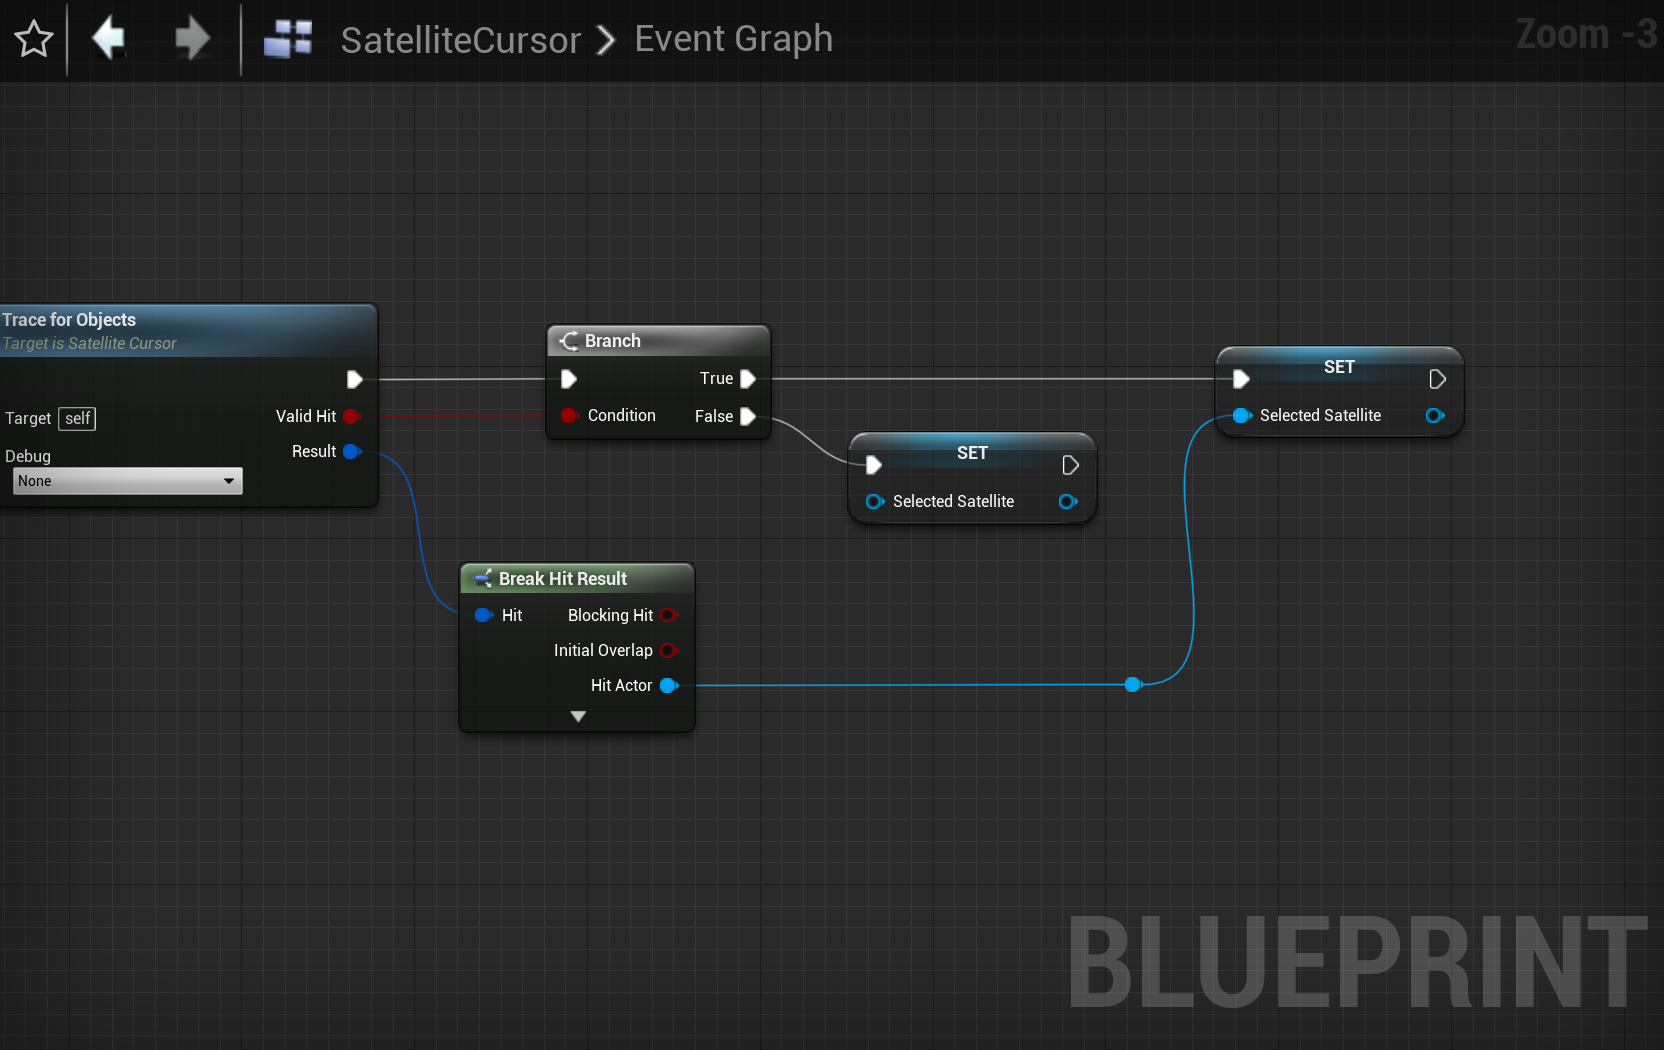
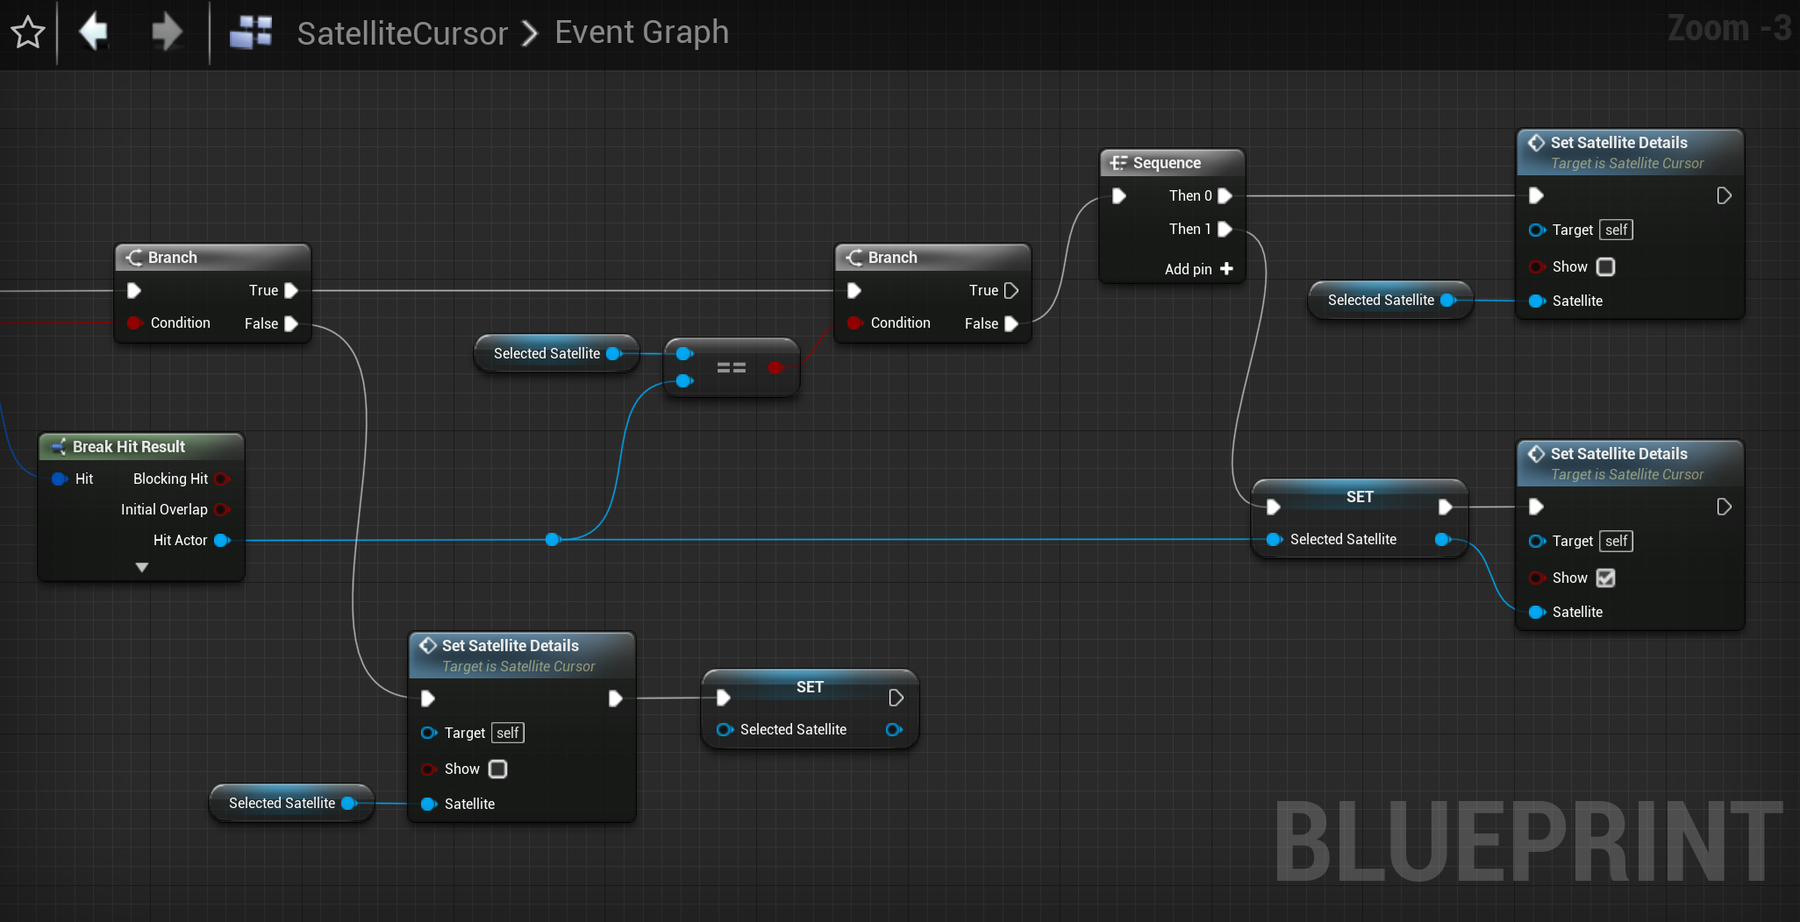
Back in your Event Graph, start with the following setup. Using a Branch node we first check if we hit anything at all. If True, set SelectedSatellite to the Hit Actor. If False, set SelectedSatellite to no input. This will clear the variable.

Next, modify this so after we hit something (True), add another Branch. This time we need to check if the Actor we've hit is the same that we've stored in SelectedSatellite. Do this by adding an Equal (object) node, pass in the SelectedSatellite node and the Hit Actor result.
If these are the same (True), we don't need to do anything. If they're not, we can use a Sequence node to:
- Set Satellite Details to false on the latest stored SelectedSatellite.
- Set the SelectedSatellite variable to the latest Hit Actor and Set Satellite Details on this to true.
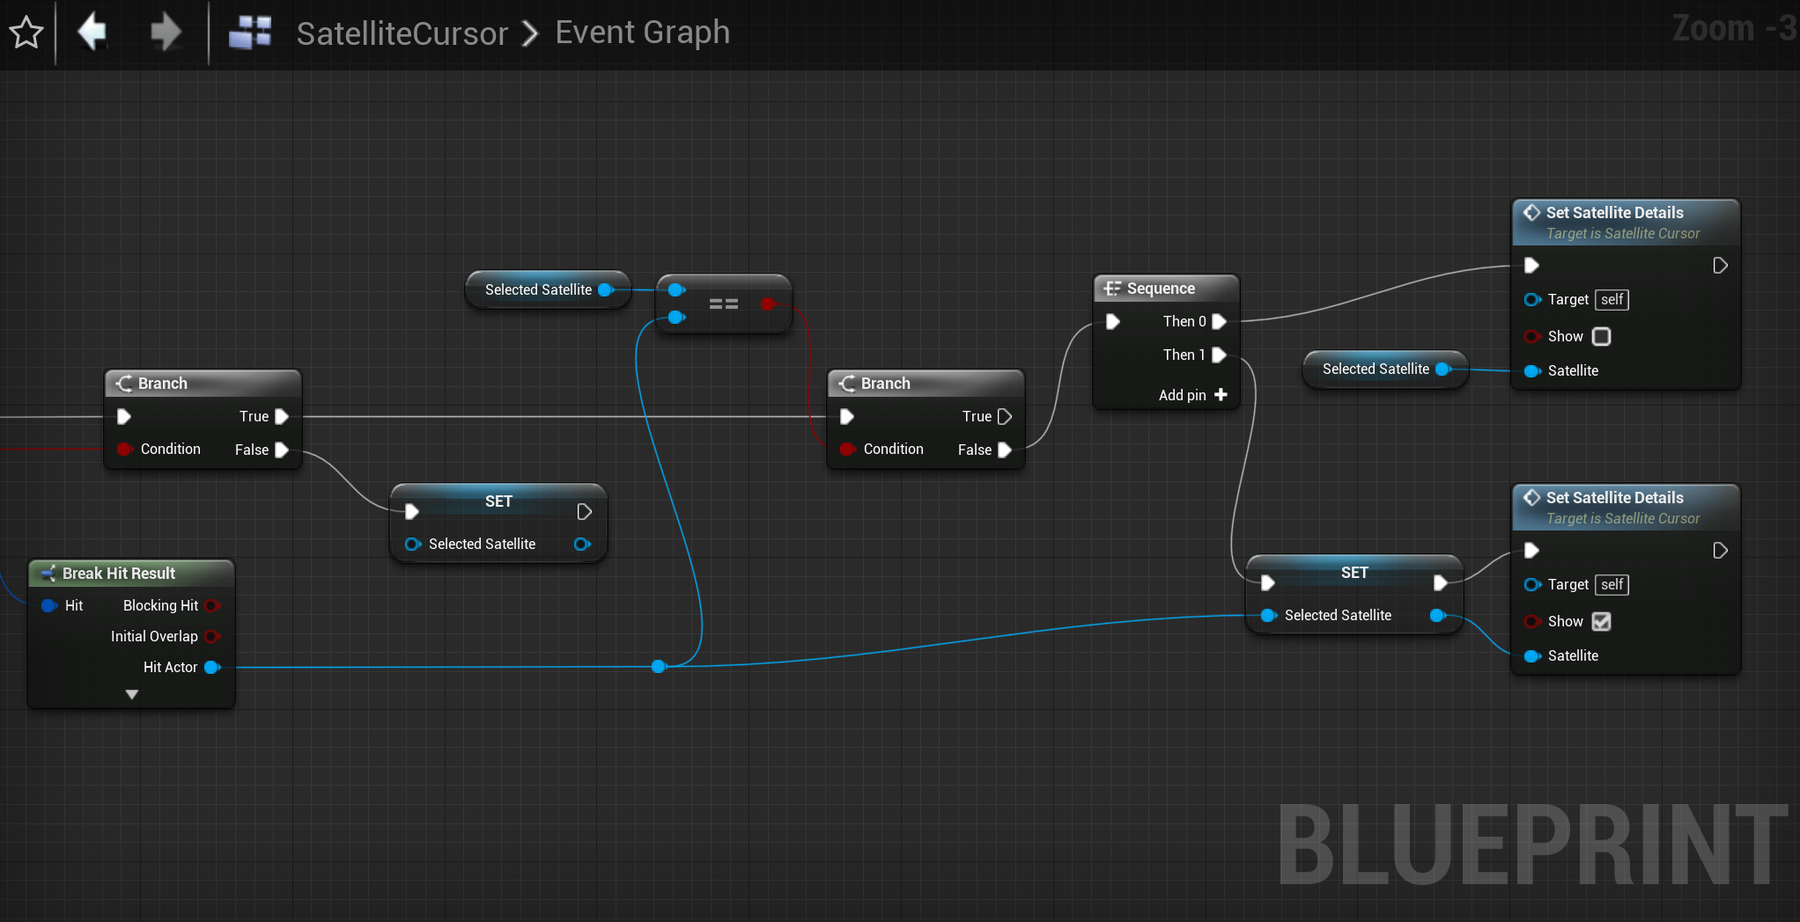

Finally, from the False output of the first Branch (if we don't hit anything at all), before we set the value of SelectedSatellite to nothing, we need to call Set Satellite Details on the current value of SelectedSatellite to hide its details.
That's it! We've cleaned up our blueprint with Reroute nodes and the right-click → Straighten option on some pins.

Run and test
Well done! Run your project and try selecting objects. We've reduced the time speed here from x100 to x50 to make it a little easier to hover on them. There are lots of things you might consider to improve this on the next page, so read on to wrap up, and congratulations on getting this far!