Colour Satellites from Data
At the moment our satellite objects are all visually identical. Let's look into how we could colour our spheres and rings based on the available data. For the purpose of this tutorial, we'll assign a few options from the Purpose column of our data to specific colours, and leave the rest as a default grey. Completing this process should introduce you to ways to further categorise data objects in Unreal Engine.
🖍 Create a SetColour function
To get started, let's stay organised in a new function called SetColour. Create this, and call it at the end of your BeginPlay chain after setting the scale of your RingPlane.

Create your variables
Open your SetColour function and create two variables. Name the first Colour and set Variable Type to Linear Colour. We'll use this to set the colour paramaters of our sphere and ring materials.
Our second variable will be a map, otherwise known as a dictionary. A map is a way of storing sets of key and value pairs. For our purpose, we'll create a String to Linear Colour map so we can assign Satellite purpose types (e.g communications, navigation etc) to specific colours and go from there. This will provide us with a system that is easy to scale to include more or less options.
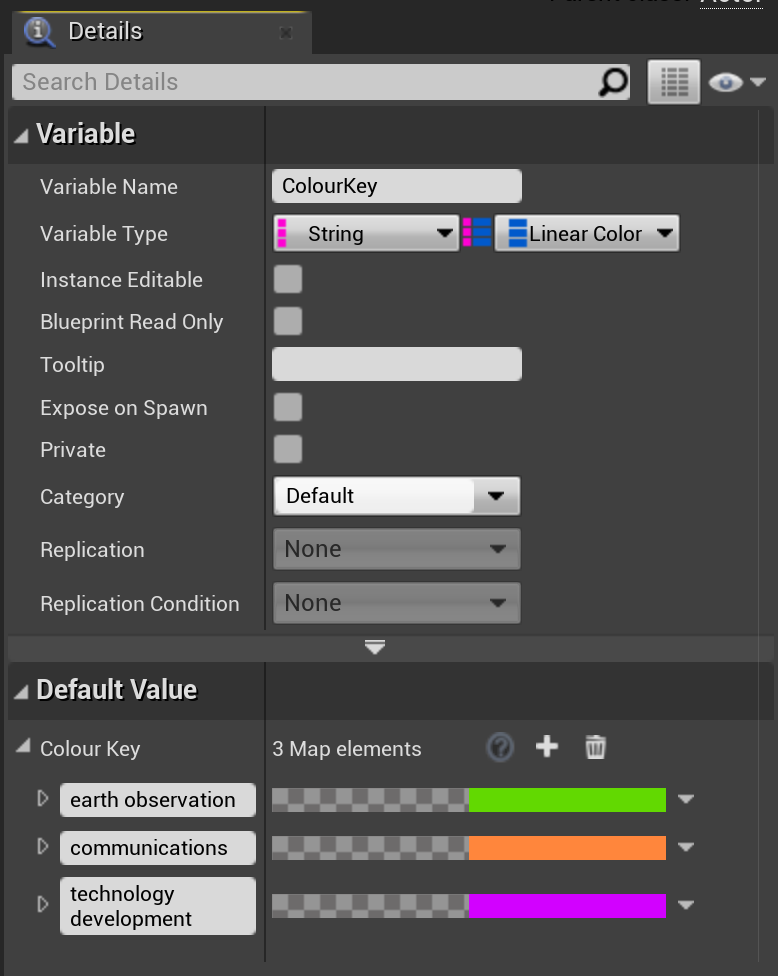
Create a variable named ColourKey and set its Variable Type to String. This will be our "key" type. To change this variable to a map, select the pink pill next to the dropdown menu and change it from Single Variable to the last option: Map (dictionary). With this done, you should see another dropdown to select our "value" type. Choose Linear Colour.
Compile your blueprint, and click the + icon in the Default Value section to add key and value pairs. We've created the assignments you can see in the image above, which you might like to follow to get started. These names will be used as part of a case-insensitive "substring" search, e.g the "communications" colour will also be assigned to satellites with a purpose of "Communications/Navigation".
Sequence Setup
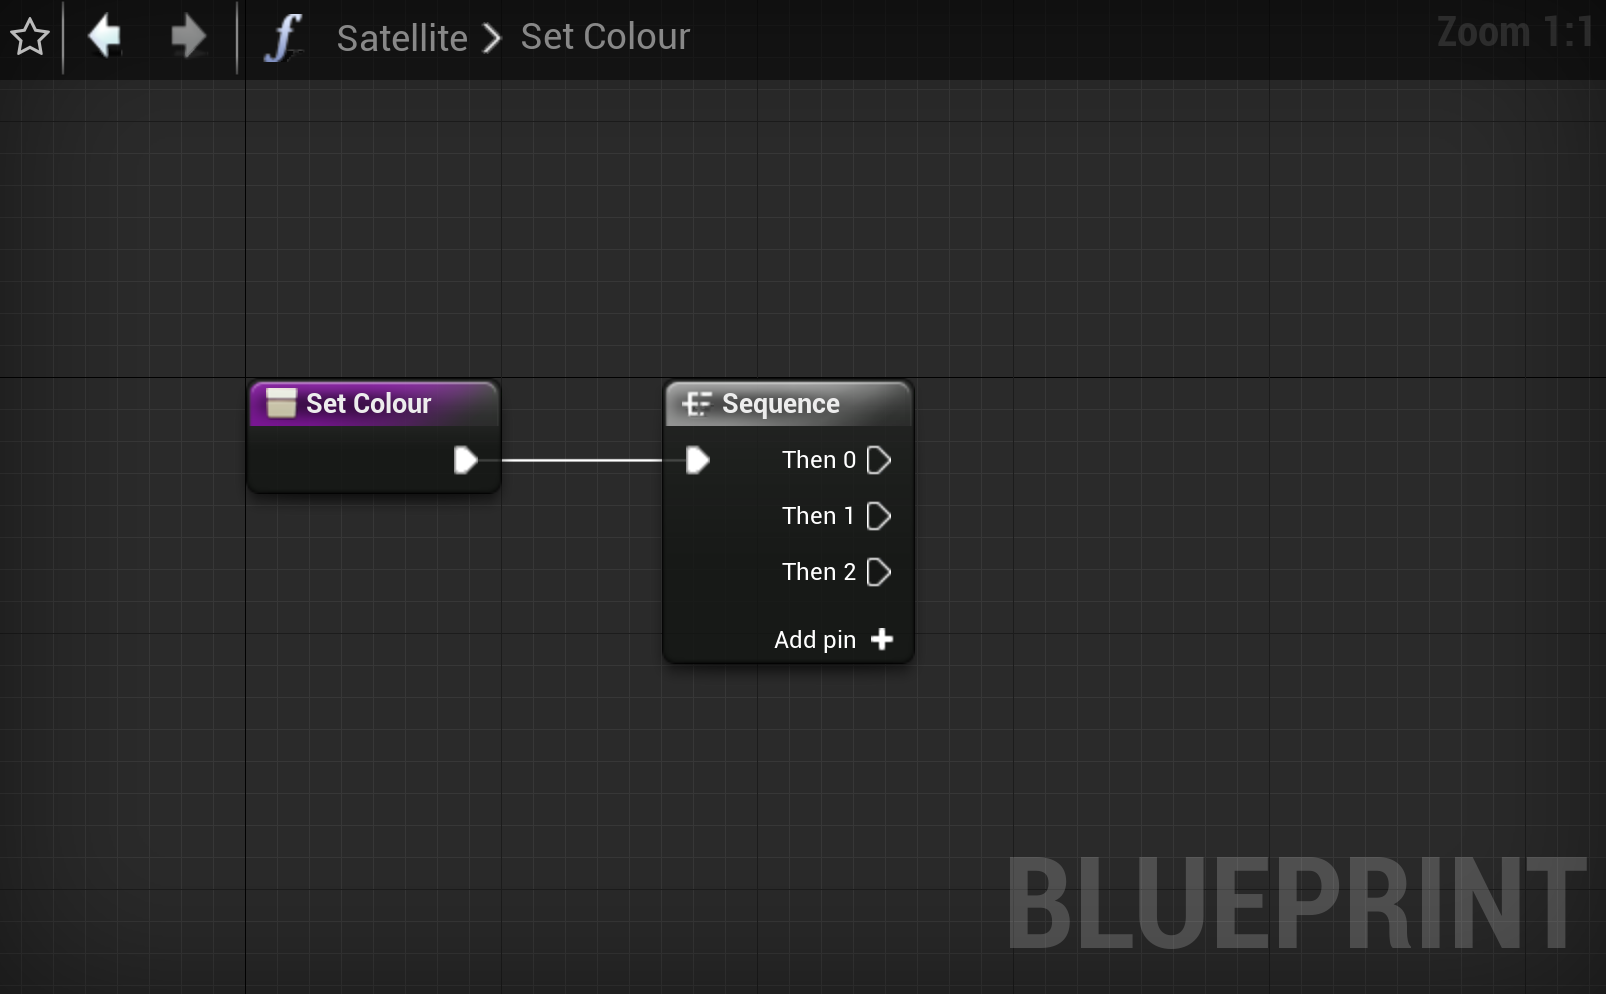
Begin the SetColour function with a Sequence node. This node simply allows you to organise your blueprints through a series of regular execute outputs. Once the first finishes, it moves onto the next, and can help prevent overly long chains.
We'll use Sequence to first set a default colour for our Colour variable, then iterate through our ColourKey options, and finish by applying the chosen colour to our various materials.
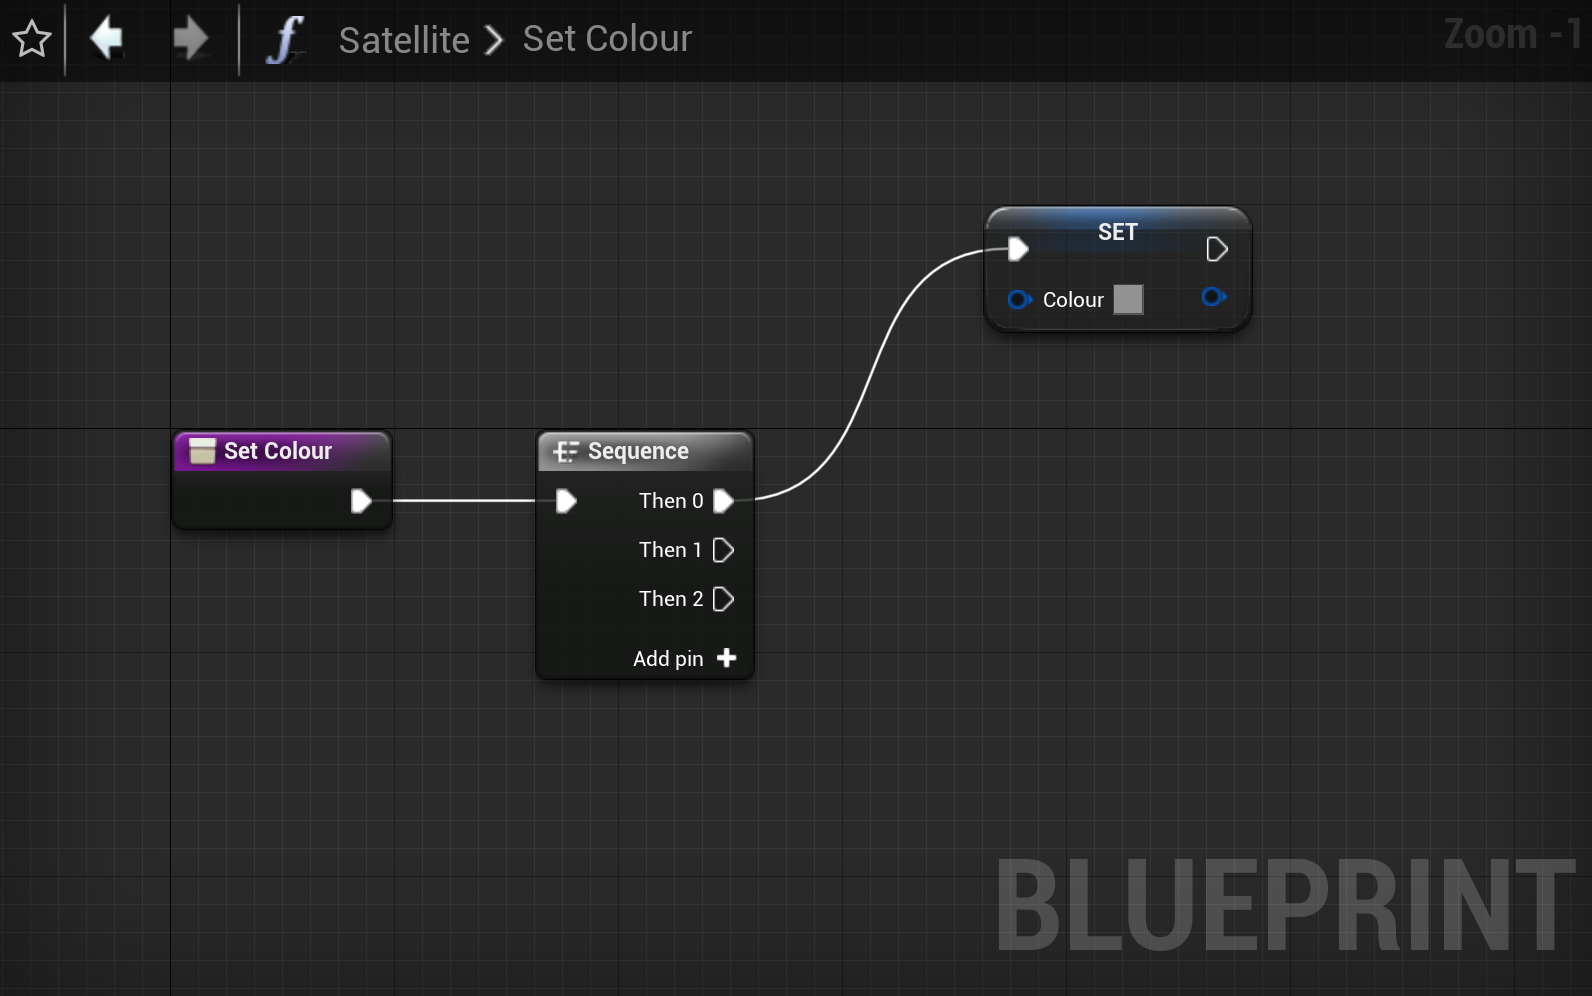
To begin, drag in your Colour variable and add a Set node, connected to the first Sequence pin. Choose a default colour to apply to your materials as an "other" colour.
Iterate through the colour keys
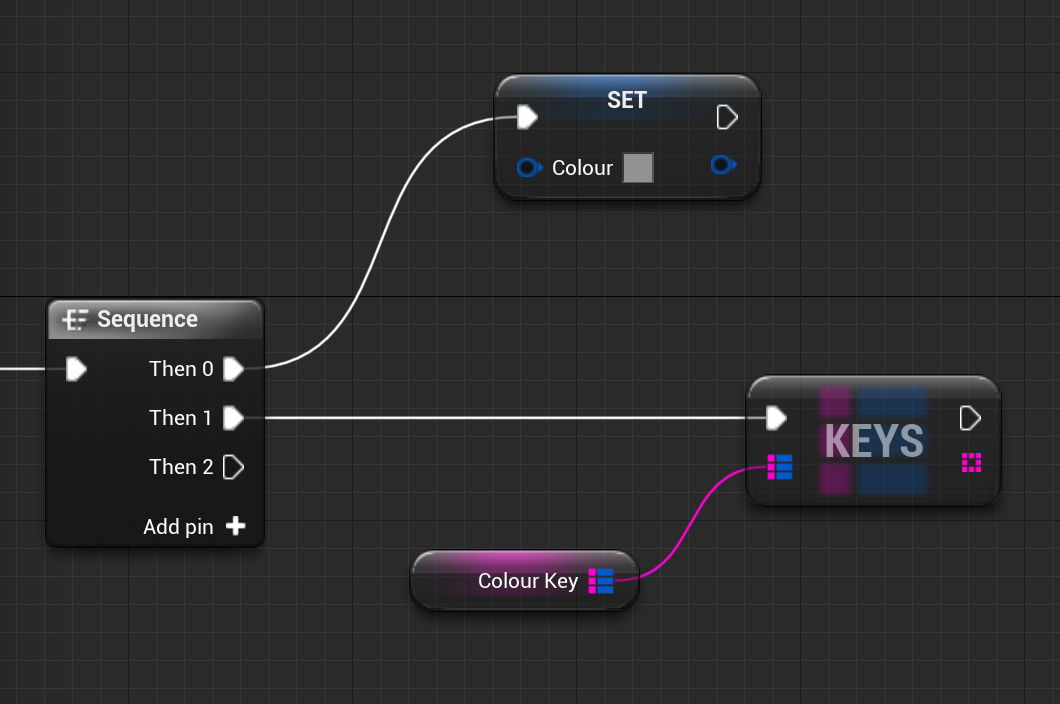
Search and add a Keys node (under the Map section) and connect the 2nd Sequence pin to this. Drag in your ColourKey variable as a Get node and wire it up to the Keys input.
The output of the Keys node is an array of all "key" strings in the ColourKey variable. E.g ["earth observation", "communications"]. We will next iterate over this list, find the colour associated to each and check if it matches the current Satellite.
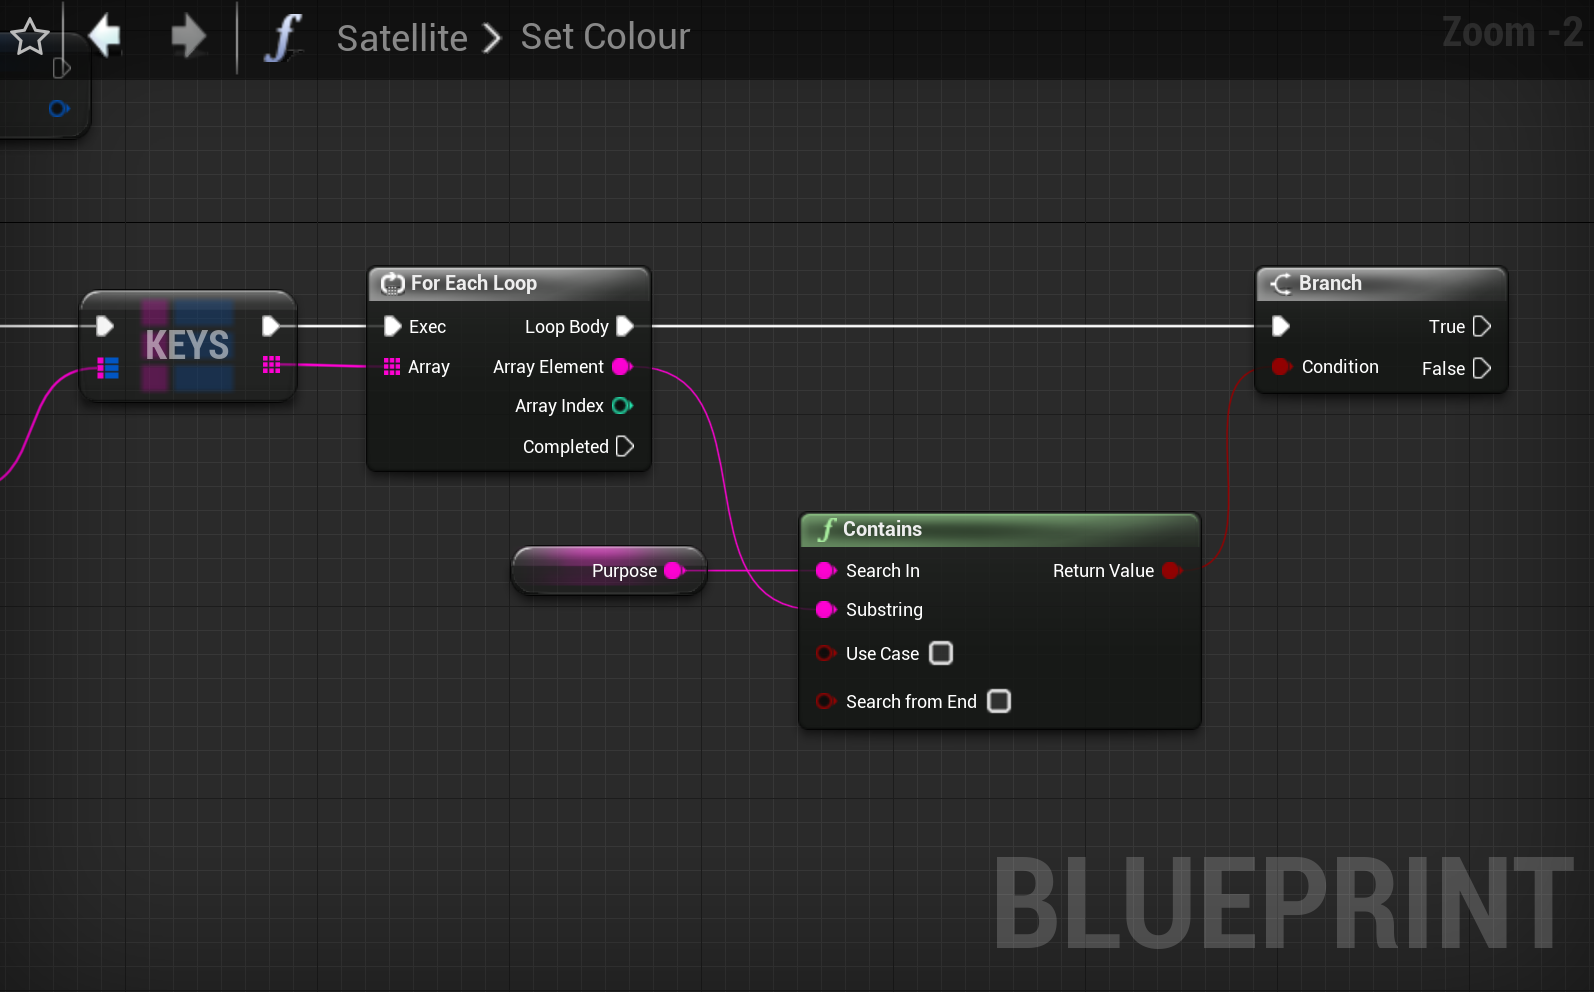
Next, add a For Each Loop to iterate over the Keys output array. Drag in your Purpose variable, and add a Contains node, which will let us check if the Purpose value exists within the current key string. Connect Purpose to the Contains node Search In input, and the Array Element output of your For Each Loop to the the Substring input. Finish by connecting the Loop Body output of your loop to a Branch, using the Contains result as its Condition.
When this runs, our program will check the current Satellite's purpose against each ColourKey entry, and a match is found, we'll continue with the True output.
If True, we need to find the associated colour and set our Colour variable. Using a new or existing reference to ColourKey, add a Find node (Map section), and pass in the current Array Element string from your for loop. Then, simply Set your Colour variable to the found colour.
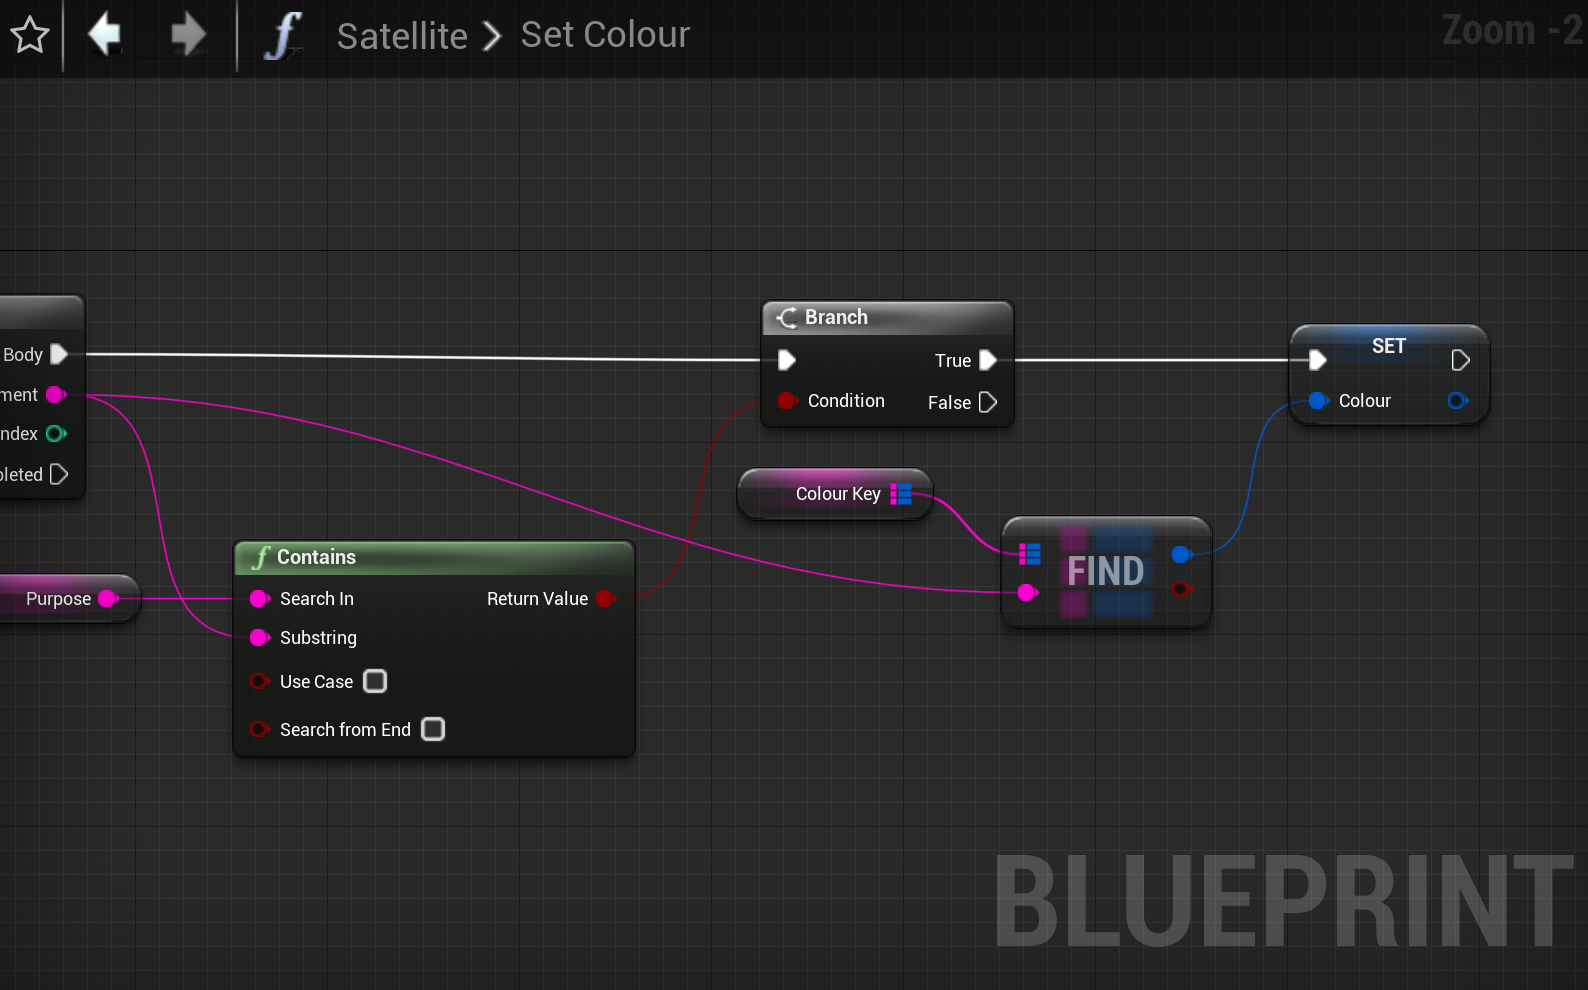
That's the hard work done! So far, our program will initially set a default Colour value, then iterate through our map in ColourKeys to try and match the current Satellite's Purpose data to a specified colour. If so, it will, otherwise nothing will happen and it will keep the default value.
Update material colours
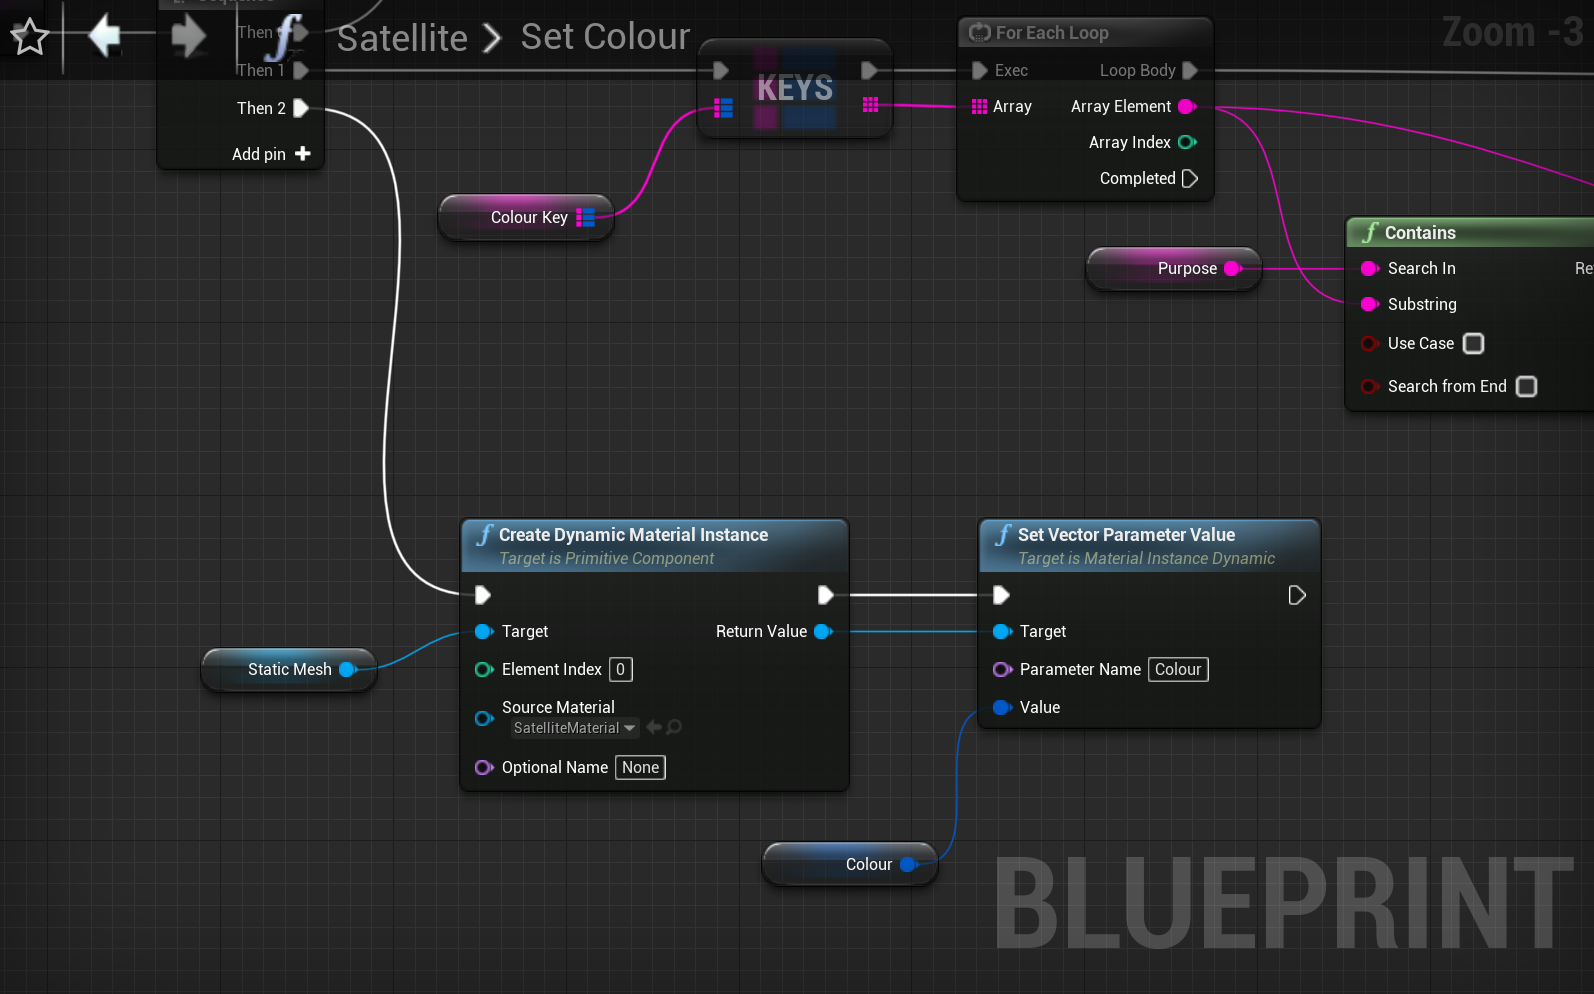
Lastly, we need to actually update our material parameters to enact colour changes. Drag in a reference to your StaticMesh component, and from this add a Create Dynamic Material Instance node. Connect the last Sequence pin to here. Set the Source Material to SatelliteMaterial which we made earlier. From here, connect the Return Value output to a Set Vector Parameter Value node, set the Parameter Name to Colour and pass in your Colour variable as the value.
👉
The Parameter Name is what we set in the SatelliteMaterial when we converted a Constant3Vector node to a parameter.
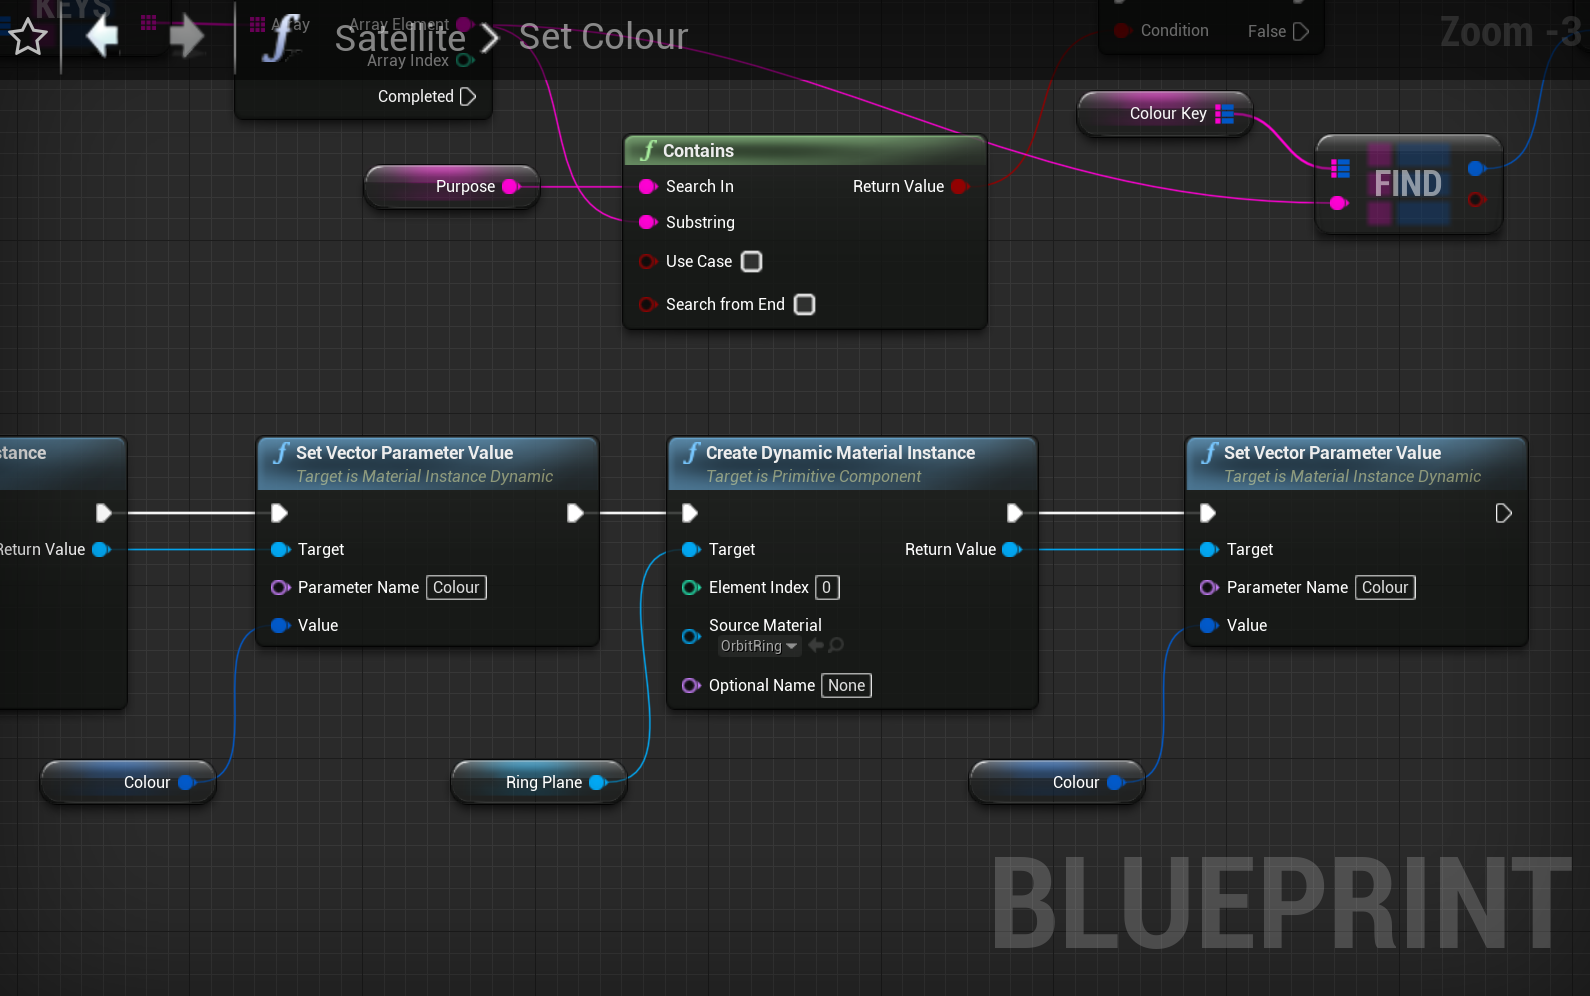
With our spheres set, let's repeat the same for our rings. Repeat these two function nodes, passing in the RingPlane component and OrbitRing materials instead.
Run your project!
Hopefully you can also see coloured Satellite objects on screen and start to differentiate between their Purpose values. Try tweaking your colours and adding more options.
Read on to add a simple Earth actor sphere to the centre of your scene.