Import and read your data
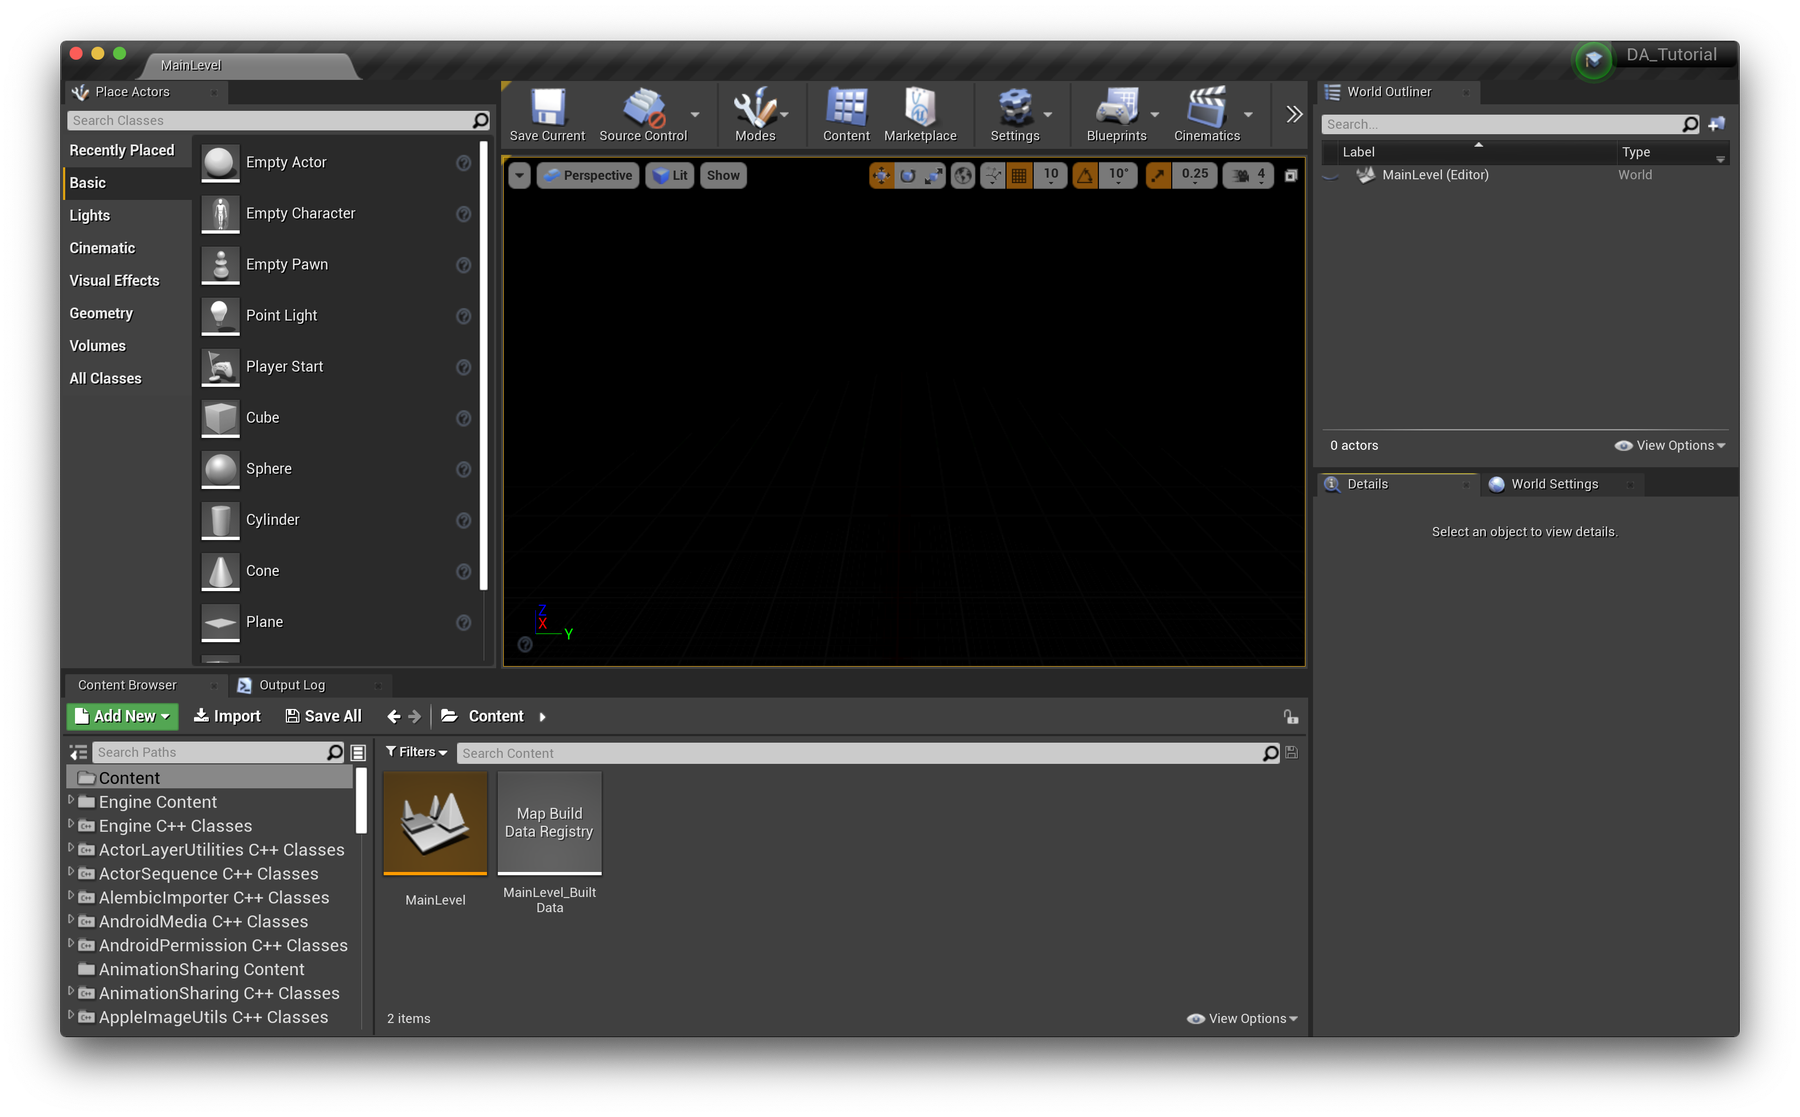
Let's get started in Unreal Engine. Launch the editor and create a new project. Most starter templates should be fine, but we'll keep it simple and use the Blank game template to begin with. Once you've opened your new project, save the current level (we've called ours MainLevel). In Project Settings → Maps and Modes, set your Editor Startup Map and Game Default Map to MainLevel to tell UE to load this level when opening this project in the editor or running as a packaged game. Read more about setting a default level here.
In our project, we removed all existing parts from the level (lighting, floor, sky etc). Feel free to do this as well. Great, let's get onto our data.

🏗 Create a data structure
Before importing our CSV data, we need to create a struct for our data. In Unreal Engine, a struct (short for structure) is a way to declare your own custom variable types. For our purpose, we need to create a struct that reflects the columns of data we want to use, so Unreal Engine knows how to interpret the incoming data. We can then use this to create a Data Table object.
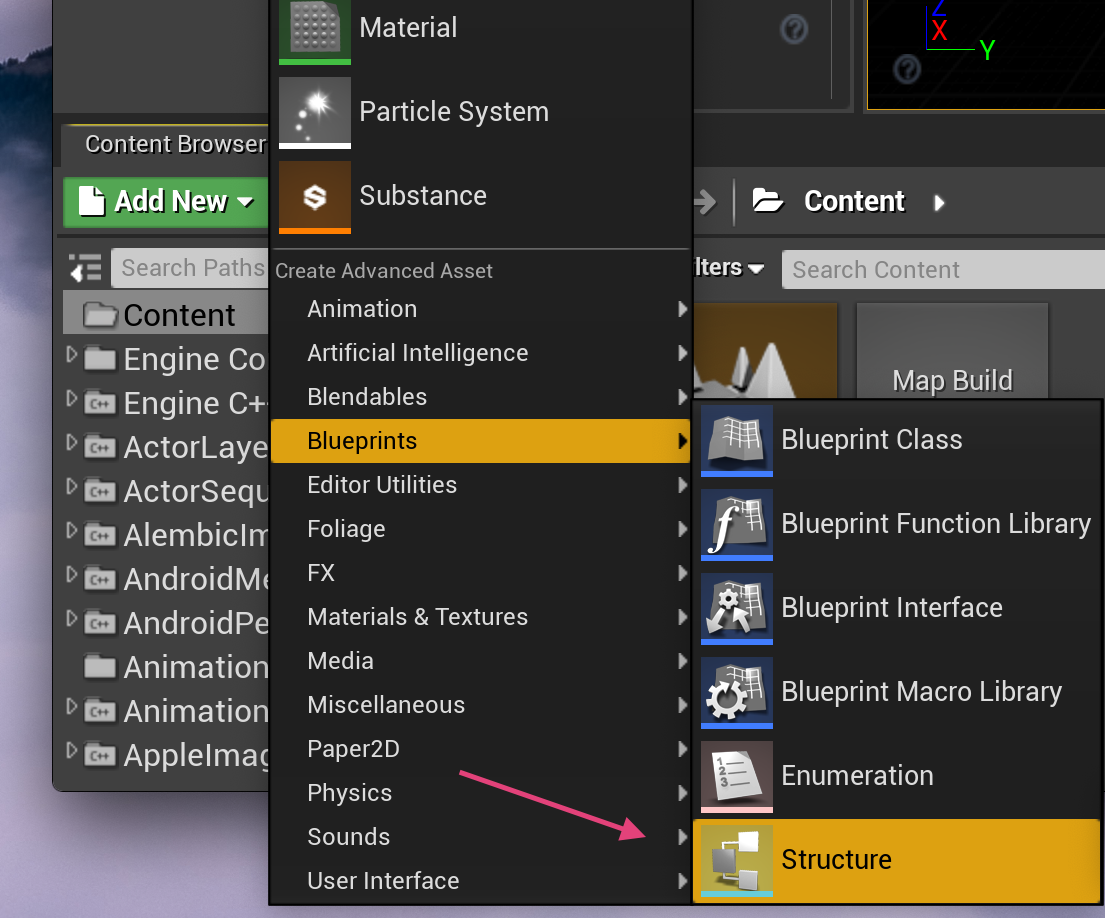

In your content browser, select Add New (or right click) and choose Blueprints → Structure.
Define your structure with a name e.g SatellitesDataStructure. We've created ours in a new Data folder to stay organised. Find out more about creating folders here.
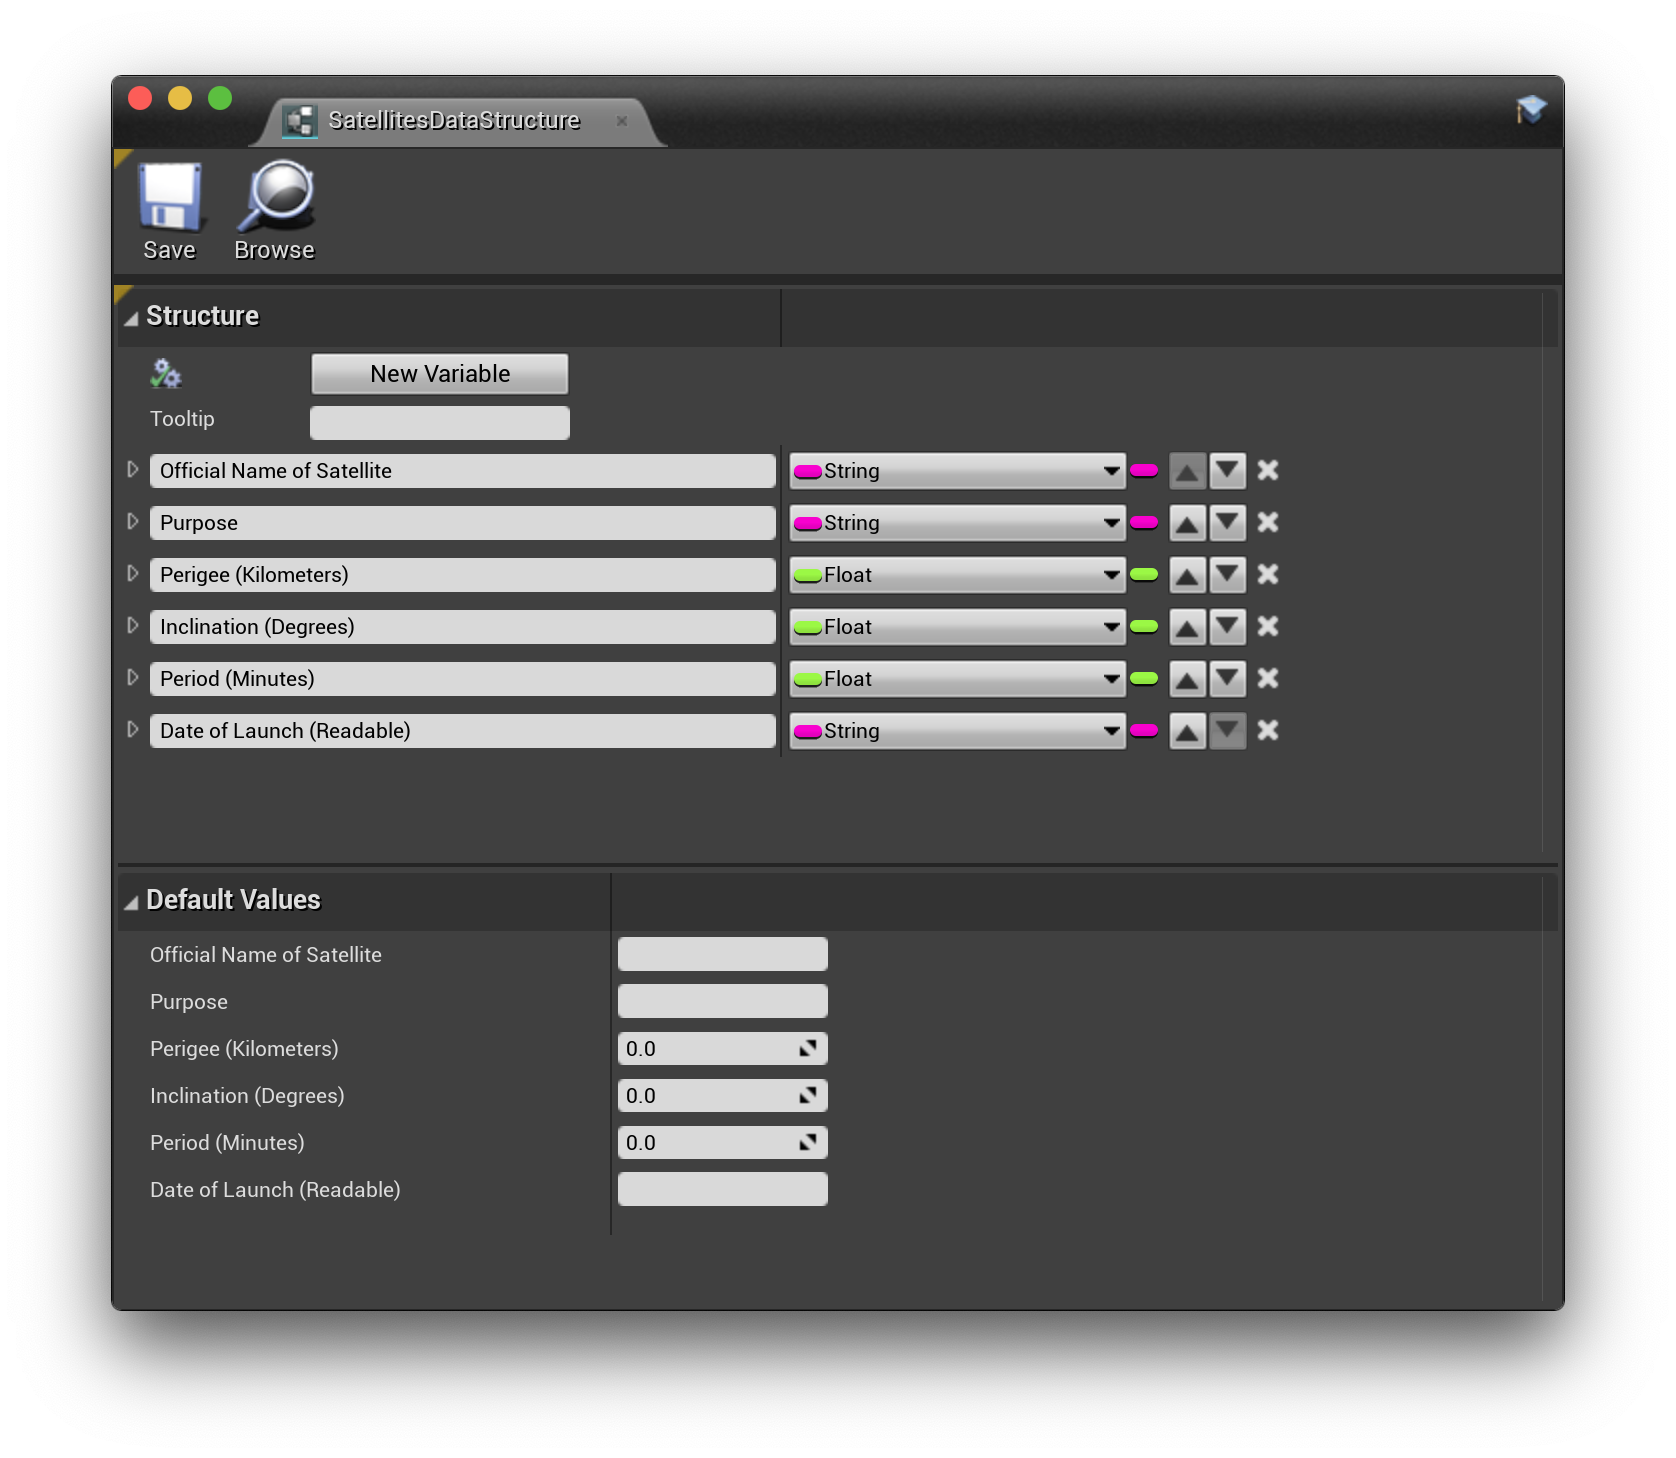
Open your new SatellitesDataStructure asset with a double-click. In the Structure Window, add variables for the following columns, and be sure to copy the header titles identically so UE can match these to our CSV.
- Official Name of Satellite —
String - Purpose —
String - Perigee (Kilometers) —
Float - Inclination (Degrees) —
Float - Period (Minutes) —
Float - Date of Launch (Readable) —
String

🏛 Create a Data Table from your CSV file
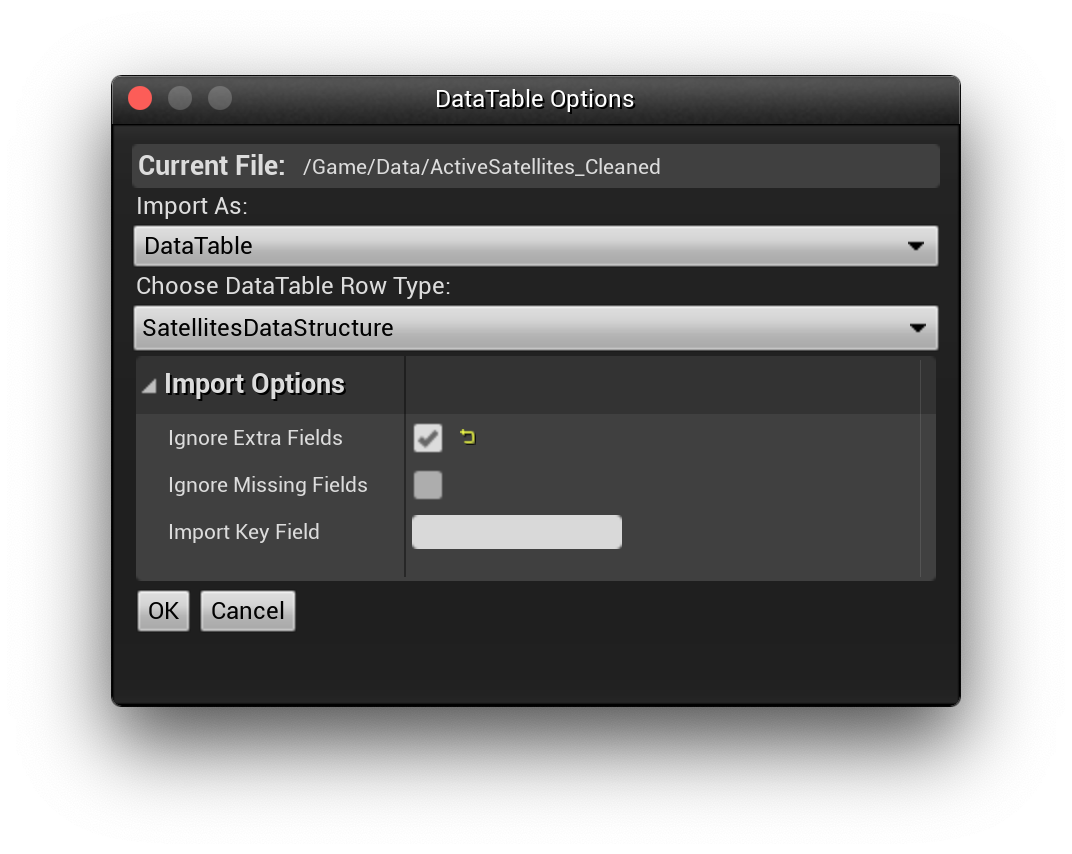

With our struct created, we're ready to bring in our dataset. Choose Import (in the Content Browser, next to Add New) and select your CSV file. In the dialog window, set the DataTable Row Type option to your newly created SatellitesDataStructure and also enable Ignore Extra Fields to ignore the columns we haven't accounted for in our struct.
Great! Unreal Engine has now created a Data Table asset to store our data. A few quick things to note:
- You can edit this data from the editor, but during gameplay it's read-only
- If you want to re-import your CSV, you can right click on your Data Table and select Reimport or Reimport With New File.
- This Data Table is referencing the struct we created. Any edits to the struct now might cause data loss issues, so best to duplicate first if needed.
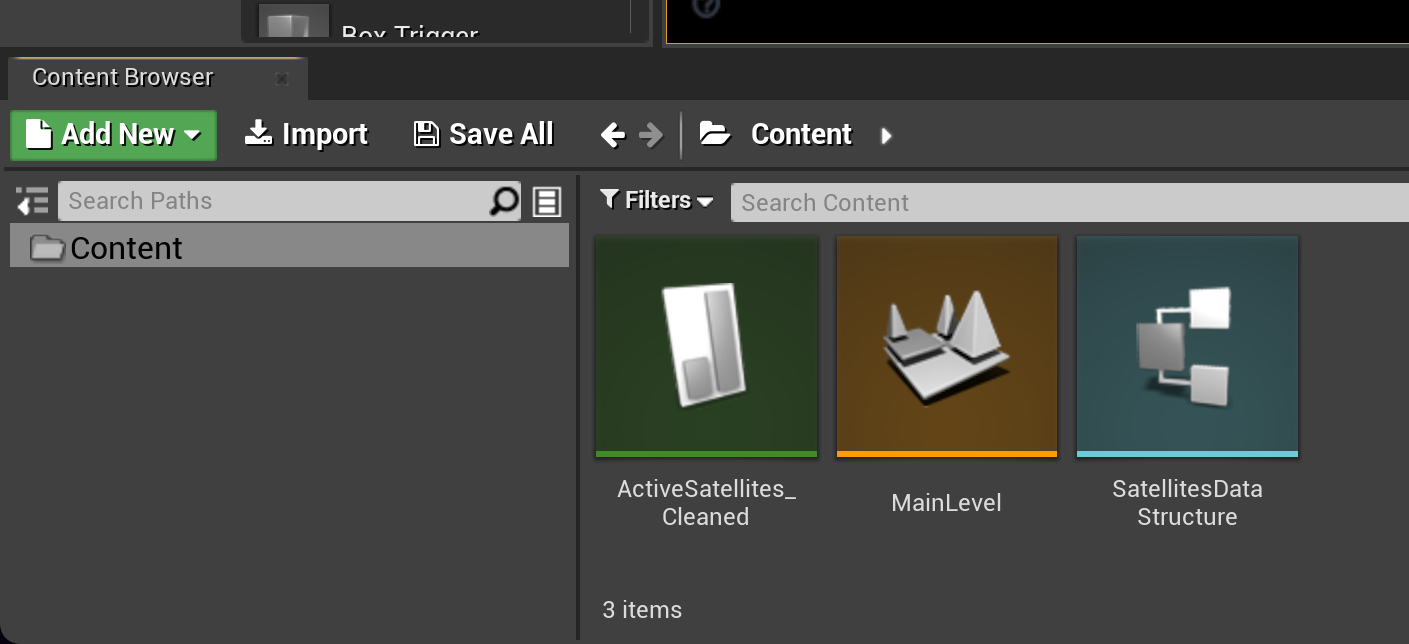
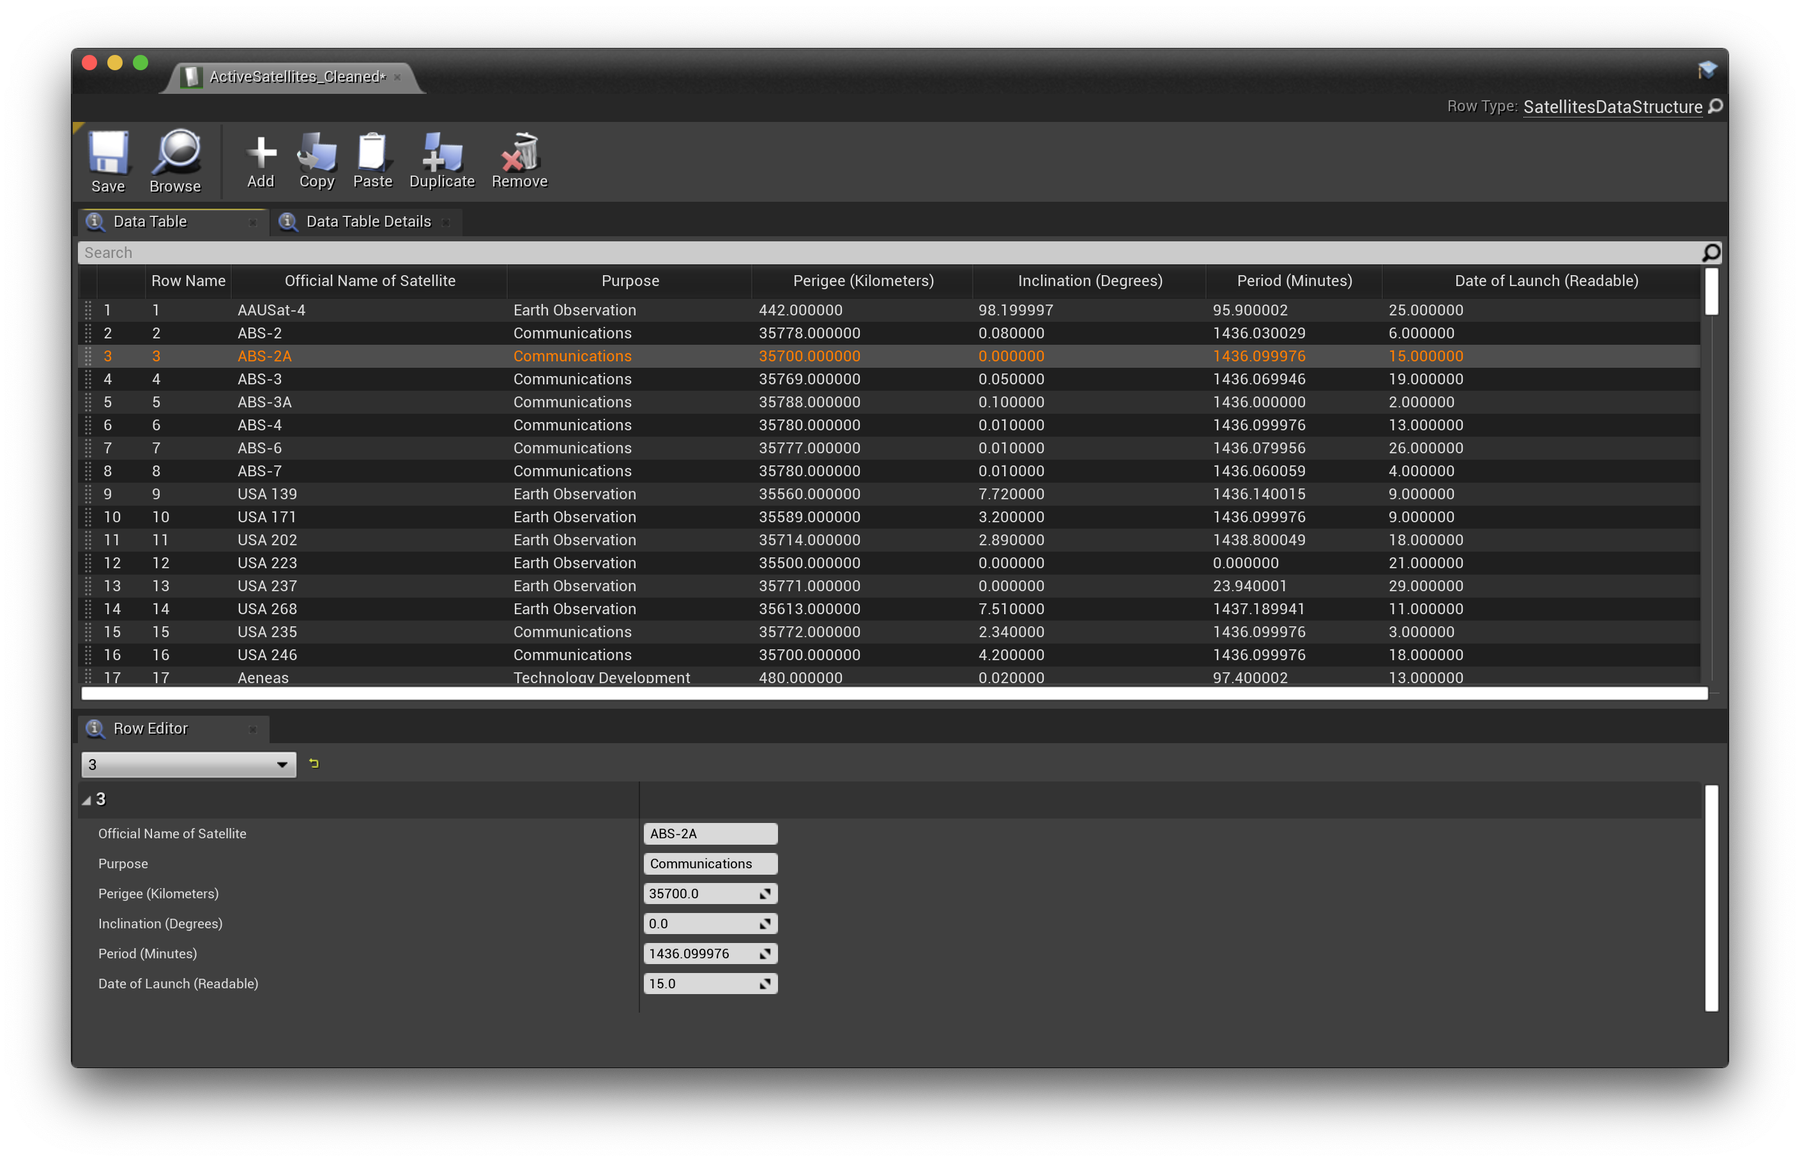
- Double-click on the green Data Table "ActiveSatellites_Cleaned" node (screenshot right) to see the pop-up window showing the spreadsheet data (screenshot below).

Data Table Pop-up Window
A few notes on the screenshot below:
- There's 2 tabs in this pop-up window: "Data Table" and "Data Table Details".
- To see the spreadsheet cells (shown below), click on the Data Table tab.
- In the other tab (Data Table Details) you may need to resize the internal panes to see everything! Look out!
- There is a somewhat-hidden horizontal bar control just above the "Row Editor" tab which reveals more of the top split-pane. ie: in the Data Table Details tab notice the vertical scrollbar on the RHS indicating there is more to see in the top pane.

📊 Access your data with Blueprints
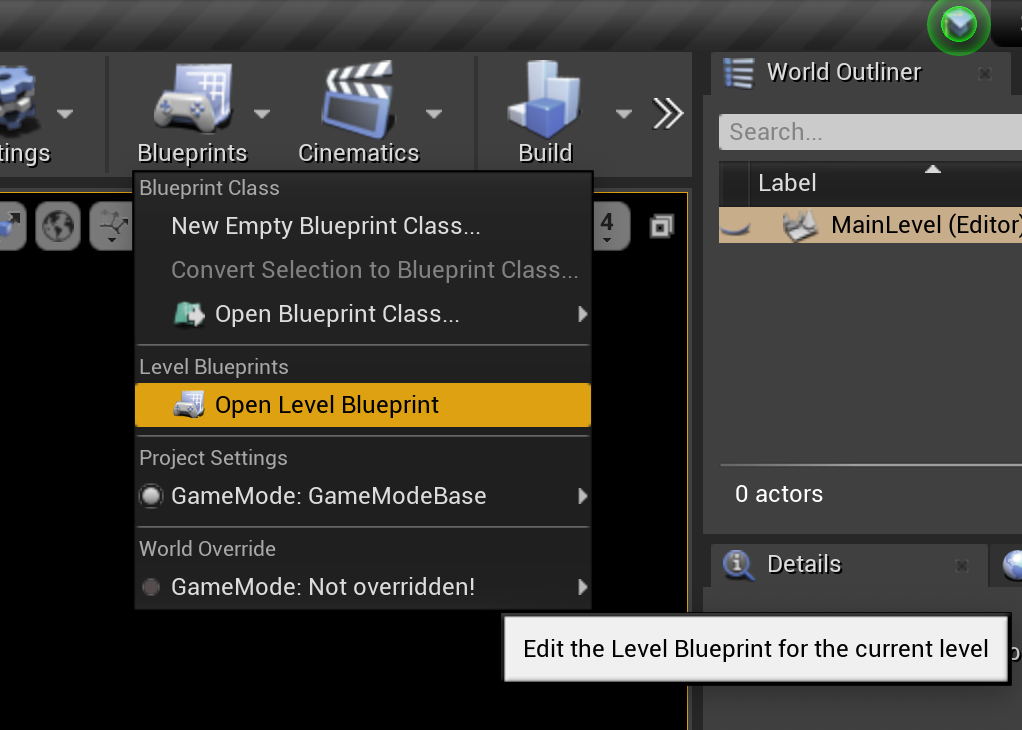
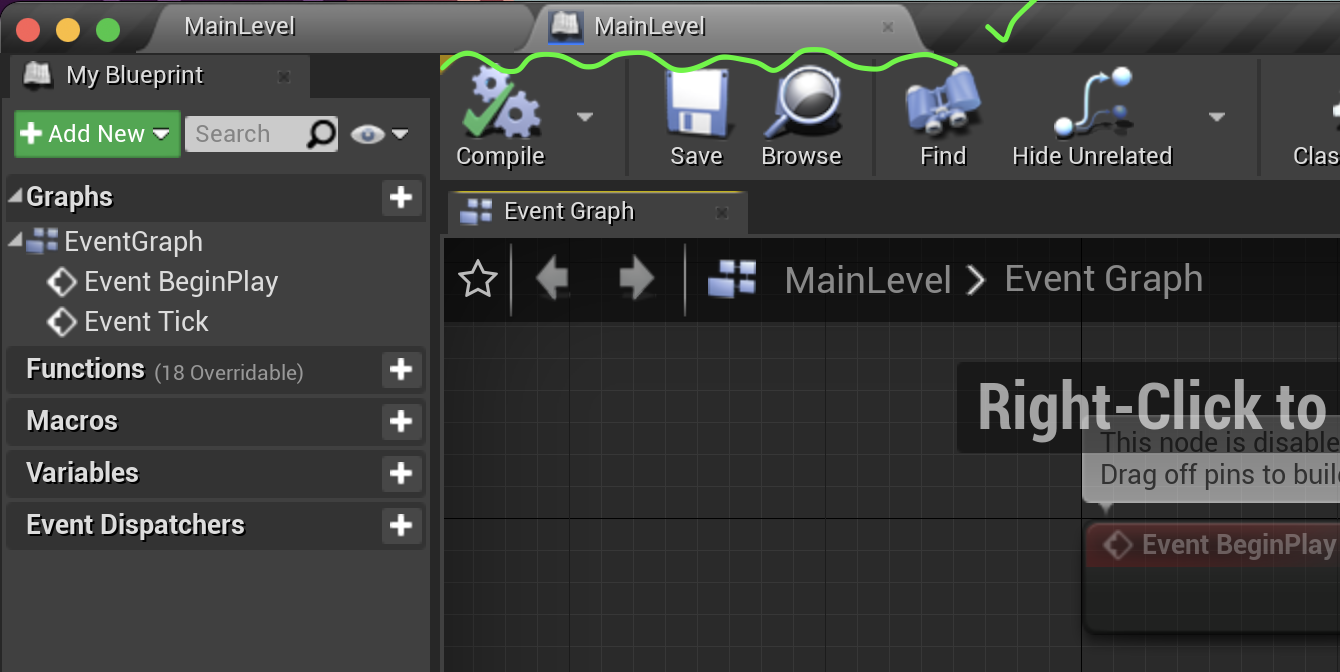
For this next stage, we're going to be working in your Level Blueprint starting from the BeginPlay event node. When we hit play, we'll have Unreal Engine read our Data Table, iterate through each row and print some satellite details to our screen.
Your level blueprint should be empty to start.

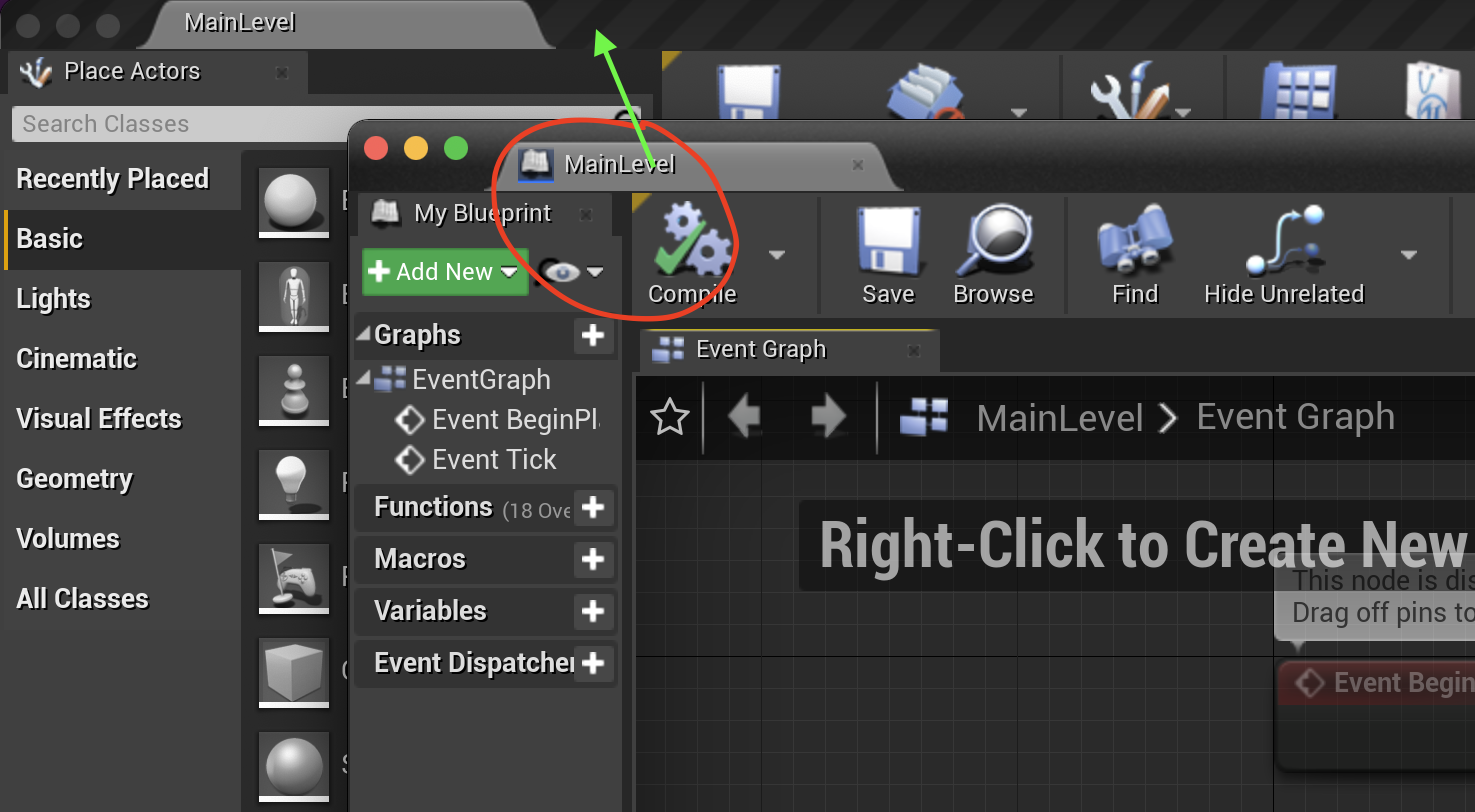
Window Pane Management
Working with Unreal Engine can lead to many pop-up windows on screen. See (top-right) how there's one window floating atop another?
Once there's a couple of windows it can become difficult to manage them all.
One Solution: It's possible to drag the pane-tab (circled red) from inside the pop-up window to the window underneath. The pane "docks" into the underlying window. Then the two panes become tabs, side-by-side.
This reduces the pop-up windows. Not necessary. Just useful.
OK - Let's dive in.


Get row names
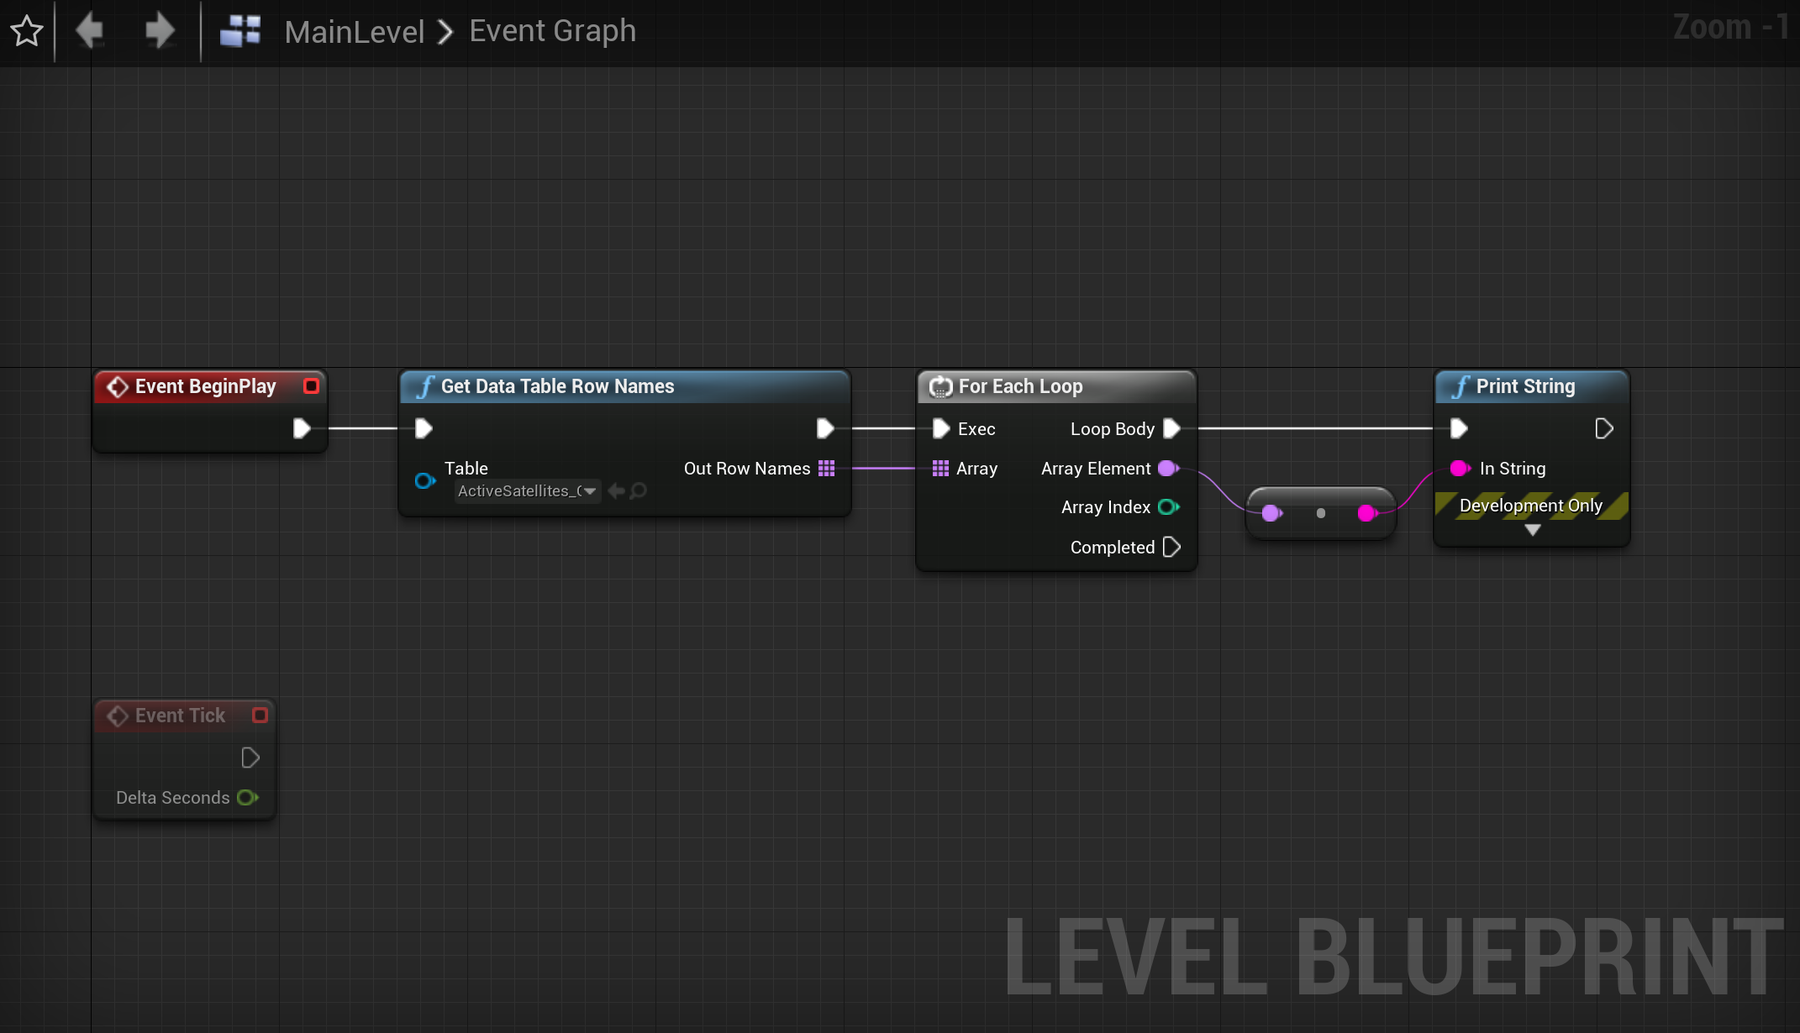
To read our Data Table, we need to first get the unique row names, and then use these to get the remaining row data. Add a Get Data Table Row Names node and set the Table option to your imported Data Table. Note the output is an array of Row Names. Next add a For Each Loop (Utilities → Array) to your chain and connect the array.
If we print the Array Element output during each loop, you should see each row name number displayed on screen (1, 2, 3 ... 1419, 1420 etc).
To do this, add a Print String Node. A quick way to do this is RMB (Right Mouse Button) click and type-in "print" in the search field section of the RMB Menu. Nodes which have 'print' in their name will appear. Select and place Print String.
Wire it up to the For Each Loop Node (see below). Notice the colours of the Array Element connector and the In String Input are not quite the same colour. This means they're different formats. Connect a wire anyway.
You'll see the Editor adds a conversion node for you! Hover over it. It says "converts a name value to a string". Cool.
Press the Play Button. See the numbers appear? They come up pretty fast. You might just see the last ones ... 1400 up to 1420..

Get row data
We're only retrieving the row identifiers at this point, not our content. Push the Print String Node up and out of the way for now. Time to try something else.
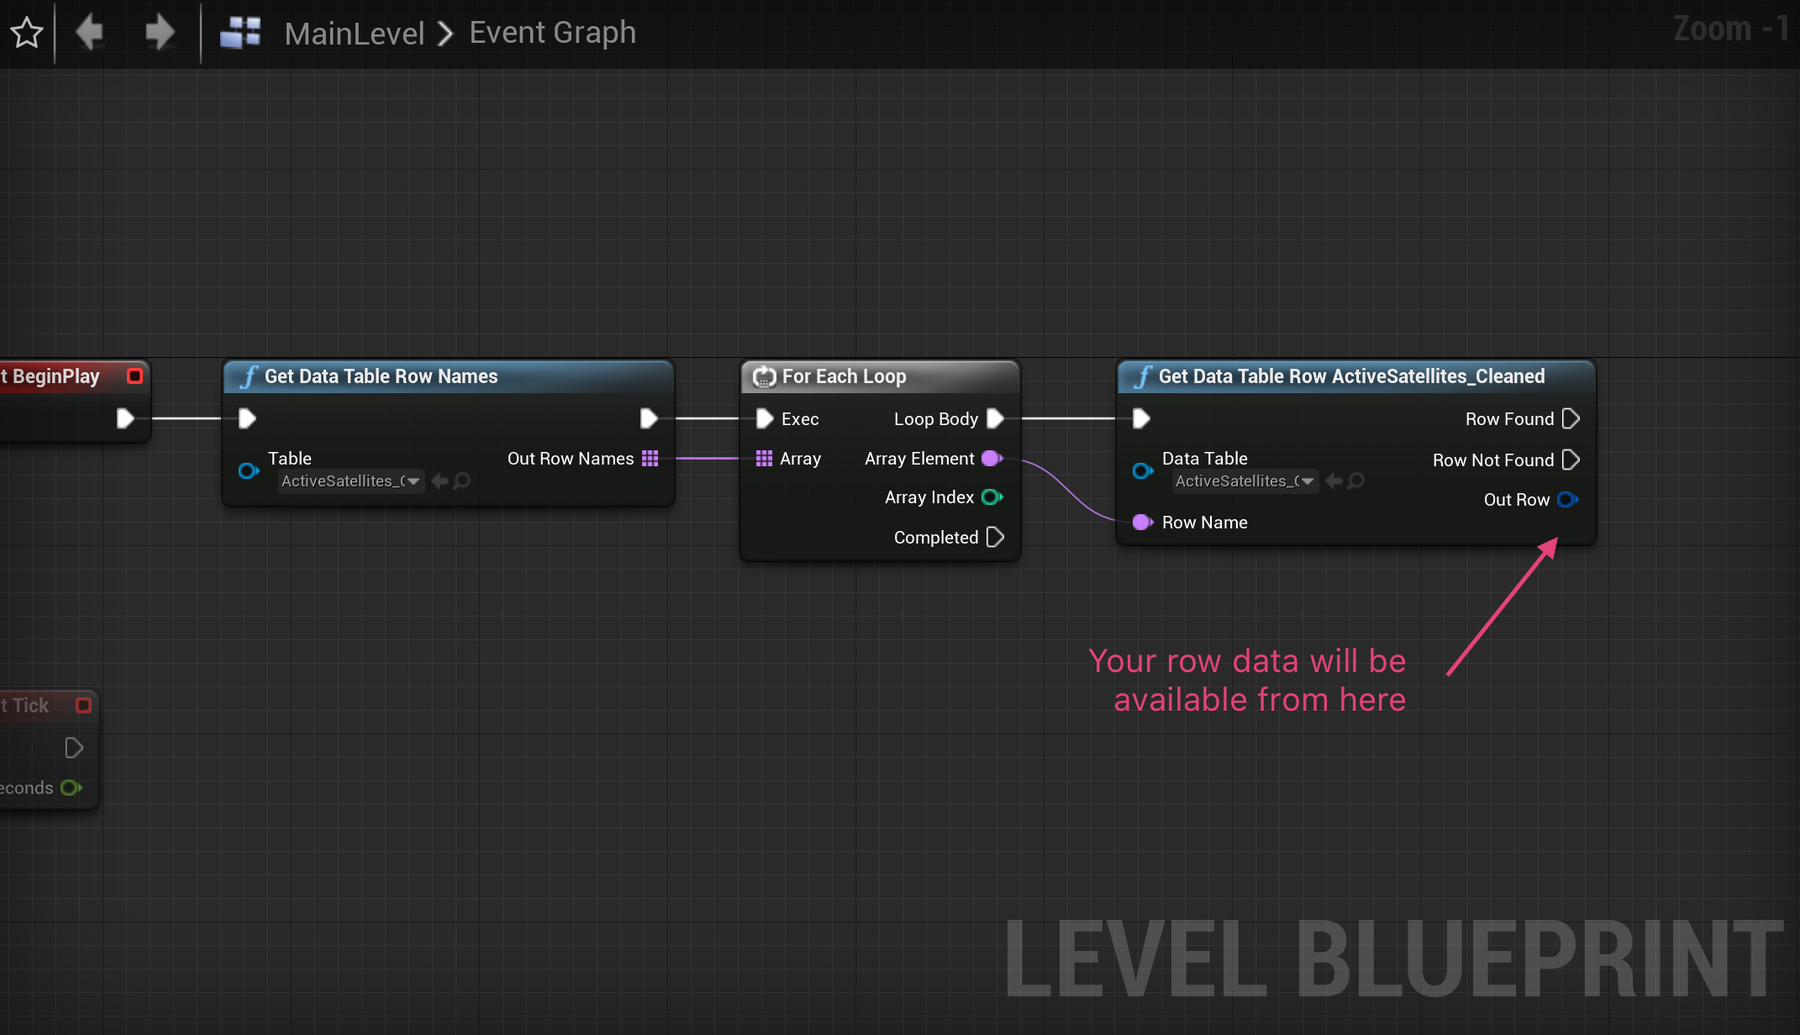
Add a Get Data Table Row node to your chain, set the Table option like before, and connect the Array Element output to your Row Name input. Now we're asking Unreal Engine to look at the same Data Table and individually find each row of data associated with these row names. The Out Row pin is what we're interested in next. Not long to go now.


Opening out data structure
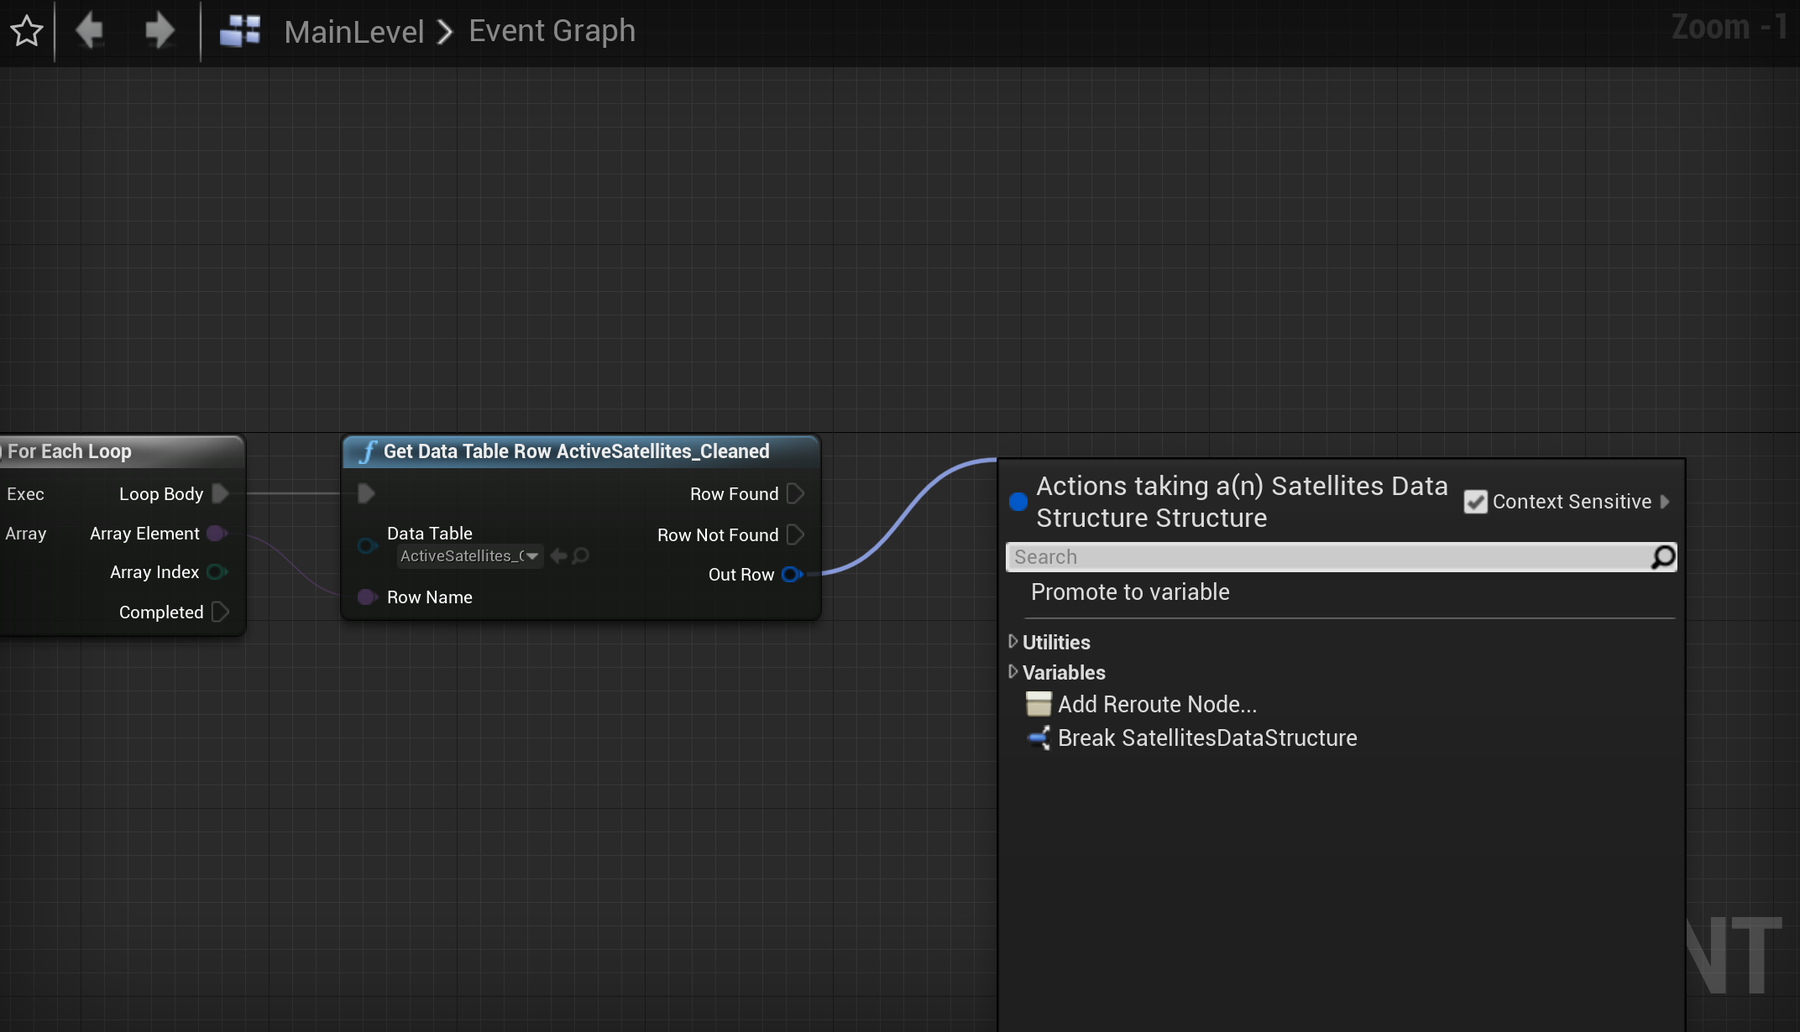
Click and drag out from the Out Row pin and note your options. There aren't many. This Out Row object is of the SatellitesDataStructure type that we made earlier. There's nothing to do here but break the structure open into its variables so we can access each one. Select Break SatellitesDataStructure and expand the node to view all output pins.
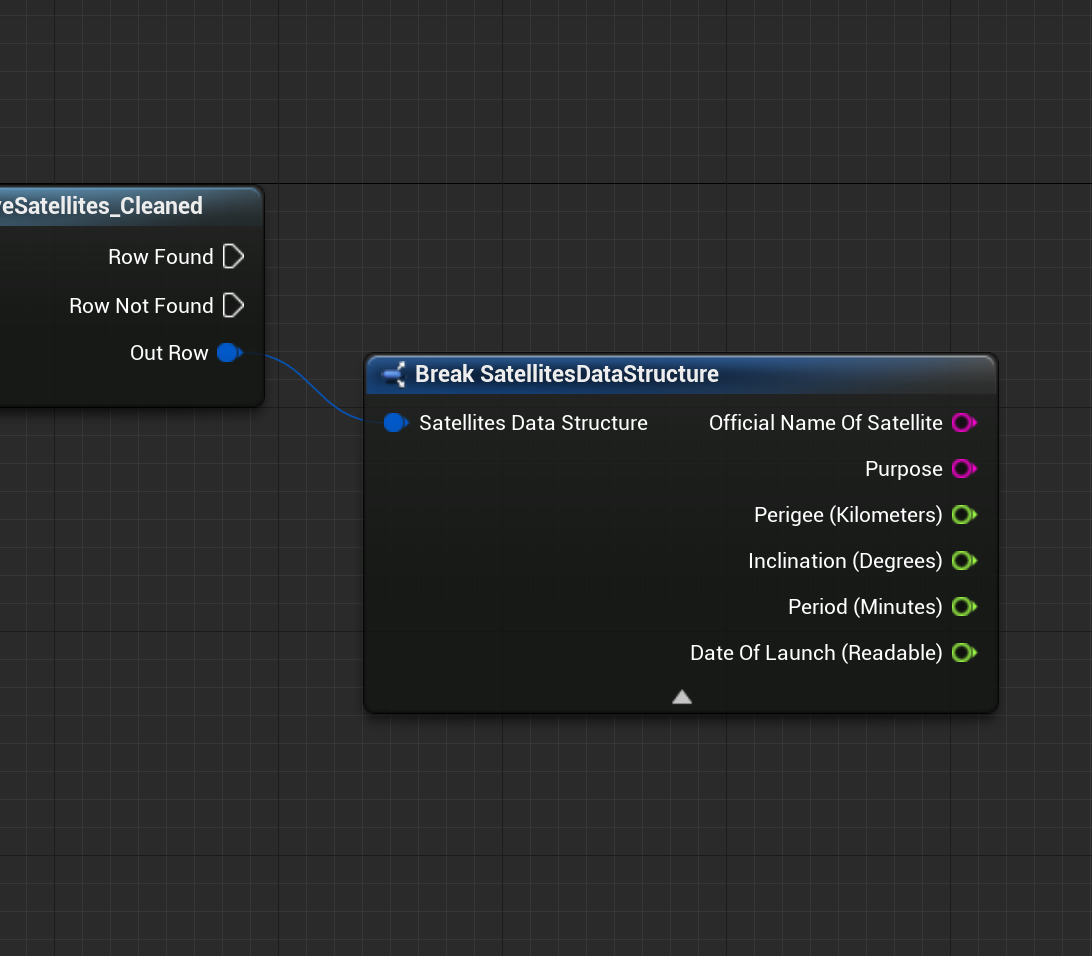

These variables should look familiar! Now we have access to each column of data for each row of our table. From here we can do whatever we might need, and we'll next continue to create our Satellite class based on this data.
For now, try printing (Print Screen node) a few of these variables and check the values against the data to make sure everything is looking ok.
Bring the Print Screen node back down. See if you can guess where to wire-up the Print Screen's Exec Pin? See the Row Found output pin? Make sense? Wire it.
While experimenting here, you might RMB on the Print String Exec Pin and select "Break Link", then instead wire up the "Row Not Found" output pin. Hit Play. What do you see? Nothing? Make sense though? Yeah, wire back the Row Found pin!