Use Live Motion Capture Trackers
The Data Arena has a 12 camera Optitrack Motion Capture system installed that can stream live motion data into Unreal Engine projects. Our system is very fast, and accurate down to 3mm of movement. We use Optitrack’s Motive 3 software for streaming and capture, and to integrate with Unreal Engine, we have predefined rigid body objects also known as trackers.
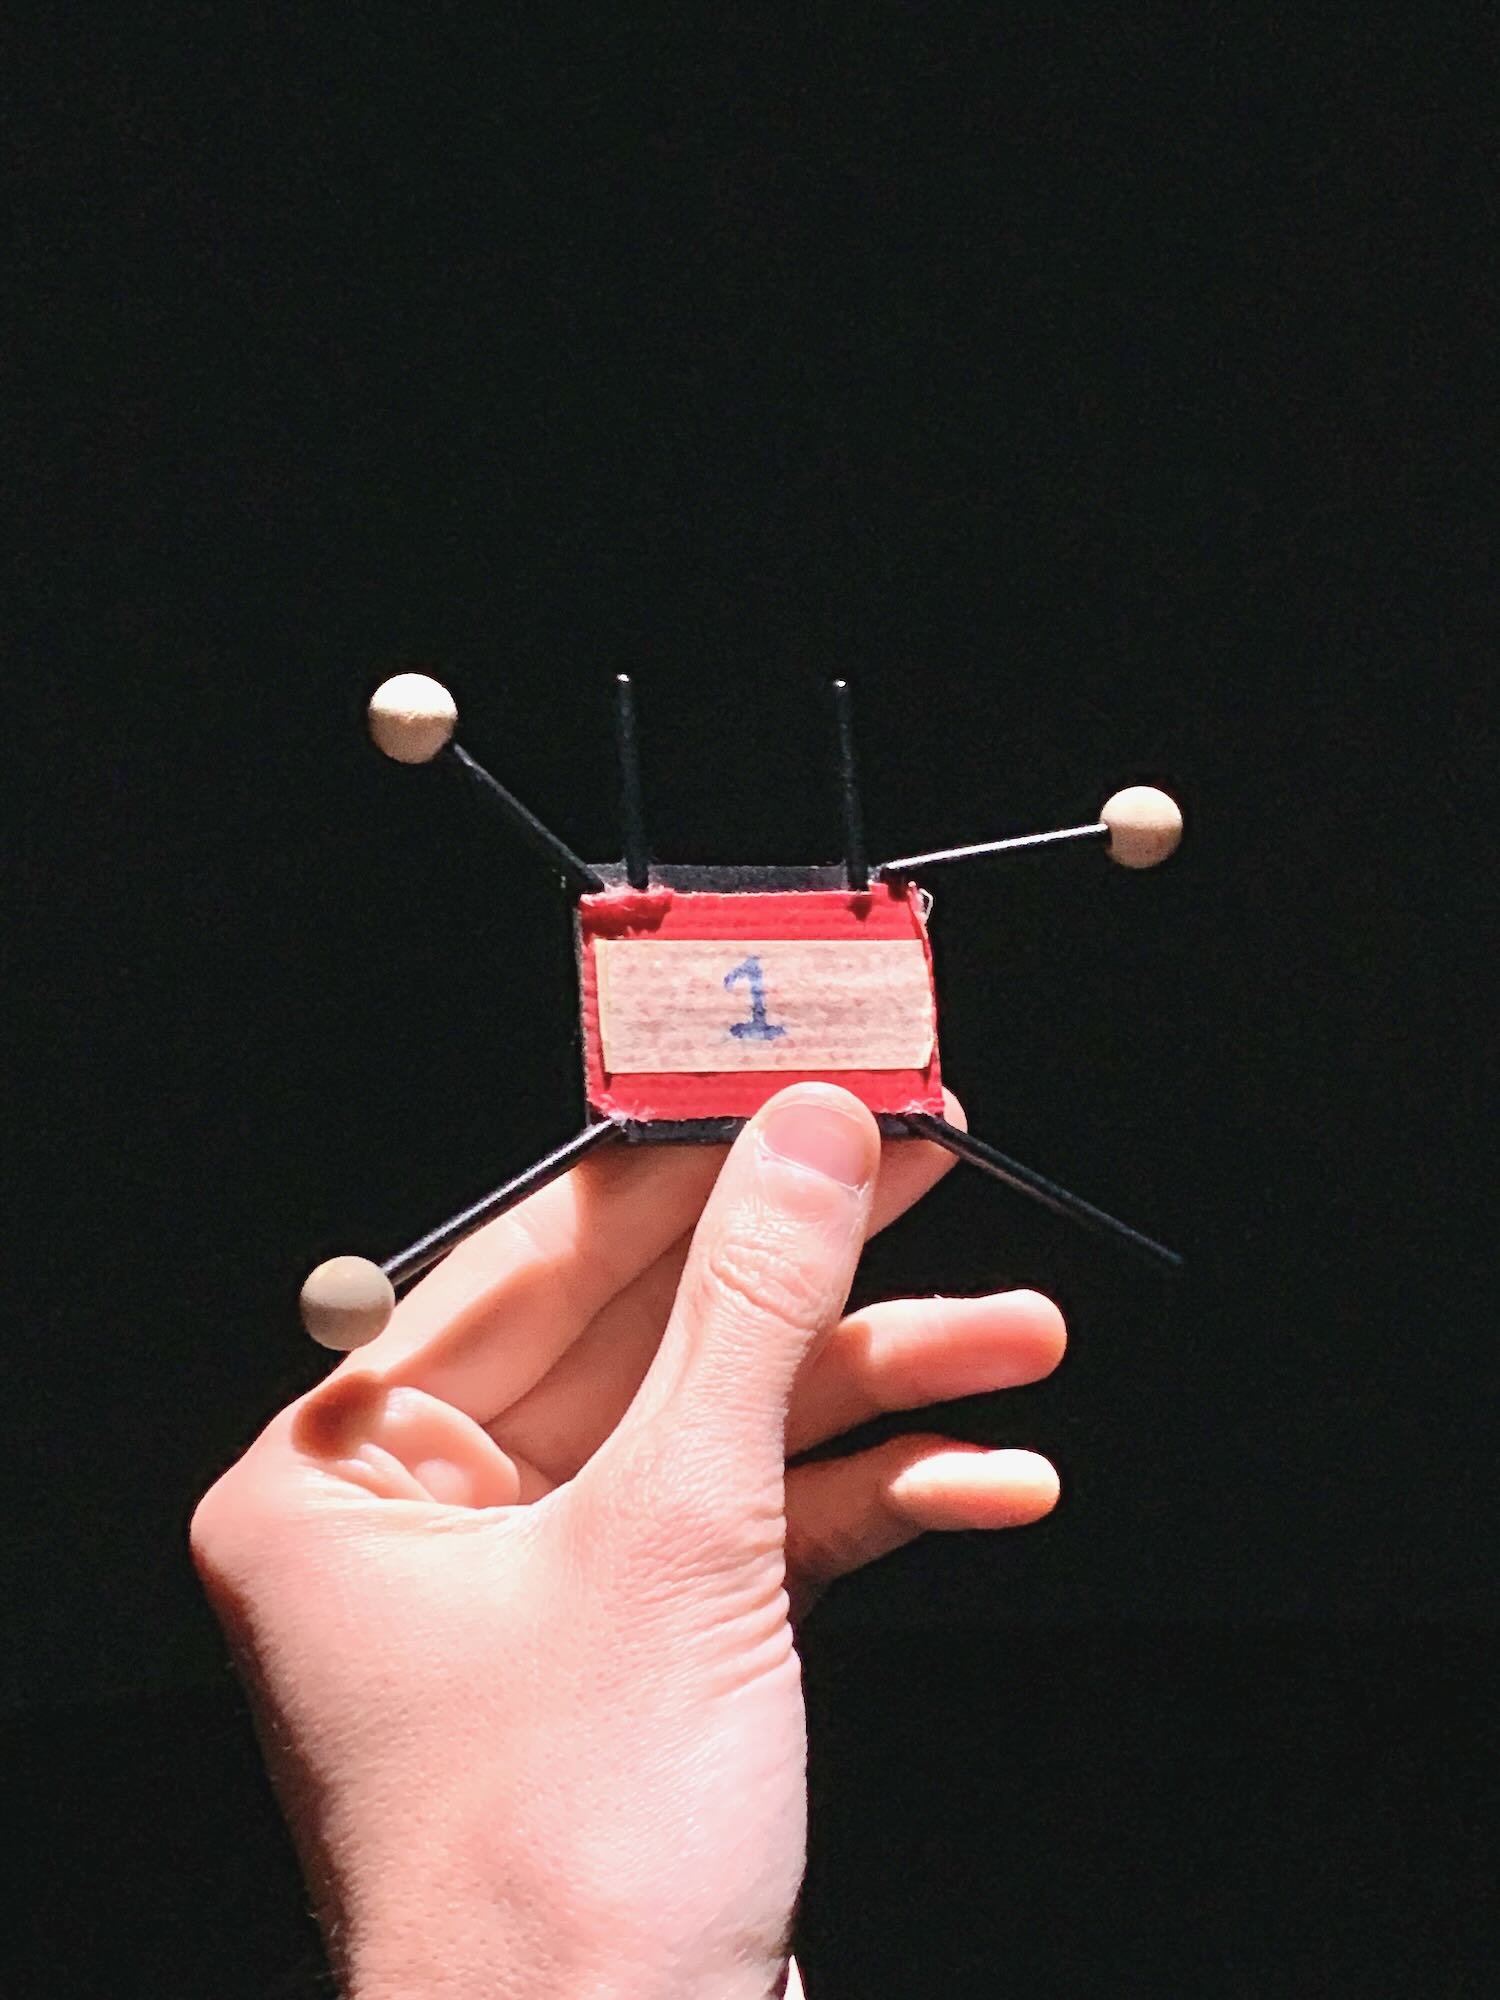
Trackers
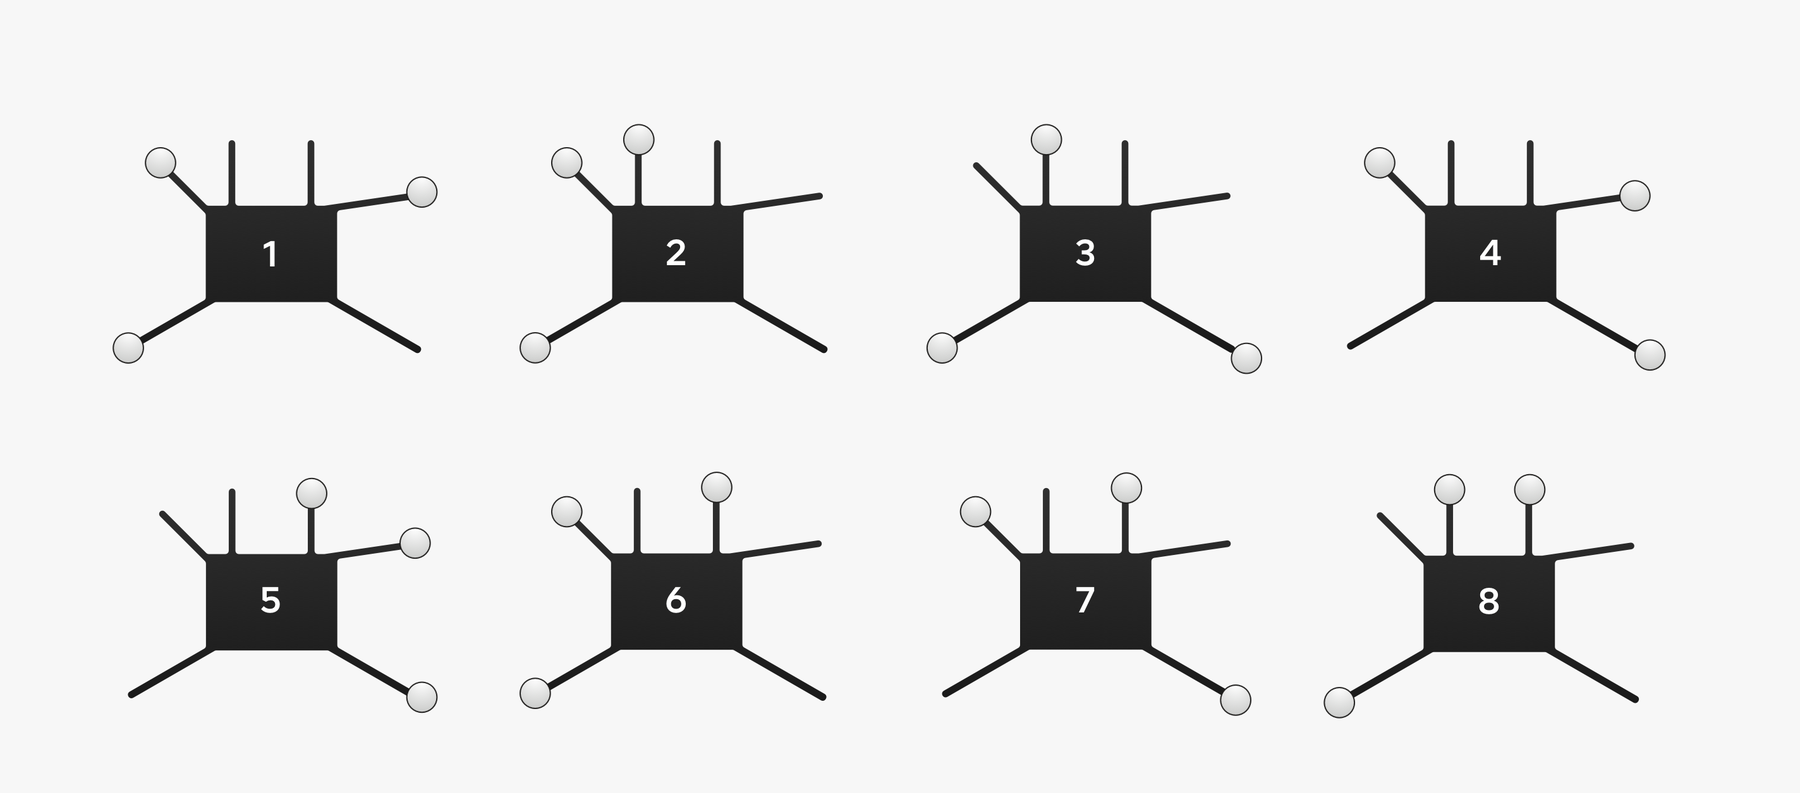
We currently have 8 unique trackers which are basically alternate arrangements of 3 reflective markers on a plastic card. From these three markers, Motive can detect a unique triangle and understands the object as number 1, or 2 etc.
Each tracker has a velcro underside for attaching to objects. As long as the 3 markers are visible to our cameras, you can track motion.
Using the DA Assets plugin, your Unreal Engine project can access the position and rotation of these objects in realtime. You can include up to 8 in your project.
Continue below for examples of how to use the DA_Tracker asset in your project.
Example Use Cases
Trackers in Unreal Engine can let you create interactions such as:
- Moving a virtual light through a dark scene as you wave a tracker around
- Syncing the transform of a virtual UE camera to a tracker’s position and rotation for a live virtual production environment
- Creating cursors by pointing a tracker towards the screen and using a flip gesture to mimic a click interaction
- Using the placement of a tracker in the DA trigger an event in your project, such as starting/stopping an animation, turning on/off lights etc
- and nearly anything you can think of...
Tracker Data
Tracker data in Unreal Engine includes a vector for position (X, Y and Z) and a rotator for relative rotation (X, Y and Z). It can be accessed at every frame draw (on tick) up to 60 times per second.
Tracker Marker Combinations
We have 8 trackers available, each with a different arrangement of markers.
🏁 Get Started
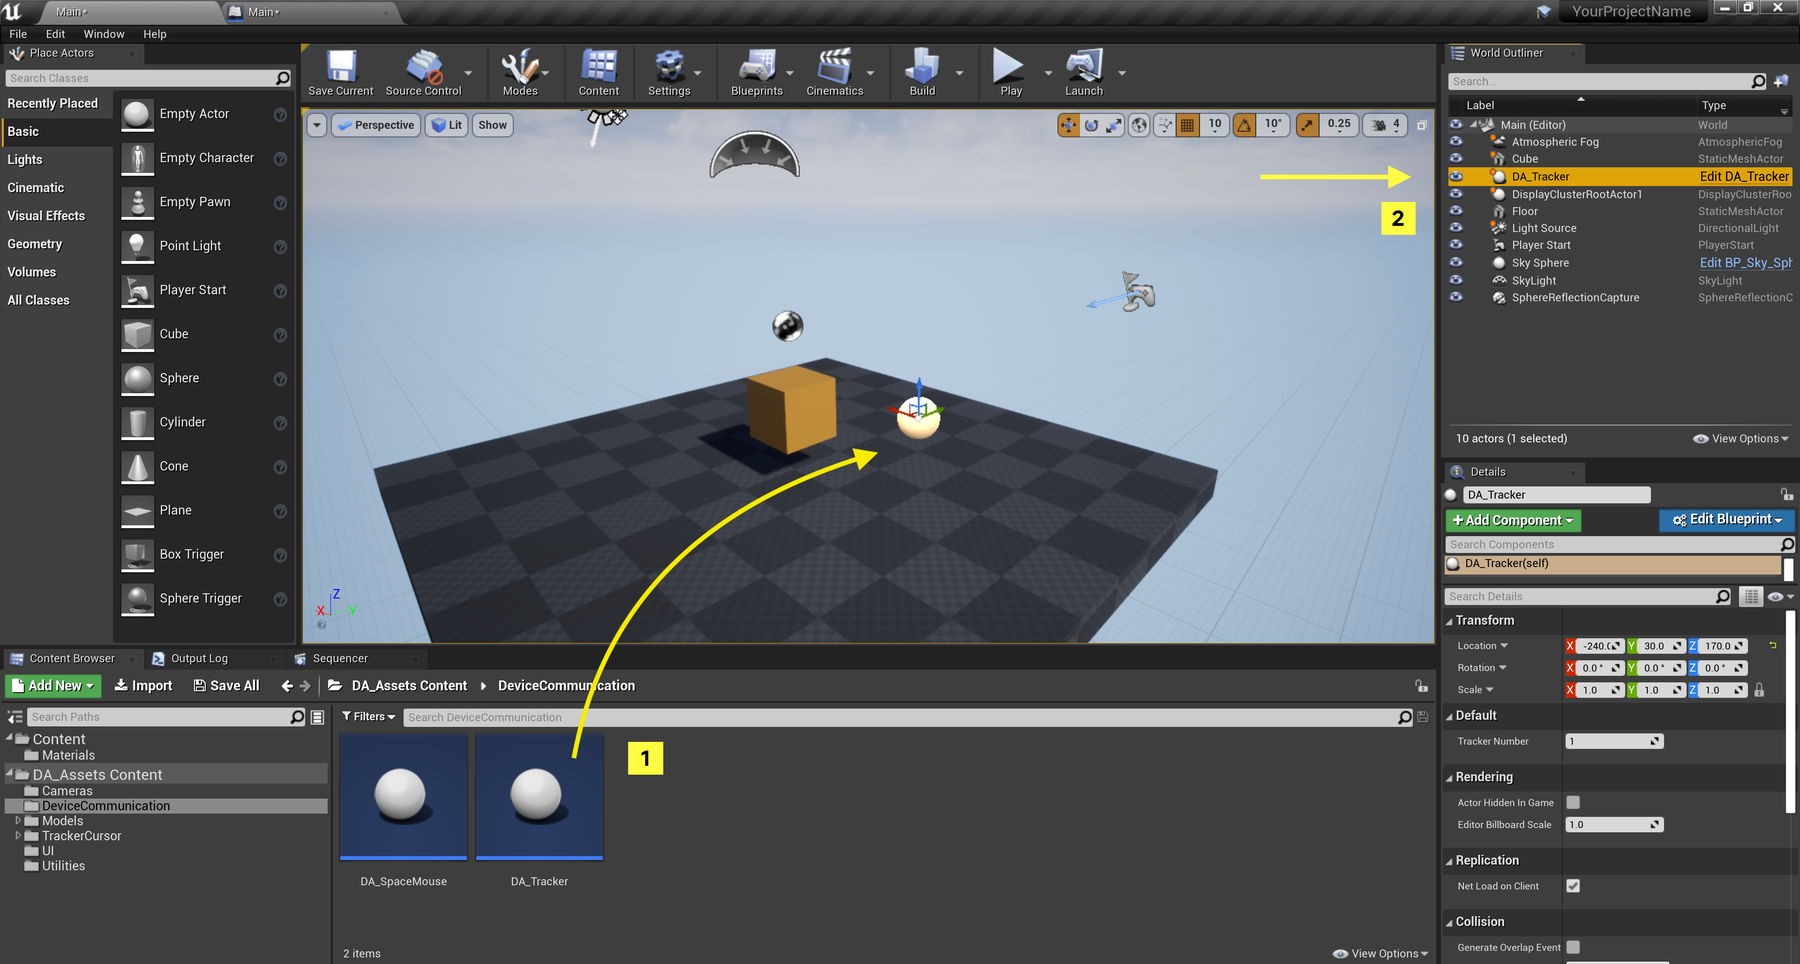
To start using trackers in your Unreal Engine projects, you first need to add a DA_Tracker object to your level. This can be done manually or programatically with Blueprints.
- Find the
DA_Trackerclass in in the DeviceCommunication folder of the DA Assets plugin content. - Drag it into your level. It can be placed anywhere (its location in your world is irrelevant to the live data).
- Select the tracker in the World Outliner. In the Details panel below, set the Tracker Number from 1–8 depending on which physical tracker you want it to represent.
📚 Examples
These examples should give you a helpful overview of what data is available from DA_Tracker objects and how to use it. The following Blueprints are created in the Level Blueprint. Each starts with a reference to the tracker object you added to your level.
To do this, with your tracker selected in the World Outliner, right-click in your Level Blueprint and select “Create a reference to <YourTrackerName>”. If this option is not visible, make sure Context sensitive is ticked. From this node, you can search for a many custom functions we’ve written to help you interact with the Data Arena. These are explained below.
Note: the examples below only demonstrate how to access tracker data and display it using the Print String node. How you use the data in your project will depend on your purpose.
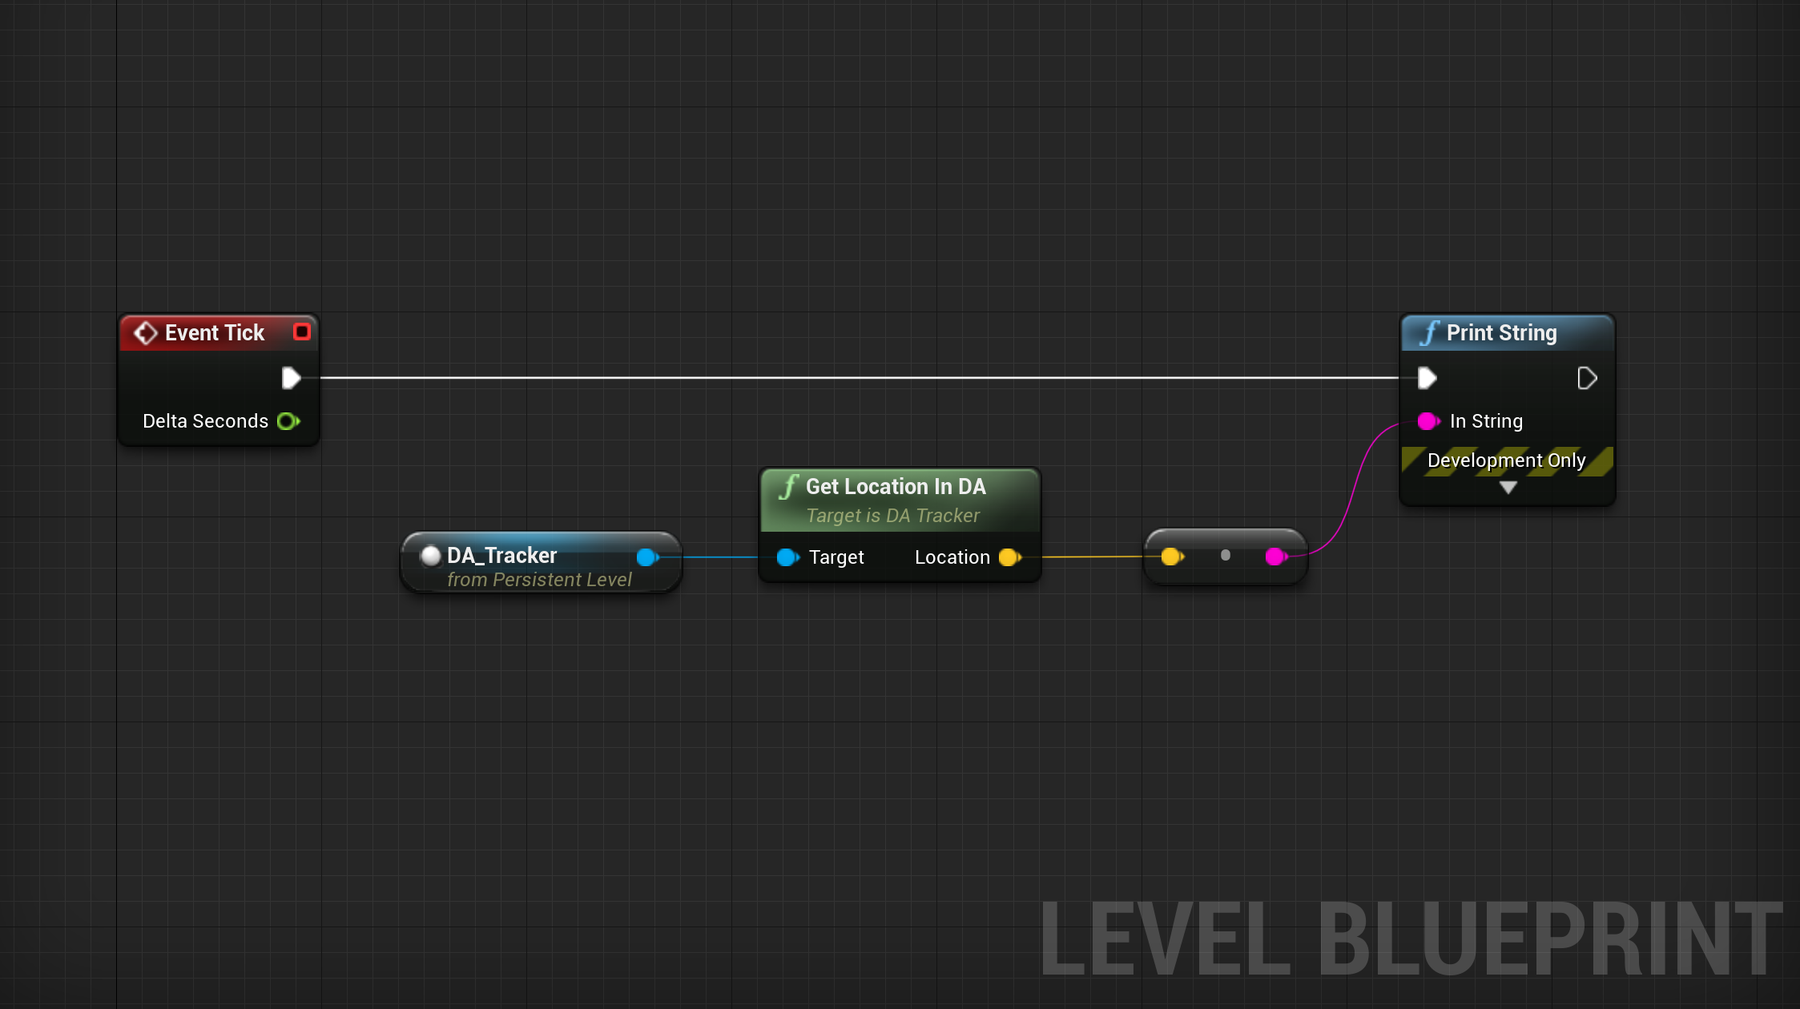
Get a Tracker’s Location in the Data Arena
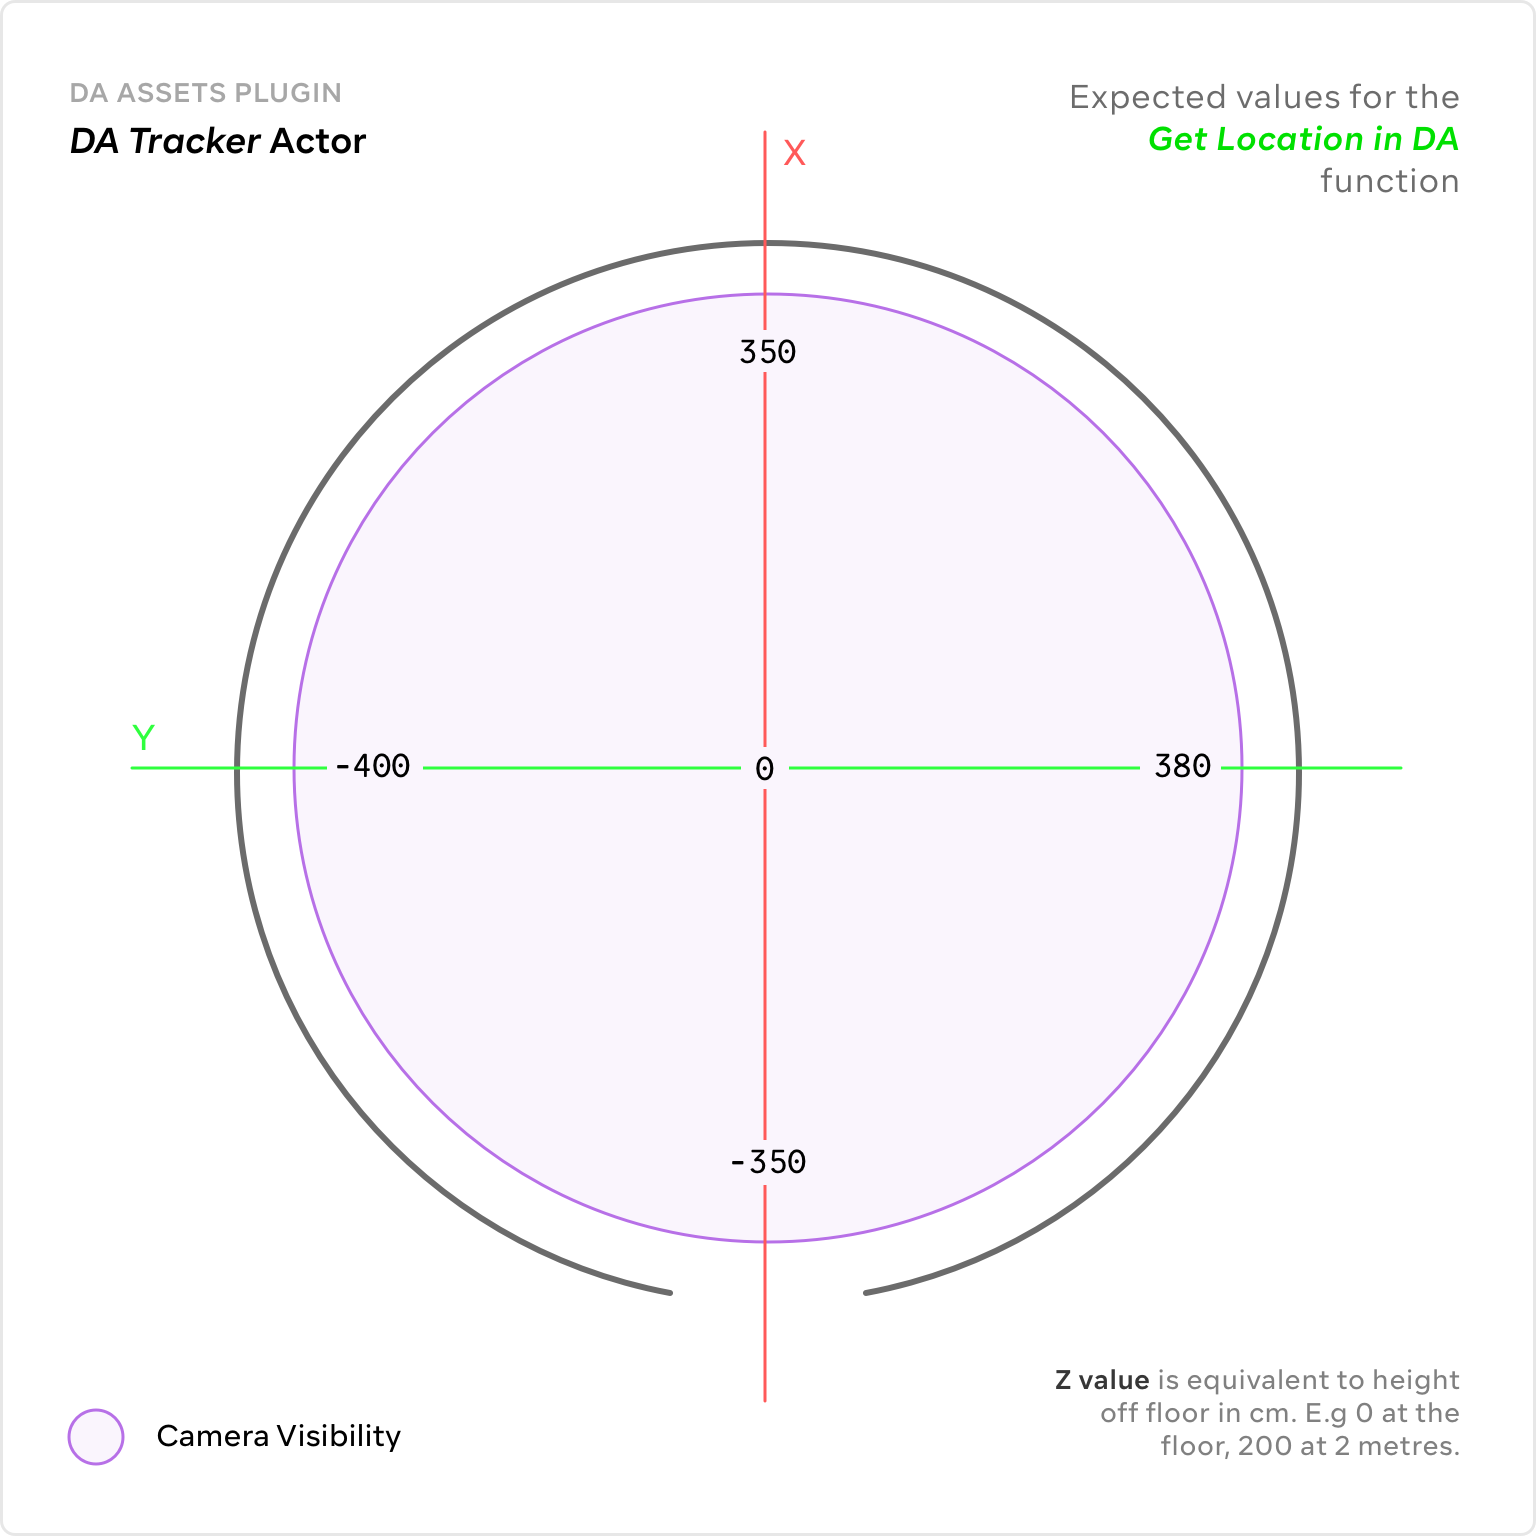
Search and add the node Get Location in DA. This function will return a vector of the trackers X, Y and Z location in the room.
Expected Values
This diagram should give you a sense of how the X and Y axis are oriented in the Data Arena, and the values you can expect as you move a tracker in the space.
Note that your Z value is equivalent to the height of the tracker from the floor (in cm by default).
Get a Tracker’s Relative Rotation
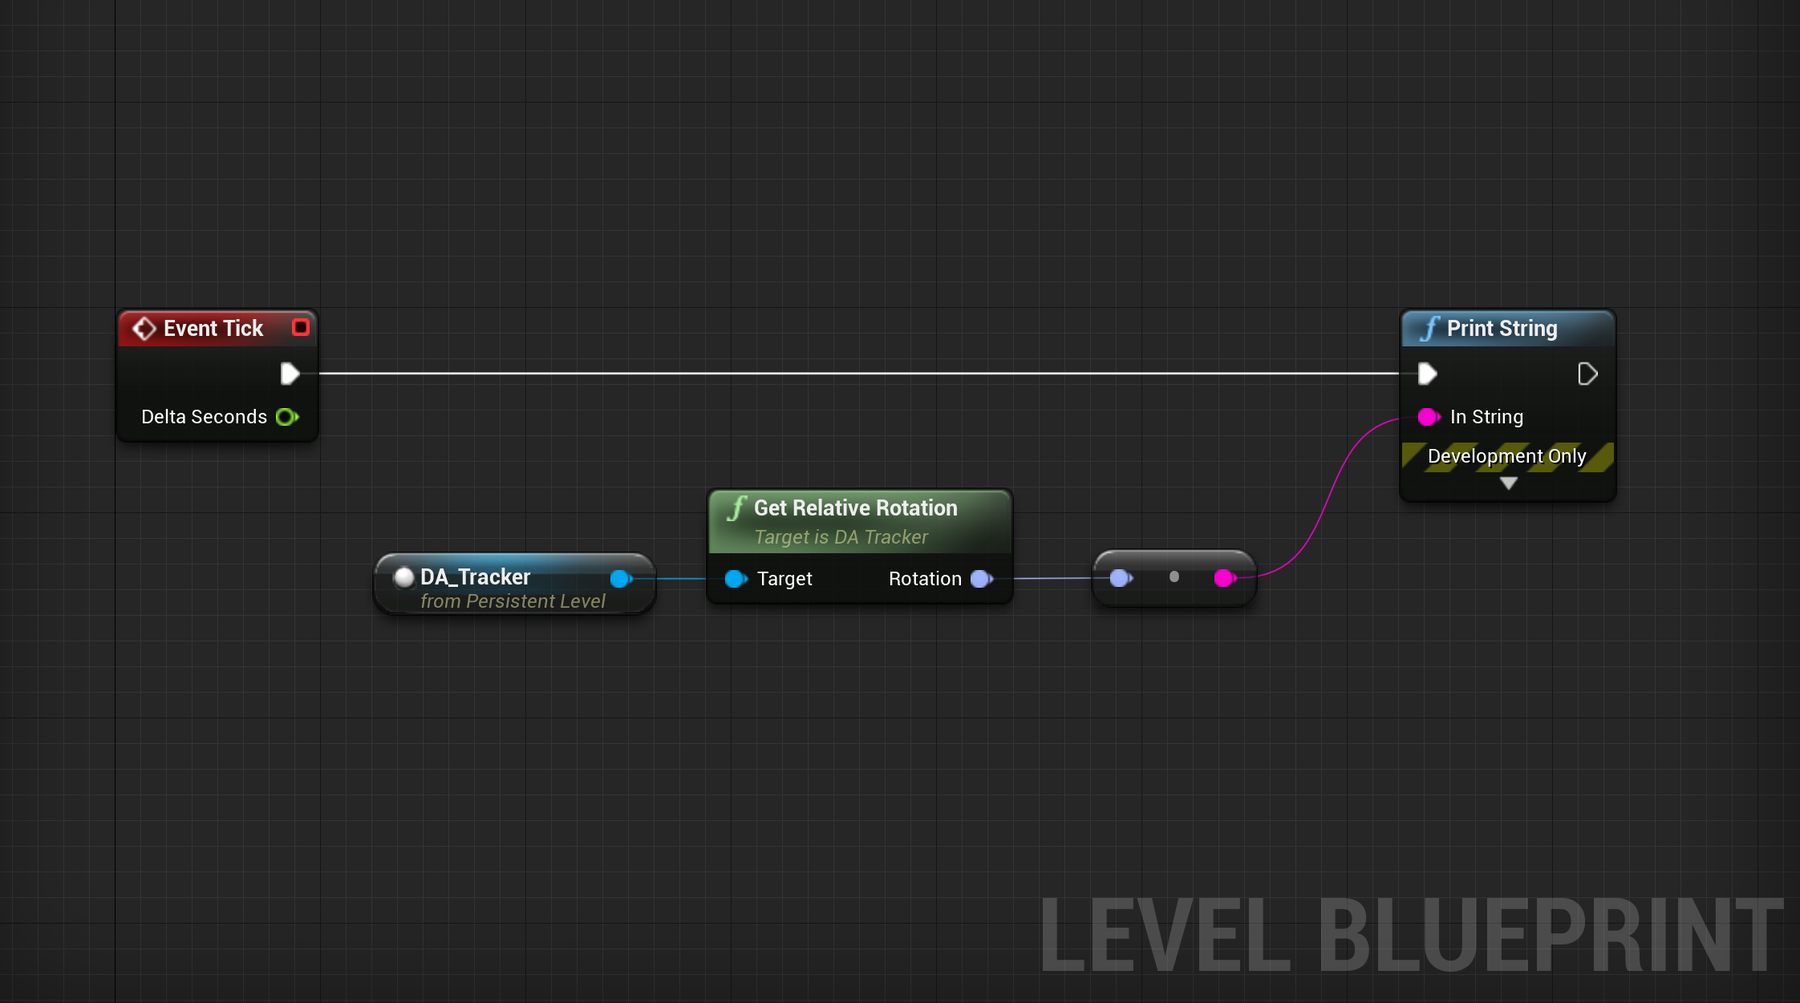
You can access the angle of a tracker across its three axis of rotation (pitch, yaw and roll). This might be useful to detect when an object the tracker is attached to is rotated, or to detect a twist gesture of the user’s hand.
Search and add the node Get Relative Rotation. This function will return a rotator containing the angles for X, Y and Z. You do not have to use all three and might just want to access data from one axis for your purpose.
Get a Tracker’s Angle in the Data Arena
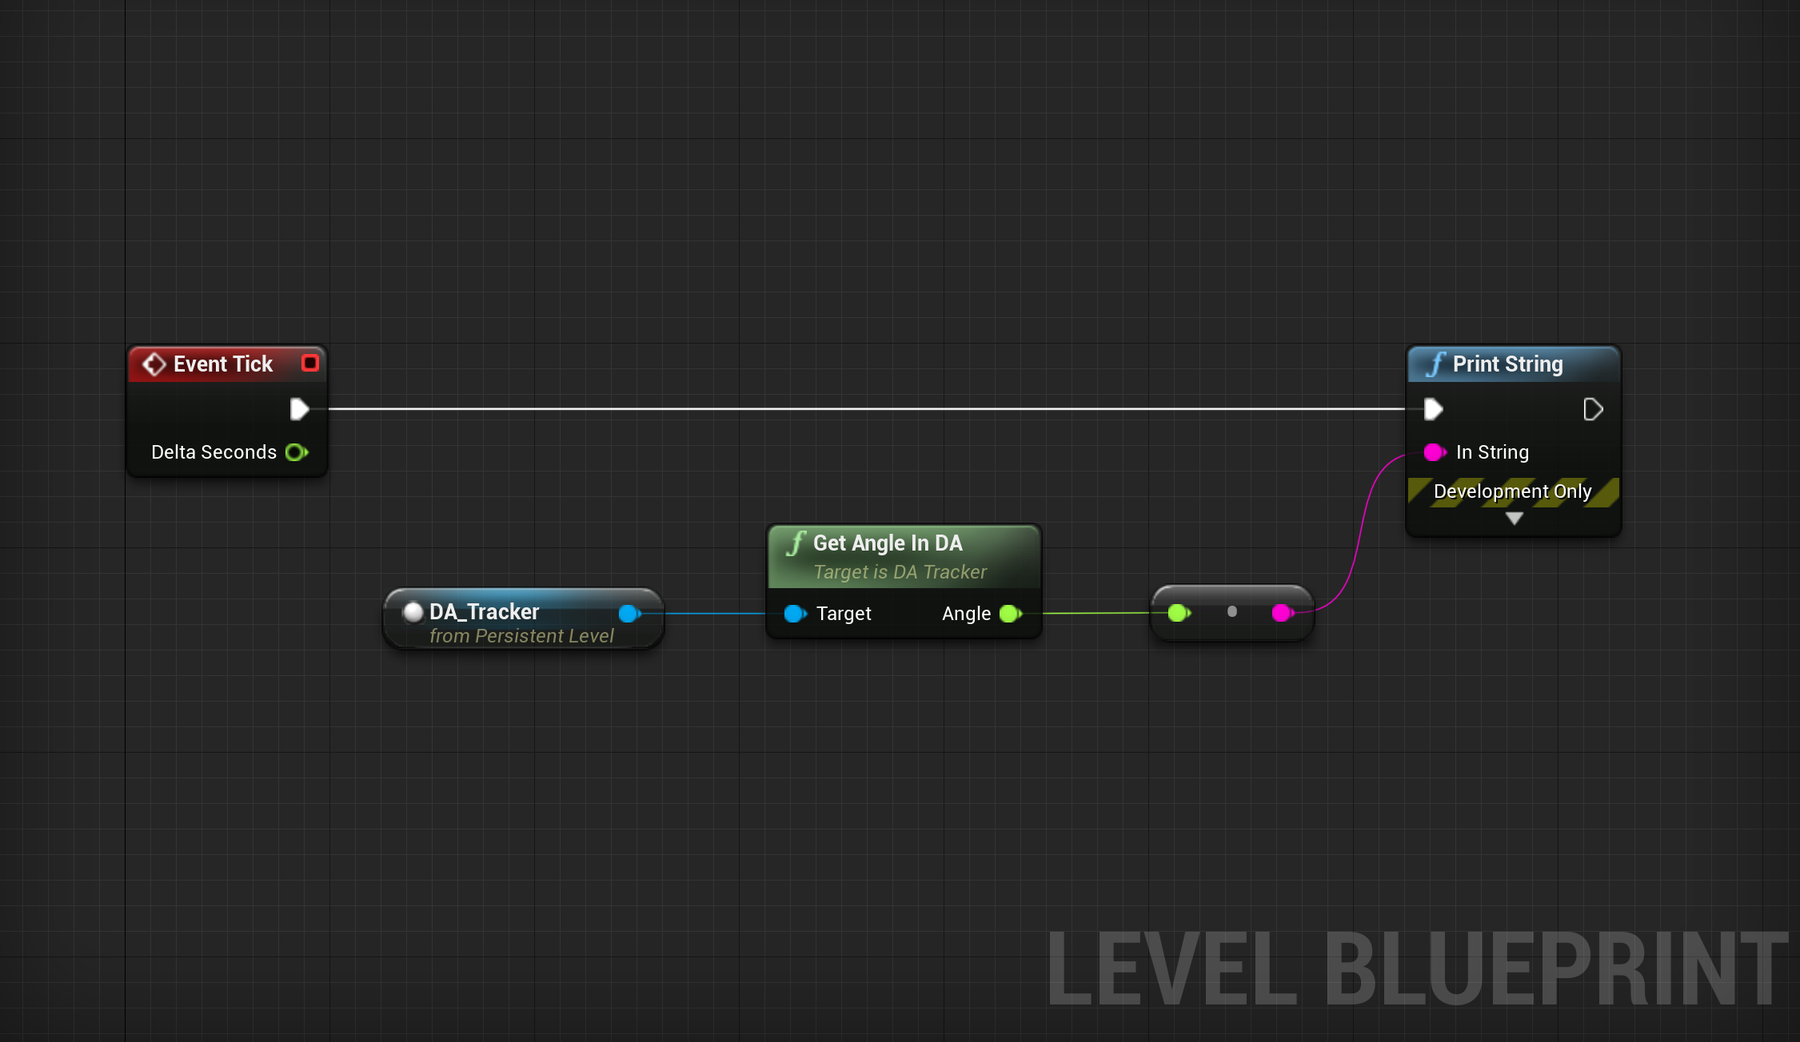
The Get Angle in DA function will return a single number representing your angle as defined from the centre of the Data Arena. This is particularly useful if you want to use a tracker as a cursor and point towards the screen.
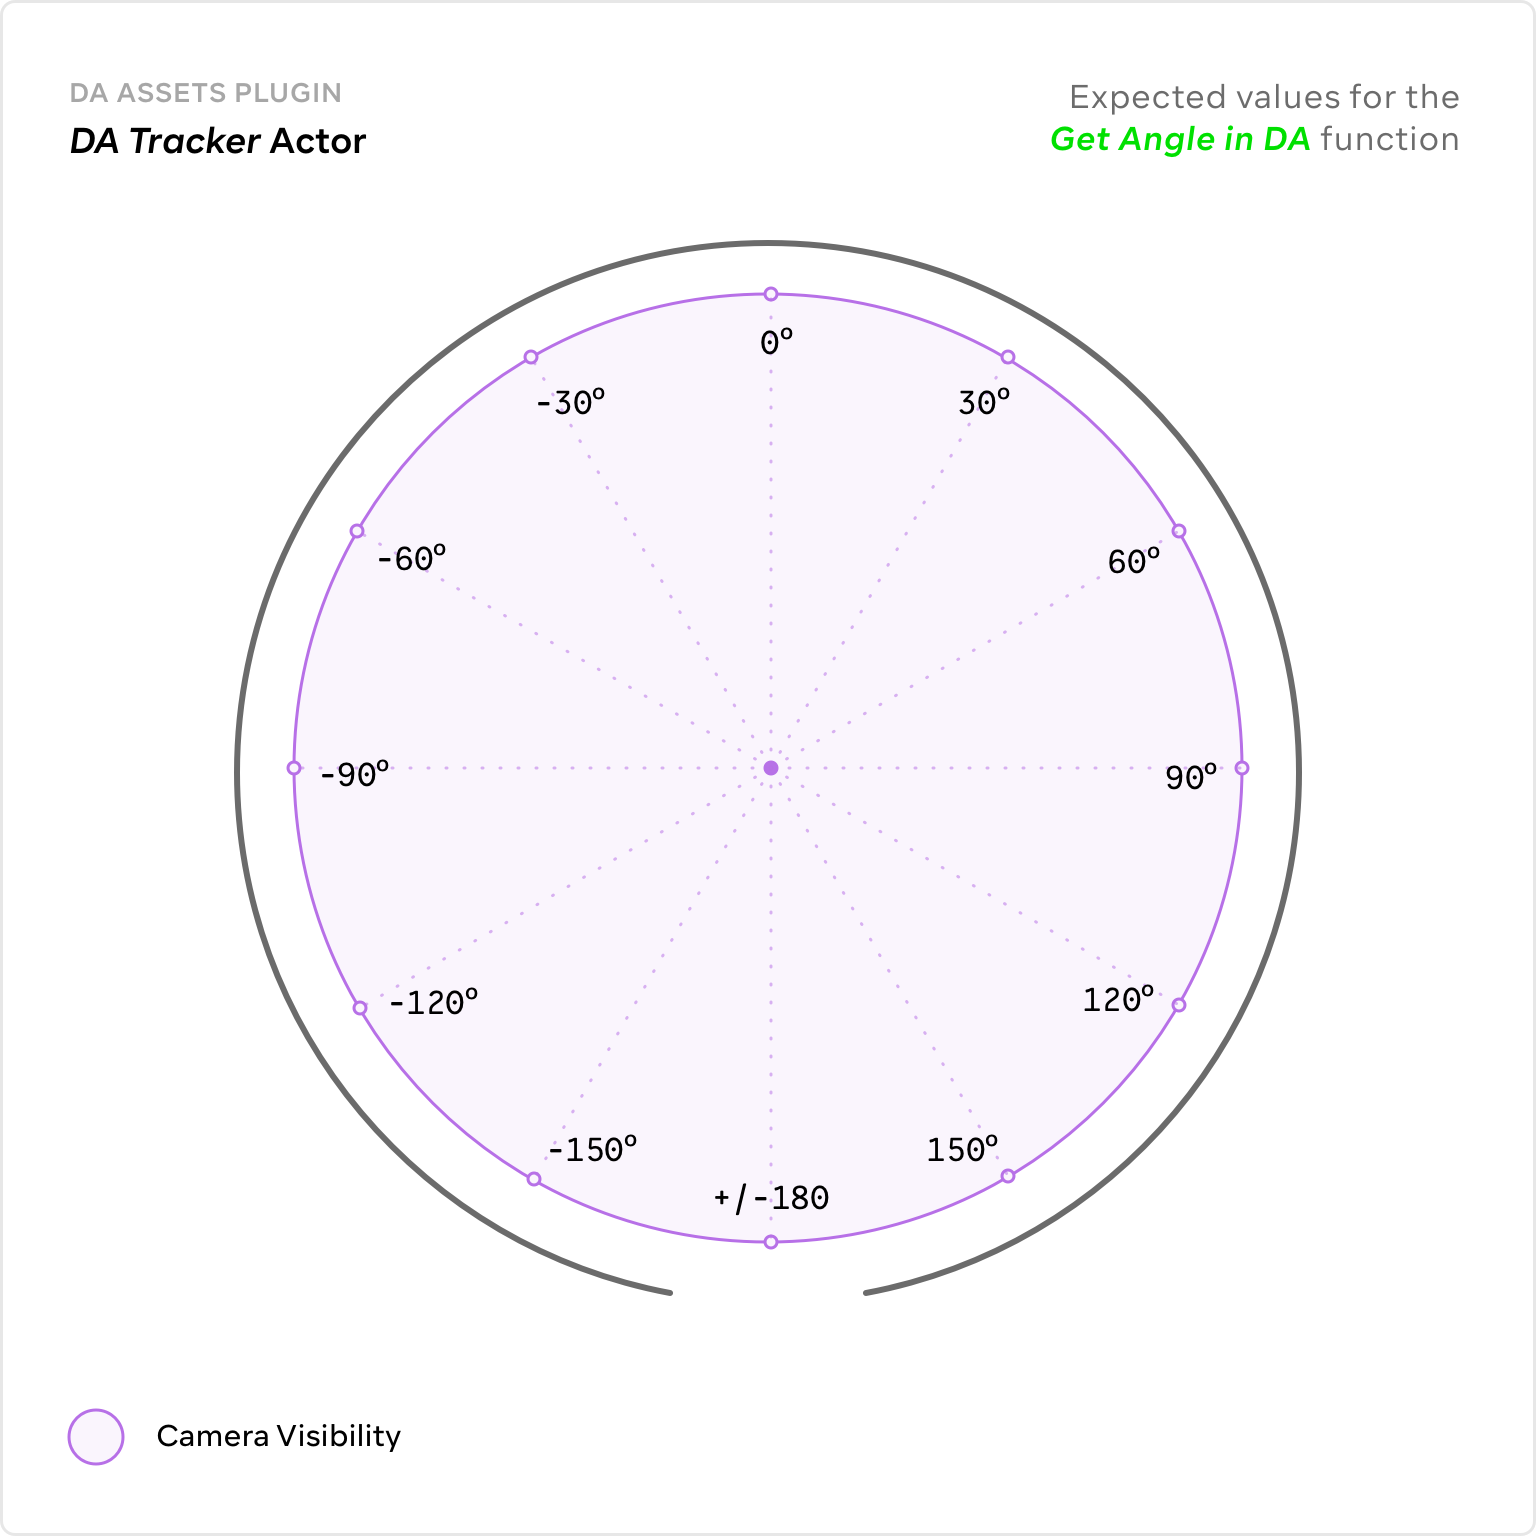
The value range you can expect is from -180º to 180º, starting at the entrance and going clockwise around the room.
Expected Values
This diagram indicates the angle you value can expect at multiple points around the Data Arena.
These values are calculated from the centre of the room, so your distance from the centre (radius) will not affect the angle.
Get a Tracker’s Distance from the Data Arena's Centre
The Get Distance from DA Centre node will return a single number representing the tracker’s distance from the centre of the room. By default this will be in centimetres (unless you have modified your project’s units settings).
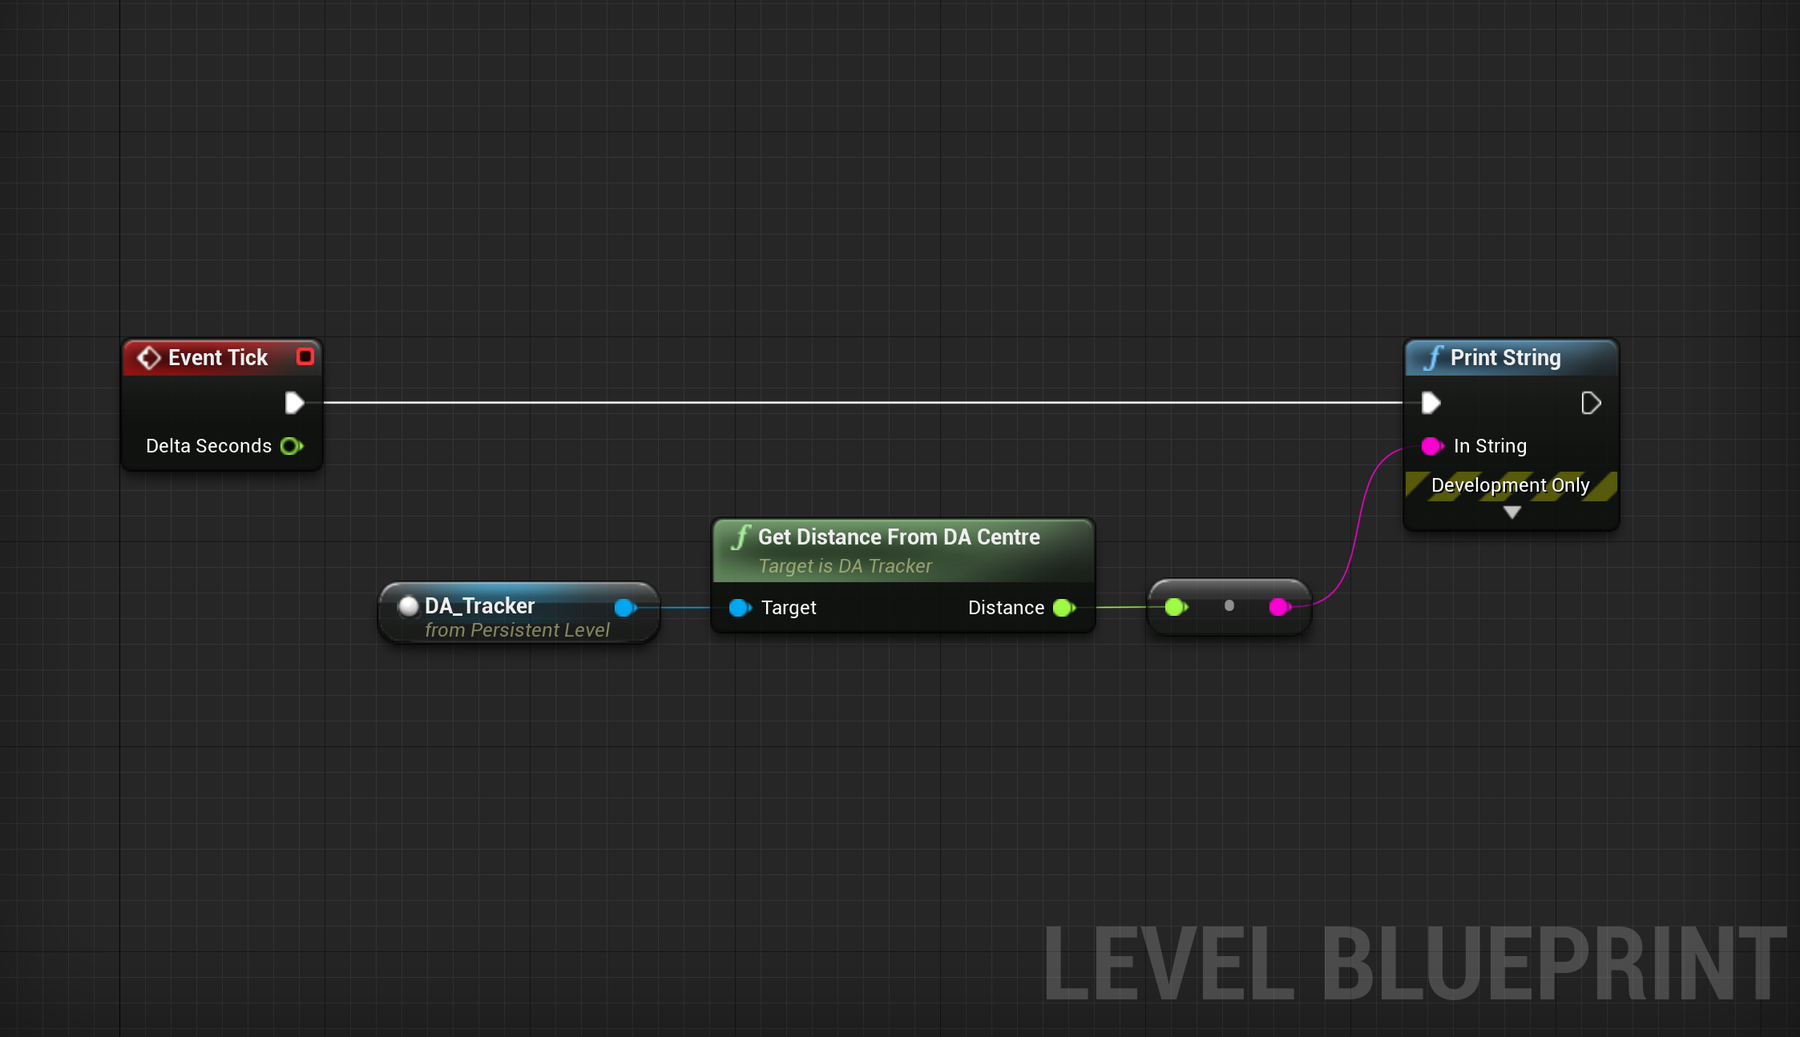
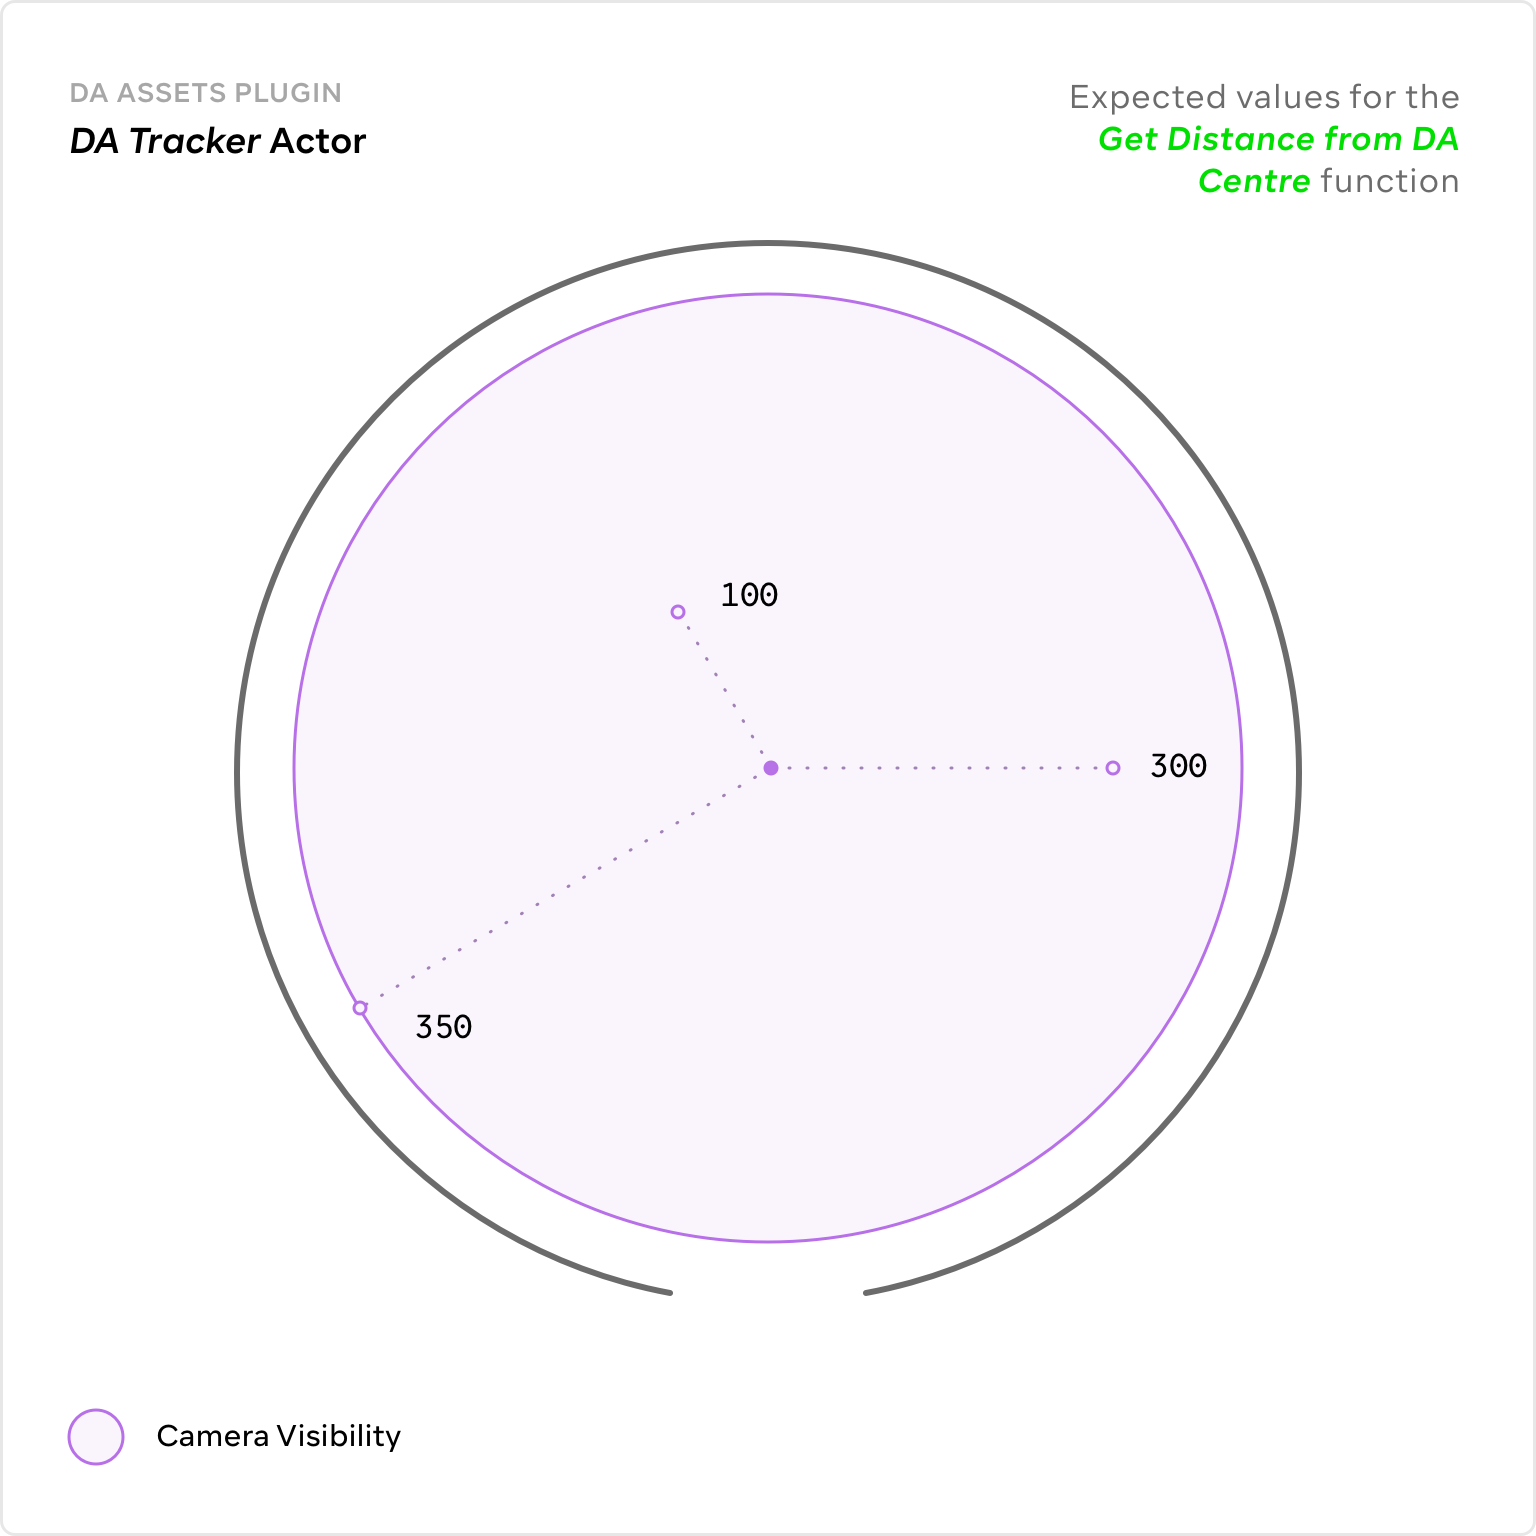
Expected Values
This diagram shows the values you can expect with a tracker at various positions in the Data Arena. Distance is measured from the direct centre so you angle won't affect the result.
Check if a Tracker is at a Specific Location
The Is Tracker At Location node is designed to make it easy to check if a tracker is at or nearby a specific location in the Data Arena. It returns either a True or False value. This function has a few inputs:
- Location: the X, Y and Z location you want to check against
- Tolerance: the acceptable distance from the specified location in centimetres. E.g a value of 10 means you can be within 10cm of the location.
- Ignore Height: enable if you’re only concerned with placement along the plane of the floor of the DA, not necessarily the height of the tracker.
It also has two outputs:
- At Location: the boolean returning True or False
- Distance From Location: the distance (in cm) from the tracker to the specified location
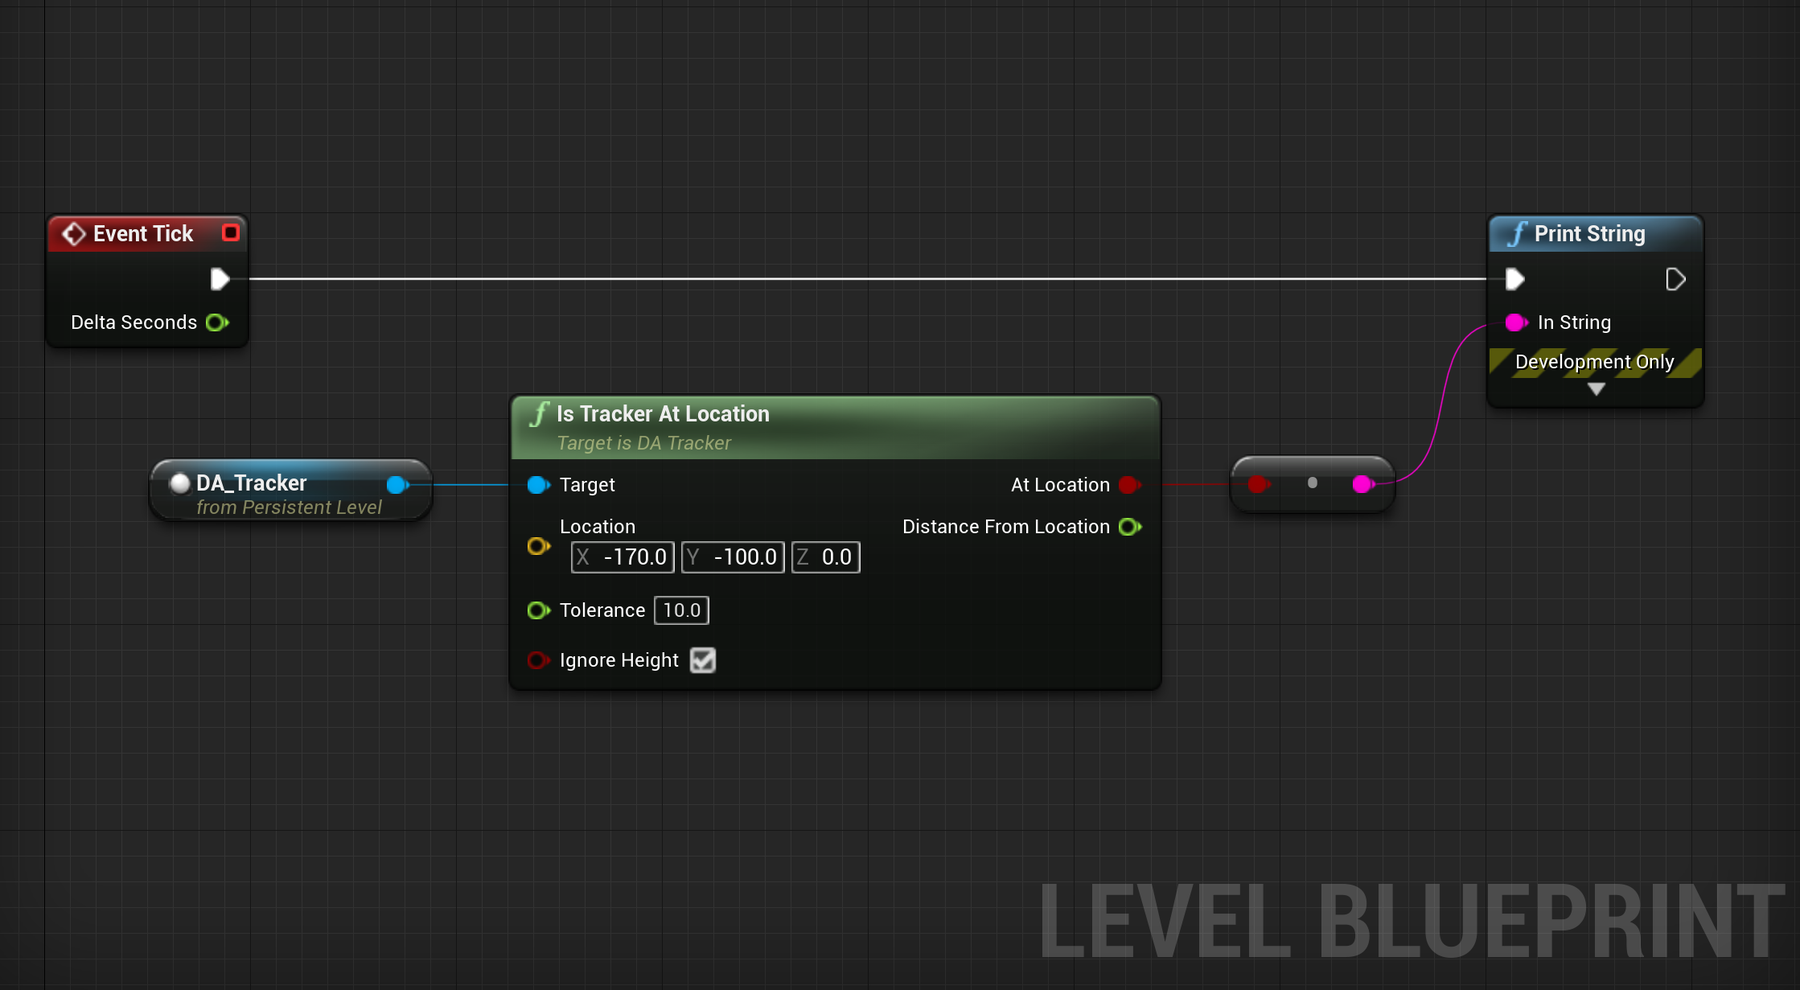
Keep in mind that this function, as with the others, will likely need to be run frequently on the Event Tick to be useful. If you want something to occur a single time as you enter or leave a location, you will need to design your logic around this function to do so.
The DA Assets plugin and the DA_Tracker class in particular is in active development and new functions will be added over time. If there’s anything that could be helpful for your purpose, let us know.