Loading Houdini Geometry into On-Screen Handles


Introduction
Houdini digital assets and the Houdini Engine provide a great deal of flexibility when combined with Omegalib. In the previous example in this series, we explained how to use on-screen controls provided by the Omegalib daHandles module to manipulate geometry using parameters exposed on a Houdini digital asset. In this tutorial we will look at the reverse – using geometry within a Houdini digital asset to define the appearance of an on-screen control.
This tutorial builds on a familiar example from the Omegalib tutorial series, which explains how to use daHandles to implement on-screen controls. In the original tutorial, the control representation was loaded from an external OBJ file. Within this example however, we will modify the script to load the control geometry from a Houdini digital asset instead. This powerful technique allows us to author custom control geometry using Houdini’s advanced modeling tools that may then be quickly and easily imported into an Omegalib visualisation for further use.
Example
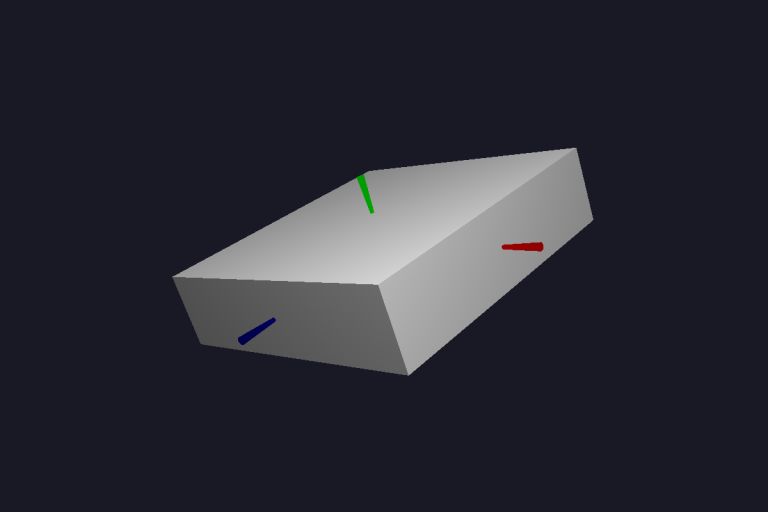
In this example, we will replace the OBJ file geometry used to represent the axis controls in the original Omegalib on-screen handles manipulator tutorial. Instead, we will load the geometry from the Houdini Engine instead. Take a look at the video shown below, to see the original example in action once again:
In this new example, we have simplified the scene to include just a single box and its associated controls. The behaviour of the controls is the same however. See the instructions included in the original tutorial to refresh your memory if necessary.
Here’s the updated Omegalib script in its entirety. You can find a copy of this script (geometry.py) in the examples directory on the DAVM under /local/examples/handles:
import os
import math
import os

from cyclops import *
from daInput import *
from daHandles import *
from daHEngine import *

if __name__ == '__main__':
    """
    This simple example demonstrates how to load control geometry from a Houdini
    digital asset.   It shows how to use various features which are provided by
    the daHandles and daHEngine omegalib modules, including:

        - How to create and initialise a connection to the Houdini Engine
        - How to use the Houdini control geometry builder to load handle geometry
          from an OTL
    """

    path = os.path.dirname(__file__)
    if not path:
        path = os.getcwd()

    resources = os.path.join(path, 'resources')

    ui_context = UiContext()

    getDefaultCamera().setControllerEnabled(False)

    houdini = HoudiniEngine.createAndInitialize()
    houdini.setLoggingEnabled(False)

    geometry_builder = HoudiniControlGeometryBuilder()
    geometry_builder.set_engine(houdini)
    geometry_builder.set_otl_path(os.path.join(resources, 'otl', 'whisker_handle.otl'))
    geometry_builder.set_asset_name('Object/whisker_handle')
    geometry_builder.set_geometry_name('whisker_handle1')

    control_builder = WhiskerControlBuilder()
    control_builder.set_geometry_builder(geometry_builder)

    transform_builder = TransformControlGroupBuilder()
    transform_builder.set_ui_context(ui_context)
    transform_builder.set_control_builder(control_builder)

    geo = BoxShape.create(1, 1, 1)
    geo.setEffect('colored -d white')
    bbox = (geo.getBoundMinimum(), geo.getBoundMaximum())

    box = ControllableSceneNode('box', geo)
    box.add_control(transform_builder.set_parent(box).set_bounding_box(bbox).build())
    box.node.setPosition(Vector3(0, 1.5, -10))
    box.node.rotate(Vector3(0, 1, 0), math.radians(-45), Space.Local)

    light = Light.create()
    light.setEnabled(True)
    light.setPosition(Vector3(0, 5, -2))
    light.setColor(Color(1.0, 1.0, 1.0, 1.0))
    light.setAmbient(Color(0.1, 0.1, 0.1, 1.0))

    manager = SelectionManager(ui_context)
    manager.add(box)

    def on_event():
        manager.on_event()

    setEventFunction(on_event)
Most of the code in this example is similar to that which appears in the earlier on-screen handles tutorials we’ve looked at and should now be quite familiar. This time around, we’ll just focus on the parts of the script related to loading geometry from a Houdini digital asset into a control, rather than breaking the script down and looking at each component end-to-end.
Firstly, we need to create and initialize a connection to the Houdini Engine. It will be necessary to ensure that an instance of the Houdini Engine HARS service is up and running as before (this is described in greater detail within the getting started with Houdini Engine guide):
houdini = HoudiniEngine.createAndInitialize()
houdini.setLoggingEnabled(False)
Next, we define a HoudiniControlGeometryBuilder to create control geometry from a Houdini digital asset which will be loaded and maintained by the connected instance of Houdini Engine. This geometry builder takes a number of parameters, comprising the path to the file containing the Houdini digital asset, the name of the asset and the name of the included geometry:
geometry_builder = HoudiniControlGeometryBuilder()
geometry_builder.set_engine(houdini)
geometry_builder.set_otl_path(os.path.join(resources, 'otl', 'whisker_handle.otl'))
geometry_builder.set_asset_name('Object/whisker_handle')
geometry_builder.set_geometry_name('whisker_handle1')
All that is needed now is to pass the builder into a control as usual, and the control will use the builder to instantiate its geometric representation within the scene:
control_builder = WhiskerControlBuilder()
control_builder.set_geometry_builder(geometry_builder)
Where to Next?
If you have a copy of the DAVM installed, you can try the example out for yourself by running the following commands in a terminal window (note: this example relies on Houdini, so make sure you’ve worked through our getting started guide to set up Houdini and provide the DAVM with access to it first):
$ cd /local/examples/handles
$ orun geometry.py
Some possible future enhancements you may like to try to implement include:
- Creating a Houdini digital asset of your own, and modifying the example in this tutorial to use the geometry in your custom asset instead of the provided default
- Writing an adapter, which you can pass into your control to transform the geometry loaded in from Houdini into the position and orientation that it requires (there is no guarantee that another user will define a Houdini asset with geometry oriented as expected by the implementation of your control)
- Developing a custom Houdini control which adjusts both its own representation, and the associated visualisation entity when manipulated (e.g., a scale control with axis geometry that changes in length to take into account the updated size of the target entity)