Multi-Parameter Handle Control Groups


Introduction
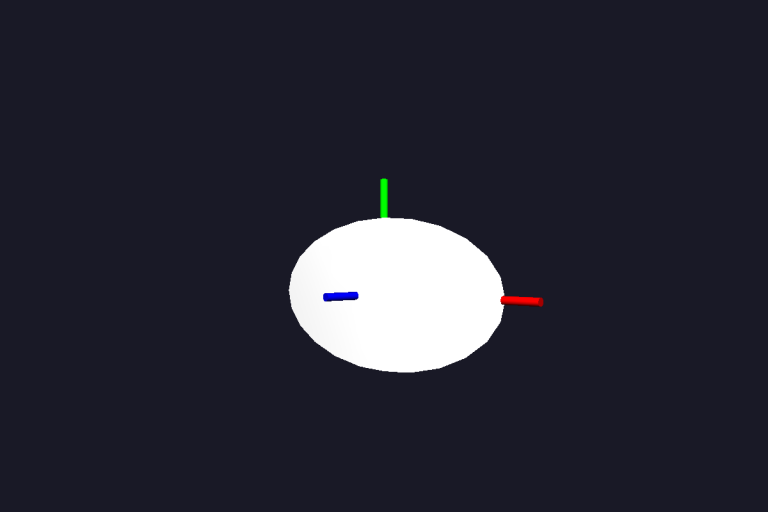
If you recall, in one of the earlier tutorials in this series, we created a simple Houdini Digital Asset containing a sphere with three exposed radius parameters. In this tutorial, we’ll finally make use of this asset, and attach handles to each of the parameters so that we are able to deform the sphere into various different ellipsoid shapes.
As before, this tutorial builds on earlier examples, so much of the code in this script will look familiar. We’ll be making use of a more complex control group this time around however, which demonstrates one approach which you may like to use to provide collections of controls which interact with multiple related parameters exported by the Houdini Engine.
Example
Let’s take a look at the script. You can find a copy of this code (sphere.py) in the examples directory on the DAVM under /local/examples/handles:
import os
import math

from cyclops import *
from omegaToolkit import *

from daInput import *
from daHEngine import *
from daHandles import *

if __name__ == '__main__':
    """
    This simple example demonstrates how to load geometry from a Houdini digital
    asset and attach handles to multiple different parameters that are also
    exported by the asset (and used to adjust the underlying geometry). It shows
    how to use the following features of the daHandles omegalib module:

        - How to use a complex control group, which maps individual Houdini
          Engine parameters to individual controls within the group
        - How to apply a minimum and maximum value to a parameter loaded from
          the Houdini Engine
    """

    path = os.path.dirname(__file__)
    if not path:
        path = os.getcwd()

    resources = os.path.join(path, 'resources')

    ui_context = UiContext()

    getDefaultCamera().setControllerEnabled(False)

    houdini = HoudiniEngine.createAndInitialize()
    houdini.setLoggingEnabled(False)

    houdini.loadAssetLibraryFromFile(os.path.join(resources, 'otl', 'sphere.hdanc'))
    houdini.instantiateAsset('Object/sphere')
    geo = houdini.instantiateGeometry('sphere1')

    parameters = HoudiniParameter.load_parameters(houdini, 'Object/sphere')

    control_builder = HoudiniParameterControlBuilder()
    control_builder.set_geometry_builder(CylinderControlGeometryBuilder())
    control_builder.set_increment(Scale.INCREMENT)
    control_builder.set_rate_limiter(RateLimiter(10))

    group_builder = HoudiniParameterScaleControlGroupBuilder()
    group_builder.set_ui_context(ui_context)
    group_builder.set_control_builder(control_builder)
    group_builder.set_bounding_box((geo.getBoundMinimum(), geo.getBoundMaximum()))
    group_builder.set_parameter_mapping({Axis.X_AXIS: parameters['radx'],
                                         Axis.Y_AXIS: parameters['rady'],
                                         Axis.Z_AXIS: parameters['radz']})
    group_builder.set_min_value(0.1)
    group_builder.set_max_value(2.0)

    sphere = ControllableSceneNode('sphere', geo)
    sphere.add_control(group_builder.set_parent(sphere).build())
    sphere.node.setPosition(Vector3(0, 1.5, -10))
    sphere.node.rotate(Vector3(0, 1, 0), math.radians(-45), Space.Local)

    light = Light.create()
    light.setPosition(0, 5, -2)
    light.setColor(Color(1.0, 1.0, 1.0, 1.0))
    light.setAmbient(Color(0.2, 0.2, 0.2, 1.0))

    manager = SelectionManager(ui_context)
    manager.add(sphere)

    def on_event():
        manager.on_event()

    setEventFunction(on_event)
In this example, we load up the Houdini digital asset as usual, import the geometry that it contains and pass it into a ControllableSceneNode. If you take a closer look at the control setup code however, you should notice a few interesting things. Lets examine the control builder first:
control_builder = HoudiniParameterControlBuilder()
control_builder.set_geometry_builder(CylinderControlGeometryBuilder())
control_builder.set_increment(Scale.INCREMENT)
control_builder.set_rate_limiter(RateLimiter(10))
The first thing to note is that we do not pass a parameter name into the control builder directly. This responsibility will be managed by the control group builder, as we will see shortly, which will create each of the individual controls. The second thing to note is that we configure the control builder with a custom increment value – this value will be added to the associated parameter each time an update is permitted by the configured rate limiter.
Now, lets turn our attention to the control group builder, in this case, we’re building a HoudiniParameterScaleControlGroup. This complex control attaches a 3D axis to the underlying geometry and allows us to map an independent asset parameter to each axis, which will be updated when the control associated with each axis is modified:
group_builder = HoudiniParameterScaleControlGroupBuilder()
group_builder.set_ui_context(ui_context)
group_builder.set_control_builder(control_builder)
group_builder.set_bounding_box((geo.getBoundMinimum(), geo.getBoundMaximum()))
group_builder.set_parameter_mapping({Axis.X_AXIS: parameters['radx'],
																		 Axis.Y_AXIS: parameters['rady'],
																		 Axis.Z_AXIS: parameters['radz']})
group_builder.set_min_value(0.1)
group_builder.set_max_value(2.0)
Note that we’ve also specified a minimum and maximum parameter value. This will lock down the range of input values which the control is permitted to apply to the underlying parameter. The control group also supports other settings which are not used in this example, such as a proxy geometry object to attach to (should you wish to attach the controls to some other object than the geometry being manipulated, e.g., a HUD element) and a scaling factor (which may be used to adjust the motion of the handles to match up with the properties of the geometry provided to the associated ControllableSceneNode).
Where to Next?
If you have a copy of the DAVM installed, you can try the example out for yourself by running the following commands in a terminal window (note: this example relies on Houdini, so make sure you’ve worked through our getting started guide to set up Houdini and provide the DAVM with access to it first):
$ cd /local/examples/handles
$ orun sphere.py
Some possible future directions you may like to try to take this example include:
- Experiment with different geometry types to learn more about the scale factor setting (for example, try creating a new digital asset that contains a box instead of a sphere and export the sizex, sizey, and sizez parameters instead of radius; see what happens when you manipulate the handles and experiment to determine what scale factor you need to ensure that the handles stay fixed to the geometry surface). The scale factor may be set using the
set_scale_factor()method on the control group builder in the example above. - Add proxy geometry to the scene, and pass this into the control group (using the
set_proxy()method) and scene node. Observe what happens as you manipulate the proxy object (the geometry attached to the parameters should also be modified). Try changing the size of the proxy object so that it has different dimensions to the parameter geometry and see what happens as you manipulate the handles – can you resolve this behaviour using the scale factor once again?